The Best Camera Settings for Landscape Photography (and When to Break Them)
A settings reference for real landscape conditions, from golden hour on a tripod to handheld shots in wind and moving water, covering aperture, diffraction, base ISO, RAW, and how to actually read a histogram.
The Best Camera Settings for Landscape Photography (and When to Break Them)
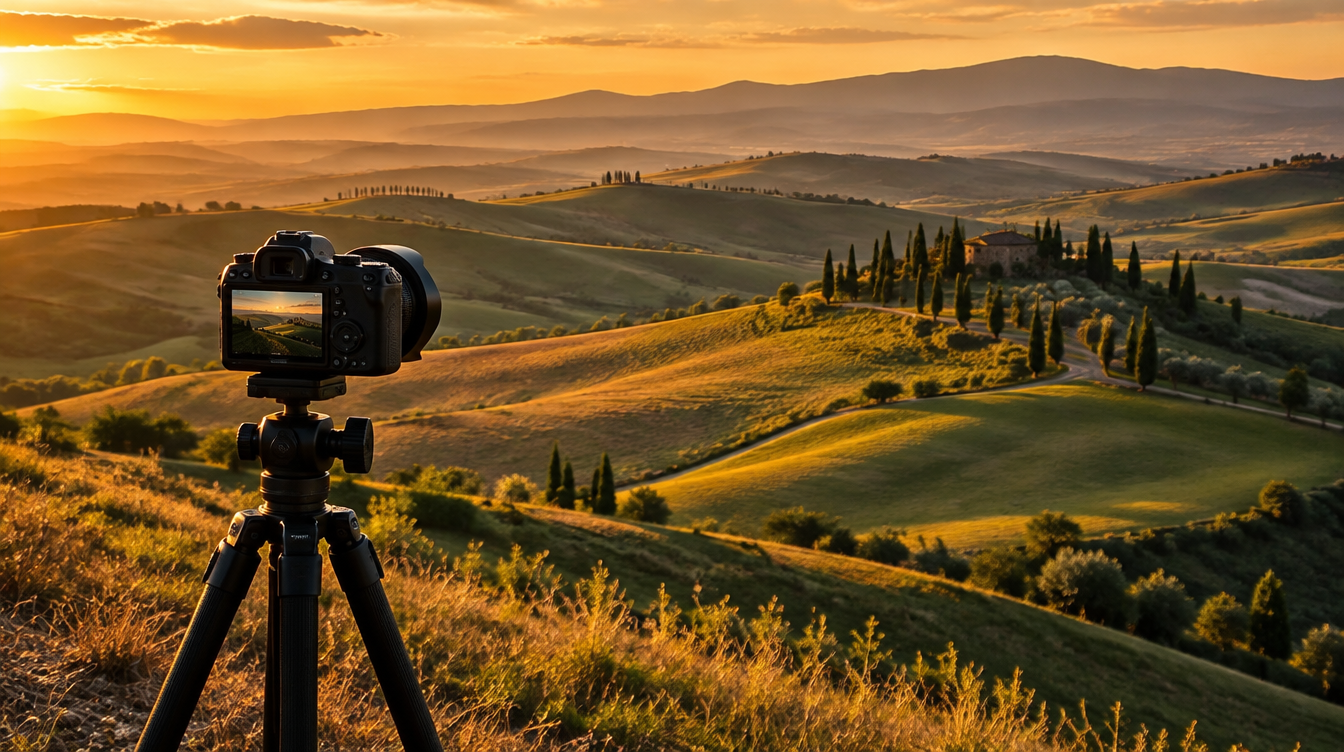
I get the same question on almost every trip, usually between unloading the van and setting up tripods at the first golden hour stop. "What settings should I use?" The honest answer is that there is no single setting, and anyone who tells you there is has not shot a sunrise on a tripod in Val d'Orcia, a handheld frame in forty mile an hour wind on a ridge in the Dolomites, and a thirty second waterfall exposure in the same month. Each scene wants something different from your aperture, ISO, and shutter speed, and the gap between "technically correct" and "actually sharp in this exact condition" is where most landscape photographs are won or lost.
This guide walks through the real reasoning behind the numbers, not just the numbers themselves, so you can adapt on the fly instead of memorizing a rule that falls apart the moment the wind picks up. We will cover aperture and diffraction, ISO and dynamic range, RAW versus JPEG, how to read a histogram, and a scenario by scenario settings table built from conditions we actually shoot on tour.
Key Takeaways
There is no universal landscape setting. There is a sweet spot for most daylight scenes, and a clear, physics based reason to break from it depending on wind, light, and what is moving in your frame.
| Point | Details |
|---|---|
| Aperture sweet spot | Roughly f/8 to f/11 on most full frame cameras before diffraction starts softening fine detail |
| Diffraction is camera specific | A compact sensor can show softening by f/5.6, a full frame body usually holds until around f/11 |
| Base ISO | Usually around ISO 100, the point of least amplified noise and maximum dynamic range on a tripod |
| When to break base ISO | Handheld shots, high wind, or any scene where a faster shutter matters more than a perfectly clean file |
| RAW vs JPEG | RAW holds 12 to 14 bits of tonal data per channel against roughly 8 bits in a rendered file, which is the real reason RAW recovers shadows and highlights better |
| Histogram caveat | Your camera's histogram is usually built from a JPEG preview, not the actual RAW data, so treat it as a guide, not gospel |
Table of Contents
- Why one setting doesn't exist
- Aperture: the sweet spot, and why f/16 isn't a law
- ISO: base ISO, and when to break it
- RAW vs JPEG for landscapes
- Reading the histogram, and its blind spot
- Settings by real scenario
- When to break every rule above
- Frequently asked questions about landscape camera settings
- See these settings in the field
Why one setting doesn't exist
Every "best settings for landscape photography" checklist you will find online says roughly the same thing: aperture priority, f/8 to f/11, ISO 100, tripod, shoot RAW. That is not wrong, but it is a starting point for one specific scenario, a static scene in good light on a stable tripod, not a universal law. The moment wind starts moving your tripod, or water is rushing through your frame, or you are handholding because there was no time to set up, that starting point stops being the right answer and you need to understand why it worked in the first place so you can adjust it correctly instead of guessing.
That is really the whole idea behind this guide. Aperture controls depth of field, but it also interacts with diffraction in a way that depends on your specific sensor. ISO controls brightness, but it is really a dial that trades dynamic range for shutter speed. RAW gives you more room to fix mistakes, but only if you understand what your histogram is actually showing you in the field. Once those four pieces click together, picking the right settings for an unfamiliar scene becomes fast and intuitive instead of a guessing game. If you have not already, our complete landscape photography guide covers how this fits alongside composition and light; this piece goes deep specifically on the settings.
Aperture: the sweet spot, and why f/16 isn't a law
Stop your lens down and depth of field increases, which is exactly why "just use a small aperture" sounds like good landscape advice. The problem is that every lens also loses sharpness to diffraction as you stop down further, and that loss is gradual rather than a hard cutoff at any specific f-stop. Cambridge in Colour's diffraction testing found that a Canon EOS 20D, a full frame style sensor, "begins to show diffraction at around f/11," while a compact camera with a much smaller sensor, the Canon PowerShot G6, "begins to show its effects at only about f/5.6." Same physics, completely different practical number, because the sensor and pixel size change the math.
What is actually happening is that light passing through any aperture spreads slightly due to diffraction, forming what optics call an Airy disk rather than a perfect point. Wikipedia's technical explanation of the Airy disk describes it as "the best-focused spot of light that a perfect lens with a circular aperture can make," and once two disks from adjacent details overlap past a certain point, the Rayleigh criterion, your lens can no longer resolve them as separate. The disk's radius scales directly with your f-number, so a smaller aperture always means a bigger, blurrier disk. By f/22, "almost all fine lines have been smoothed out," Cambridge in Colour notes, because the Airy disks have grown larger than the fine detail you are trying to capture.
Here is the part almost nobody mentions: higher resolution sensors reach that softening point sooner, not later, since smaller pixels get overtaken by the same sized Airy disk earlier. Cambridge in Colour's follow up piece on digital diffraction found that "diffraction more easily limits resolution as the number of camera megapixels increases." A worked example in Wikipedia's entry on diffraction-limited systems shows that at f/8, the green-light diffraction spot works out to roughly 9.76 micrometers, right in the pixel-size range of most full frame sensors, meaning a 40-plus megapixel body is already trading some resolution to diffraction at a "safe" f/8. That is not a reason to panic. It is a reason to stop treating f/16 as a rule and start treating it as a tool you reach for only when the scene genuinely needs the extra depth of field.
In practice, that means defaulting to roughly f/8 to f/11 for most daylight landscapes on a full frame or APS-C camera, pushing to f/16 only for a scene that truly needs front to back sharpness from a close foreground to a distant background, and reaching for focus stacking instead of f/22 whenever that extreme depth of field matters more than convenience. A telephoto compression shot of a distant ridgeline rarely needs anything past f/8, since there is no close foreground competing for focus; our guide on telephoto landscape photography goes deeper on exactly that kind of composition.
Pro Tip: Do not trust a single rule of thumb across every lens you own. Test your own gear once: shoot the same static scene at f/8, f/11, f/16, and f/22 on a tripod, then zoom to 100 percent on each file. You will see exactly where your specific camera and lens combination starts losing detail, and that number is more useful to you than anything in this article.
ISO: base ISO, and when to break it
ISO does not work the way most beginner explanations describe it. You are not "making the sensor more sensitive to light." Wikipedia's entry on image noise is precise about the actual mechanism: ISO is "the amount of gain applied to the voltage output from the image sensor," and the extra noise you see at higher settings is "a result of the amplification of shot noise" that was already present in the signal, not new noise being created out of nothing. The same entry is direct about the tradeoff: a higher ISO brings "a lower dynamic range as a result of technical limitations in current technology."
That dynamic range cost is the entire reason base ISO, typically somewhere around ISO 100 depending on your camera, is the default for a tripod shot in good light. You are not avoiding noise for its own sake. You are preserving the maximum range between the darkest shadow and brightest highlight your sensor can record in one frame, which matters enormously for a sunrise with a bright sky and a dark foreground.
Where this gets genuinely interesting is a concept called ISO invariance. DPReview's technical explainer puts it plainly: a sensor is "ISO invariant when a one stop increase in ISO results in a one stop reduction in DR," meaning that past a certain point, raising ISO in camera gives you "zero shadow improvement in return for the additional gain," and you are "just giving away a stop of highlight information" for nothing. On a genuinely invariant sensor, you could shoot at base ISO and brighten the shadows in post with a nearly identical result, as long as you still protect the highlights. That does not mean ISO never matters, just that "always shoot ISO 100" solves the wrong problem on a modern sensor; the actual goal is protecting highlights and shadows, and ISO is one tool among several for doing that.
None of this means you should avoid raising ISO, only that you should raise it on purpose. Wind shaking your tripod on an exposed ridge, a handheld shot grabbed with no time to set up, or any scene where motion blur would ruin the image faster than noise would are all legitimate reasons to push ISO up and accept a faster shutter speed in exchange.
RAW vs JPEG for landscapes
This one is close to a non-debate for serious landscape work, and the reason is almost entirely about bit depth. Wikipedia's breakdown of the raw image format notes that a RAW file typically carries "12 or 14 bits of intensity information per channel (4096 to 16384 shades)," compared with a rendered format that is "typically 8 bits (256 shades)." That is not a small gap. It is the difference between having sixteen times more tonal information to work with when you try to pull detail out of a shadowed foreground or recover a slightly blown sky, versus trying to stretch an already compressed 256 shade file and immediately seeing banding and posterization.
The same entry points out that editing from RAW data "leave[s] more scope for both corrections and artistic manipulations," and that RAW edits are non-destructive, since adjustments are stored as instructions rather than baked permanently into the pixels. For a shot where you deliberately underexpose the sky to protect highlights, or shoot flat midday light planning to add contrast back in post, that headroom is frequently the only reason the shot is recoverable at all. The one place JPEG still earns a spot is volume, a multi-day timelapse or burst sequence where storage space matters more than recoverability. For a single composed frame, shoot RAW and do not think about it twice.
Reading the histogram, and its blind spot
The histogram is the single most useful tool on your camera's screen for judging exposure in bright daylight, where the LCD itself is nearly impossible to read accurately. Wikipedia's entry on the image histogram describes it simply: it "plots the number of pixels for each tonal value," running from dark on the left to light on the right. An overexposed image will have "most of its data points on the right side and center of the graph," while an underexposed one skews hard to the left. Learning to read that shape at a glance, rather than trusting your eyes on a bright, glare-washed screen, is one of the fastest ways to stop coming home with a card full of blown skies.
Here is the part that genuinely surprises most photographers the first time they hear it: your camera's histogram is not a direct readout of your RAW file. The same Wikipedia entry notes the displayed histogram "may only be an approximation to that in the raw file," because it is typically generated from the camera's internal JPEG preview rather than the actual RAW data you will edit later. In practice, your RAW file usually has a little more real highlight and shadow detail than the in-camera histogram suggests, which is a reasonable argument for not panicking over a slightly clipped-looking highlight at the edge of the sun during golden hour, as long as the rest of your exposure is solid.
Pro Tip: Treat the right edge of your histogram as the one to watch most carefully for a landscape with sky in frame. A little clipping on the left, in deep shadow, is almost always recoverable from RAW. Clipped highlights in a bright sky are the harder problem to fix after the fact, so when in doubt, expose slightly darker rather than slightly brighter.
Settings by real scenario
All of the physics above is only useful once you can translate it into an actual starting point in the field. These are the settings I actually reach for first on tour, adjusted from there based on what the histogram shows me.
| Scenario | Aperture | ISO | Shutter / notes |
|---|---|---|---|
| Golden hour, tripod, static scene (Val d'Orcia hills, Dolomites ridgelines) | f/8 to f/11 | Base ISO (~100) | Shutter follows exposure; use a 2-second timer or remote to avoid shake |
| Handheld in wind, no tripod option | f/8, widest you can afford | Raise until shutter is fast enough, often 400 to 1600 | Favor a shutter speed that freezes camera shake over a "clean" low ISO file |
| Blue hour, village or coastline | f/8 to f/11 | Base ISO | Shutter often several seconds; tripod and remote release become mandatory |
| Moving water, waterfalls, rivers | f/8 to f/11 | Base ISO | Shutter speed is the creative choice; see the long exposure breakdown below |
| Exposed ridge or coastal cliff in high wind | f/8 | Raise as needed for a shutter fast enough to beat vibration | A sturdy tripod helps, but is not a substitute for a fast enough shutter in real wind |
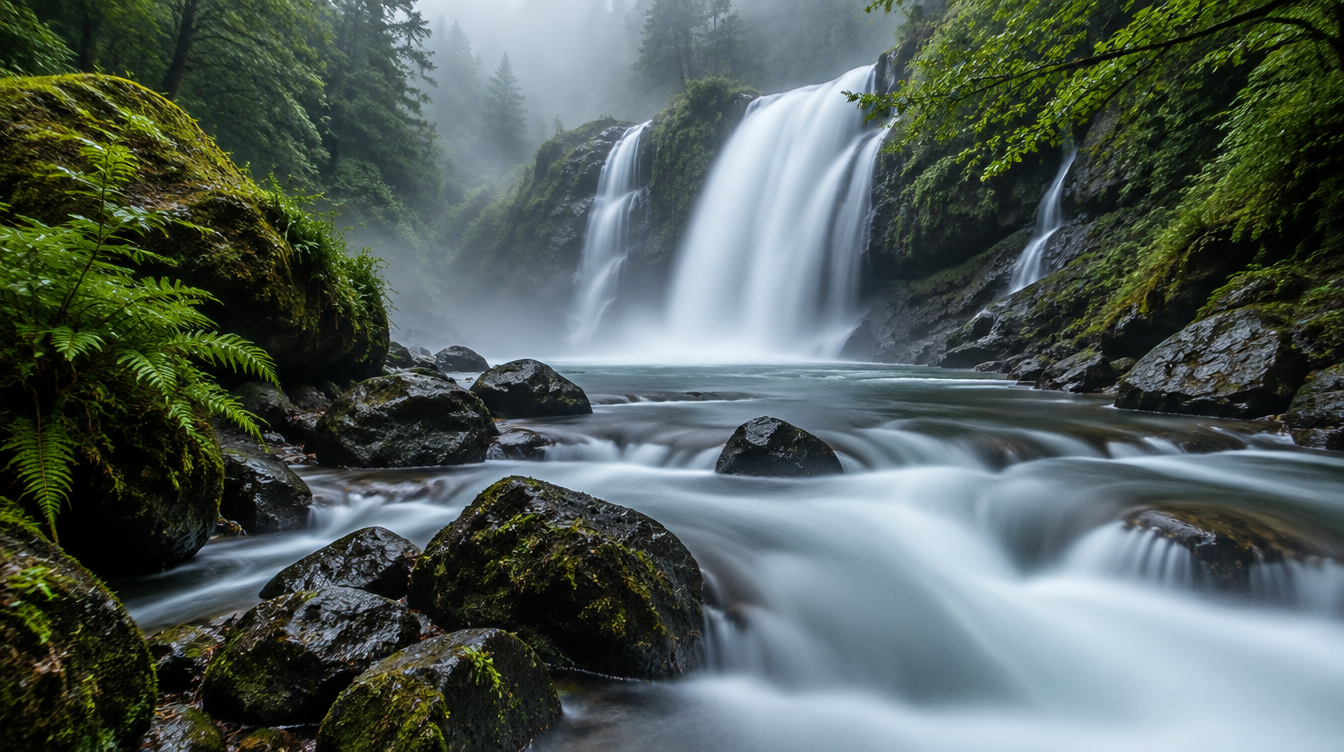
Moving water deserves its own paragraph, because the shutter speed you choose there is a creative decision, not just a technical one. A short exposure around a quarter second freezes individual droplets and texture in a waterfall. A longer exposure, Wikipedia's entry on long-exposure photography notes that exposures around thirty seconds "blur moving water so it has mist-like qualities," turning a rushing waterfall into the smooth, silky look most people associate with landscape photography. Getting there in daylight almost always requires a neutral density filter, and the same entry has a field note worth remembering: "When using a dense neutral density filter, a camera's auto focus will not be able to function," so lock focus before the filter goes on, not after. Our piece on long exposure photography in Val d'Orcia has the full filter-strength breakdown, and our guide to the filters that actually earn a spot in your bag covers the rest of the kit.
When to break every rule above
Every default in this article has a legitimate exception, and knowing them is what separates a photographer who follows a checklist from one who actually understands their camera.
Shooting directly into the sun for a sunstar effect is the clearest case for ignoring the diffraction warning on purpose. A small aperture, often f/16 or smaller, is exactly what creates the pointed rays of a clean sunstar as light diffracts around your lens's aperture blades, the same physical effect that softens fine detail elsewhere in the frame. Here, diffraction is the desired result, not a flaw to avoid. Our guide to shooting into the sun for sunstars, flare, and silhouettes covers how to balance that tradeoff.
Fog and bad weather bend the playbook too. A foggy or heavily overcast scene often has dramatically reduced dynamic range compared to a clear sunrise, so you can sometimes get away with a slightly higher ISO or a less conservative histogram reading, simply because there is less highlight and shadow detail at risk. Our piece on shooting landscape photography in bad weather goes further into how that changes your approach on site.
Sometimes the right move is not a different setting, but a different plan. A close foreground rock with a distant mountain a mile behind it is a textbook case for focus stacking several frames at your sharpest aperture rather than stopping down to f/22 and accepting the diffraction penalty. If you have not planned your composition and light before touching the settings dial, none of this matters much anyway; our guides on planning a landscape photography shoot and landscape composition cover the decisions that come before the settings do.
Frequently asked questions about landscape camera settings
What's the best aperture for landscape photography? Generally f/8 to f/11 on a full frame camera, sharp enough for most depth of field needs while staying short of where diffraction starts noticeably softening detail, though the exact number shifts slightly with your sensor and lens.
Is f/16 or f/22 ever a mistake for landscapes? Not a hard mistake, but by f/22 most lenses have lost enough fine detail that it should be a deliberate choice, not a default. Use it when depth of field genuinely requires it, and reach for focus stacking first when you can.
Does megapixel count change my sharpest aperture? Yes. Higher resolution sensors reach visible diffraction softening at a wider aperture than lower resolution ones, because their individual pixels are smaller and get overtaken by the same sized diffraction spot sooner.
What ISO should I shoot landscapes at? Base ISO, often around 100, whenever a tripod allows it, since raising ISO amplifies existing sensor noise and costs you dynamic range. Raise it deliberately when wind, handheld shooting, or motion in the scene make a faster shutter speed more valuable than a cleaner file.
Why does raising ISO sometimes seem to do nothing for noise? On a modern, ISO invariant sensor, pushing ISO up in camera past a certain point gives you no real shadow improvement and only sacrifices highlight headroom, so brightening a base ISO exposure in post can sometimes produce a nearly identical result.
Should I always shoot RAW for landscapes? For almost every composed landscape frame, yes. RAW files hold several times more tonal data than a rendered file, which is what gives you real room to recover shadows and highlights afterward without banding or posterization.
Why doesn't my in-camera histogram match what I see after importing the RAW file? Your camera typically builds the displayed histogram from an internal JPEG preview, not the actual RAW data, so it is an approximation. Your real RAW file usually has a little more recoverable detail at both ends than the in-camera graph suggests.
What's the real difference between golden hour and blue hour? Golden hour is roughly the hour around sunrise or sunset when the sun sits near 10 to 12 degrees of altitude, producing warm, low, raking light. Blue hour is civil twilight, precisely defined as the sun sitting between the horizon and 6 degrees below it, producing the deep saturated blue sky that comes before sunrise or after sunset.
See these settings in the field
Reading about diffraction curves and ISO invariance only gets you so far. The fastest way to internalize this material is to shoot the same kind of scene across a few real conditions with someone beside you who can tell you, in the moment, whether your histogram actually means what you think it means. That is the premise behind how we run our trips: every departure is timed for optimal light, weather, and seasonal highlights at each destination, so you practice these exact settings decisions against real golden hour, real wind, and real moving water, not a backyard test scene. Whether that means a tripod-steady sunrise over Val d'Orcia's hills or a wind-blown ridge in the Dolomites, the settings logic is the same, and a guide beside you to catch a clipped histogram before you walk away is worth more than any article. Take a look at our current photo tour departures to see which light and location matches what you want to come home with.
Whatever camera you bring, the goal of every setting in this guide is the same: protect the highlights, keep enough shutter speed to beat whatever is moving in your frame, whether that is wind or water or your own hands, and shoot RAW so you have room to fix the small mistakes later. Get those three things right and the specific numbers stop being a mystery and start being a tool you reach for without thinking about it.
Sources
- Cambridge in Colour: Lens Diffraction & Photography
- Cambridge in Colour: Digital Camera Diffraction, Part 2
- Wikipedia: Airy disk
- Wikipedia: Diffraction-limited system
- Wikipedia: Image noise
- DPReview: What is ISO invariance, and should I care?
- Wikipedia: Raw image format
- Wikipedia: Image histogram
- Wikipedia: Golden hour (photography)
- Wikipedia: Twilight
- Wikipedia: Long-exposure photography