Exposure Bracketing for Landscapes: HDR That Doesn't Look Like HDR
How many frames to shoot, what EV spacing to use, and the Lightroom HDR Merge plus luminosity mask workflow that blends a bracket without halos or grey skies.
Exposure Bracketing for Landscapes: HDR That Doesn't Look Like HDR
I used to be embarrassed by the word HDR. Say it in a room full of landscape photographers and someone will roll their eyes and mention orange skies, glowing halos around trees, or that flat, waxy look that makes a sunrise look like a video game cutscene. For years I avoided bracketing entirely because I did not want my photos to look like that, but some scenes genuinely need it. A bright snowfield under a dark night sky, a sun breaking through clouds over a ridgeline, an aurora pulsing over a glacier lagoon: these are scenes where a single frame simply cannot hold everything your eye can see at once.
What changed my mind was realizing that bad HDR is not a problem with bracketing. It is a problem with how the blended file gets processed afterward. Bracketing itself is just information gathering, a handful of exposures of the same static scene, each one protecting a different part of the tonal range. This guide walks through how many frames to shoot, how to space them, how to set your camera up to do it automatically, and the specific blending workflow I use on every trip that keeps the result looking like a photograph, not a special effect.
Key Takeaways
Bracketing solves a real dynamic range problem, but only a careful blend keeps the result looking natural.
| Point | Details |
|---|---|
| When to bracket | When the gap between your brightest and darkest important areas is roughly 8 stops or more, beyond what one RAW frame can hold cleanly |
| Typical frame count | 3 frames for a mild sunrise, 5 for bright snow against a dark sky, 7 or more for sun-in-frame or aurora-over-snow scenes |
| EV spacing | 1 EV steps for most scenes, 2 EV steps when you need to cover extreme range in fewer frames |
| Best blending tool | Lightroom's native HDR Photo Merge, which outputs a 32-bit DNG you can edit like a normal RAW file |
| Main causes of fake-looking HDR | Local tone mapping that over-brightens edges (halos) and global tone mapping that over-compresses contrast (flat grey skies) |
| Fix for most artifacts | Shoot a wide enough bracket that the software has to work less hard, use a tripod, and process the merged file conservatively |
Table of Contents
- What exposure bracketing actually solves, and when you don't need it
- How many frames, and what EV spacing
- Setting up auto-bracketing on your camera, and when to go manual
- In the field: the order of operations for a clean bracket
- The natural blending workflow, step one: Lightroom's HDR Merge
- Step two: luminosity masks for the finishing touches
- Why HDR looks fake, and the four fixes that actually work
- A scene built for bracketing: aurora over snow in Iceland
- Frequently asked questions about exposure bracketing
What exposure bracketing actually solves, and when you don't need it
Every camera sensor has a limit on how much range it can capture in one frame, from the darkest shadow that still holds detail to the brightest highlight that is not blown out to pure white. That limit is called dynamic range, and it is measured in stops, the same unit used for exposure value, or EV. A one stop change in exposure means the sensor is recording exactly half or exactly double the light, which is the whole reason bracketing in clean EV steps works so predictably.
Modern full frame sensors are genuinely good at this. Dynamic range is a measured quantity, not a vibes-based one, tested by comparing the lowest light level a sensor still resolves detail at against the highest level it can capture before clipping, which is exactly how outlets like DPReview rate camera sensors. A camera like the Nikon D850 captures somewhere around 14.8 stops of range in a single RAW file by that kind of testing, and most current mirrorless bodies land in a similar 13 to 15 stop range. A real landscape scene can exceed that by a wide margin: the difference in brightness between a moonless night and a sunny day is roughly 30 stops, which is far beyond what any single exposure can hold, and plenty of ordinary scenes, a backlit sunrise with a bright sky and a dark foreground, or snow next to shadowed rock, sit outside what one frame can capture cleanly too.
Bracketing exists for this gap. Take one correctly metered exposure, then one or more frames deliberately brighter and darker, by varying shutter speed, aperture, or ISO. It is recommended, as photography references have long noted, in difficult, high contrast lighting conditions where no single frame holds the scene's full tonal range. Each exposure protects a different slice from clipping, and you merge them into one file with more usable range than any single frame could hold.
None of that means you should bracket everything. If I am shooting midday hills in open shade, or a cloudy sky with soft, even light, a single RAW frame almost always holds the full range cleanly with room to spare in post. The fast field test I use is simple: meter the brightest and darkest parts of the scene you actually care about. If the gap between them is under about six or seven stops, shoot one frame and move on. Bracketing only earns its place once that gap pushes past what your camera can hold in a single exposure, which in practice means scenes with the sun in frame, bright snow against deep shadow, or a glowing sky over a dark silhouette.
How many frames, and what EV spacing
Every bracketing tutorial answers this with one generic example, as if every scene needs exactly three frames at two stop spacing. The right answer depends on how wide the gap is between your brightest and darkest important tones, and matching the frame count to that gap is what separates a clean blend from a file that forces the software to guess.
A real camera's automatic bracketing range varies enormously between models, anywhere from a narrow total spread on simple point and shoots up to roughly 18 EV of total range on some professional bodies, which is exactly why a one-size answer does not work and different cameras need different bracket plans for the same scene. The table below is the decision rule I actually use in the field, matched to how wide the scene's dynamic range gap is.
| Scene type | Approx. dynamic range gap | Frames | EV spacing |
|---|---|---|---|
| Even, soft light (overcast, open shade) | Under 7 stops | 1 (no bracket needed) | n/a |
| Mild sunrise or sunset, sun not in frame | 7 to 9 stops | 3 | 1 to 2 EV |
| Bright snow or water against dark rock or trees | 9 to 11 stops | 5 | 1 EV |
| Sun directly in frame, or very dark foreground silhouette | 11 to 14 stops | 7 | 1 to 2 EV |
| Aurora over snow, extreme contrast night scenes | 14 stops or more | 7 or more | 2 EV |
Real camera examples bear this out. Older Pentax HDR modes shot 3 or 5 exposures depending on the setting, and documented bracketing sequences for extreme scenes have run close to a 1 stop step across eleven frames, while gentler scenes are commonly handled with just four or five frames spaced two stops apart. You rarely need more than seven frames for anything you will shoot in landscapes, even at night.
Setting up auto-bracketing on your camera, and when to go manual
Every mirrorless and DSLR body sold in the last decade has some version of auto exposure bracketing, usually labeled AEB or BKT in the menu. The three things you are setting are the number of shots, the EV increment between them, and the sequence order: whether the camera shoots the metered exposure first, or shoots darkest to brightest in one pass. For a tripod shot I prefer darkest to brightest, since the slowest shutter speed frame then comes last, after the camera has settled from the earlier frames' movement.
The limitation nobody mentions is that most cameras cap their native AEB mode at three frames, sometimes five on higher end bodies, and cannot spread far enough to cover the most extreme scenes in a single automated burst. The workaround is simple but rarely explained: switch to manual exposure, take your correctly metered frame, then change only the shutter speed by the EV step you want and fire the next frame, repeating in both directions. Aperture and ISO stay locked throughout so depth of field and noise stay consistent across the whole bracket.
Pro Tip: Use a 2 second self-timer or a remote release for every bracketed frame, even on a sturdy tripod. The tiny vibration from pressing the shutter button by hand is enough to shift the frame just slightly between exposures, and that misalignment is exactly what creates ghosting and double edges when you merge the files later.
A tripod matters more for bracketing than for almost any other landscape technique, because a clean merge depends on every frame lining up. Movement between frames, whether from wind, a shifting tripod leg, or your own hand on the shutter, creates ghosting: semi-transparent duplicate or blurred regions where the merge software cannot decide which frame's content to trust. The fix, confirmed by the same references that define the bracketing process itself, is a sturdy tripod that keeps every frame aligned before you open the files in Lightroom.
In the field: the order of operations for a clean bracket
The sequence you follow in the field has a bigger effect on your final image than most people realize. I run the same checklist on every bracketed shot, quick five frame sunrise sequences included.
First, compose and focus, then switch to manual focus so the camera cannot hunt between frames. Second, set white balance manually, since a shifting white balance is a common cause of color banding in the merged file. Third, meter for the midpoint of the scene and check your histogram on the brightest and darkest frames specifically, to confirm neither end is clipping where it matters. Fourth, shoot the sequence quickly and in one direction, generally darkest to brightest, to minimize how much clouds, water, or the sky itself has moved between the first and last frame.
If anything in the scene is moving fast, water crashing over rocks or clouds racing by, shoot a tighter bracket with fewer frames and wider EV spacing rather than a slow seven frame sequence that gives movement more time to create ghosting you will have to fight later in Lightroom's Deghost tool.
The natural blending workflow, step one: Lightroom's HDR Merge
HDR, strictly defined, is nothing more mysterious than merging several frames of the same scene at different exposures into one image with more dynamic range than any single frame could hold, exactly the bracket you just shot. Many tutorials point you toward dedicated tone-mapping software instead, which can work well in the right hands but is also where most of the "fake HDR" look gets baked in, since it applies aggressive local contrast by default. I do almost all of my blending inside Lightroom itself, using Photo, then Photo Merge, then HDR, on the selected frames.
The output is a single 32-bit floating point DNG file that behaves like a RAW file in every other respect. You can use Exposure, Highlights, Shadows, Whites, and Blacks on it the same way you would on a single frame, which is why this workflow looks natural: you are not applying a specialized tone-mapping algorithm, just processing a RAW file that already holds far more dynamic range than any single exposure could. Two settings matter during the merge. Auto Align compensates for small shifts between frames and should generally stay on. Deghost, with its None, Low, Medium, and High options, controls how aggressively Lightroom picks a single frame's content in areas with movement, like water, clouds, or people, instead of blending all the frames together there.
Pro Tip: Start with Deghost set to Low or even None for a static tripod scene with nothing moving, and only increase it if you actually see soft, doubled edges in the preview. A heavier Deghost setting than the scene needs will sometimes pick a single frame for a whole region instead of blending it, quietly throwing away the extra dynamic range you worked to capture.
Step two: luminosity masks for the finishing touches
Here is where most tutorials go wrong: they treat luminosity masks and HDR merge as competing techniques, as if you have to pick one. The strongest workflow uses both, in sequence, since they solve different problems. The HDR merge solves capture, recovering the scene's full dynamic range into one editable file so nothing clips. A luminosity mask solves finishing, small, targeted adjustments to specific brightness ranges within that already-recovered file.
After merging my bracket into a DNG, I will often find the sky, while technically holding detail now, is still visually a touch bright for the mood I want. Rather than pulling the global Highlights slider down, which affects every bright area in the frame, I build a luminosity range mask targeting just the brightest tones, using Lightroom's own Luminance range masking tool under Select Sky, and pull only that selection down half a stop. Because the mask follows luminance rather than a hard-edged shape, there is no visible line where the adjustment starts and stops, the kind of soft, natural looking burn a global slider cannot replicate. This is the same principle I lean on when warming up a flat Tuscany frame, covered in more depth in my guide to editing Tuscany photos for warmth: targeted, luminance-based adjustments beat global sliders for a natural result.
Why HDR looks fake, and the four fixes that actually work
Every bad HDR photo falls into one of four failure modes, each with a mechanical cause and a concrete fix. Knowing the cause lets you prevent it before you open the merge dialog, rather than fighting it afterward.
Halos are the glowing outline you sometimes see around a dark tree silhouetted against a bright sky. They come from local tone-mapping operators, which brighten the area immediately around a dark edge to preserve local contrast there, an effect that becomes visible exactly where contrast is extreme or the brightness changes steeply, which is precisely the edge between a silhouette and a bright sky behind it. The fix is to shoot a wide enough bracket that the software does not need to compress the range so aggressively, and to process the merged file with restraint rather than pushing Clarity hard on top of it.
Flat, grey skies are the opposite problem, caused by global tone-mapping operators compressing the range so much that the same reference describes it as a genuine loss of contrast across the image. The fix is to keep a true black point and a true white point somewhere in the frame, rather than letting the software compress everything toward the middle of the histogram.
Color shifts and ghosting come from movement between your bracketed frames: a branch in the wind, water, or your own tripod settling slightly. The fix is the same tripod discipline covered above, paired with the right Deghost setting for the motion actually present in the scene. The fourth failure mode, the oversaturated, cartoonish look most people associate with the word HDR, is not caused by the merge itself. It comes from processing the merged file as if it needs special treatment, cranking Clarity, Dehaze, and Vibrance all at once on top of an already wide tonal range. The fix is to treat the merged DNG like a single RAW file: a normal, careful edit, built on dynamic range you have already recovered rather than one you are still trying to force open.
A scene built for bracketing: aurora over snow in Iceland
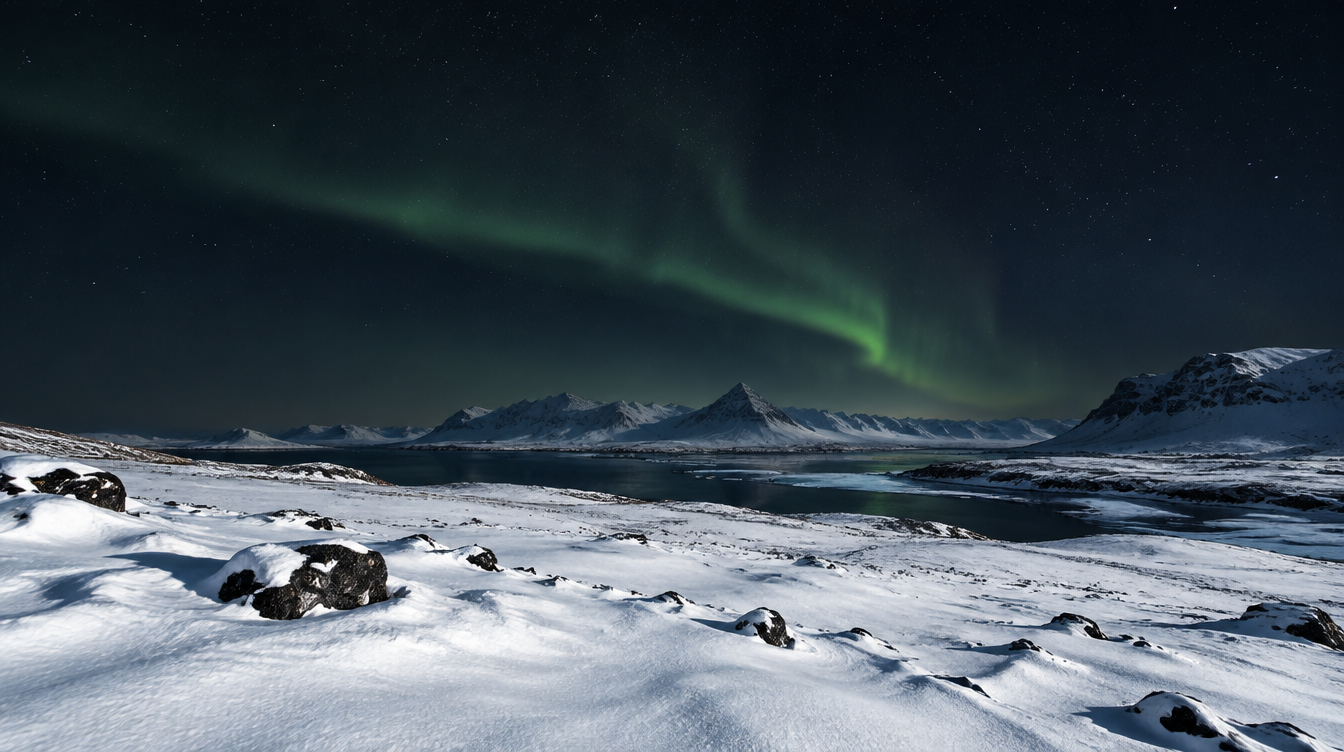
If you want to see every idea in this guide matter at once, stand on a frozen beach or a snowfield in Iceland on a clear winter night with the aurora overhead. You have three wildly different brightness zones in a single frame: snow and ice reflecting what little ambient light exists, a genuinely dark night sky, and an aurora whose own brightness swings constantly, from a faint glow near the edge of visibility to a display bright enough that observers have described being able to read by its light, sometimes shifting within seconds of the shutter closing on your last frame. That is about as close to a worst case dynamic range scene as landscape photography gets, which is exactly why this guide's bracketing and blending workflow, rather than a single clever exposure, is the right tool for it.
This is also, not coincidentally, the exact scene I build an entire trip around. On our Iceland Winter Aurora photo tour, an eight day trip I co-lead with fellow photographer Marco Carotenuto, we spend our nights chasing exactly this kind of light, tripods up, working through a bracket while the display shifts overhead. It is one thing to read about dynamic range on a page. It is another to watch your histogram clip while the aurora brightens, and realize in the field why a five or seven frame bracket at one stop spacing was the right call. The tour runs from $4,500 per person in double occupancy, with an $800 single room supplement, and departs on several dates including February and October. If this guide has made you want to practice bracketing somewhere that genuinely demands it, this is the place. For more on how the light behaves at this latitude, my earlier piece on mastering golden hour photography in Iceland is a useful companion read.
Frequently asked questions about exposure bracketing
How many bracketed shots do I actually need for a landscape? Three frames covers a mild sunrise or sunset. Five frames handles bright snow or water against dark rock. Seven or more is for extreme scenes like the sun directly in frame or an aurora over snow. Match the count to the actual dynamic range gap in the scene rather than defaulting to one number for everything.
What EV spacing should I use between bracketed frames? One stop steps work for most scenes and give the cleanest blend. Two stop steps let you cover an extreme range in fewer frames, which is useful when something in the scene is moving and you need to shoot the whole sequence quickly.
Do I even need to bracket if I am shooting RAW? Not always. A single RAW frame from a modern camera comfortably holds somewhere in the 13 to 15 stop range, enough for most daylight scenes with soft or moderate contrast. Once the gap between your brightest and darkest important tones pushes past roughly 12 stops, which happens with backlit scenes, bright snow, or night skies, a single frame starts to clip and bracketing earns its place.
Why do my HDR photos look fake, with weird halos or grey skies? Halos come from local tone-mapping brightening the area around dark edges to preserve contrast there. Flat, grey skies come from global tone-mapping compressing the image's range too far. Both are fixed by shooting a wide enough bracket and processing the merged file conservatively.
Should I use Lightroom's HDR Merge or a dedicated HDR app? I use Lightroom's native merge for almost everything, because the output is a 32-bit DNG you edit exactly like a normal RAW file. Dedicated tone-mapping apps can work well in experienced hands but default to a much more aggressive look.
What does the Deghost setting in Lightroom's HDR Merge actually do? It controls how aggressively Lightroom picks one frame's content, instead of blending across all of them, where something moved between exposures. Start on Low for a static tripod scene and raise it only if you see soft double edges.
Do I still need luminosity masks if I have already merged my bracket? Often, yes. The merge recovers the dynamic range so nothing clips. A luminosity mask is a finishing tool applied after that, for small, targeted adjustments, like pulling down a sky that is technically detailed now but still looks a touch too bright.
Can I bracket for aurora shots, or does the aurora move too fast between frames? Bracket the static elements, the snow and the dark sky, using a fast sequence on a tripod, and treat the aurora's own brightness swings separately by exposing your base frame for the aurora directly.
Will bracketing work for a handheld shot? Lightroom's Auto Align compensates for small handheld movement, but a tripod gives a cleaner result, especially as your bracket widens or shutter speeds slow down in low light.
Sources
- Exposure value (EV): Wikipedia entry on the technical definition of a "stop"
- Bracketing: Wikipedia entry on exposure bracketing technique and purpose
- Multi-exposure HDR capture: Wikipedia entry on frame counts, AEB ranges, and ghosting
- Dynamic range: Wikipedia entry comparing sensor stops to real scene luminance range
- Tone mapping: Wikipedia entry on the mechanism behind halos and flat skies
- DPReview: article on how camera sensor dynamic range is measured and tested
- High-dynamic-range imaging: Wikipedia entry on multi-exposure HDR capture and merging
- Aurora: Wikipedia entry on aurora brightness variability