Bad Weather Landscape Photography: Storms, Rain, and Dramatic Skies
Why the best light often arrives right before or after a storm, how NOAA says to handle lightning risk, and the camera settings and gear habits that actually keep a shoot going in the rain.
Bad Weather Landscape Photography: Storms, Rain, and Dramatic Skies
I used to be the guide who canceled a shoot the moment rain showed up on the radar. I am not that guide anymore. Some of the strongest frames I have brought home from a tour, a cracked sky over a fjord in Lofoten, a wall of rain lit gold from behind over a Tuscan ridge, a rainbow arcing over wet cobblestones, happened because the group stayed out when every instinct said to pack up and run for the van. Bad weather is not the enemy of landscape photography. Flat, boring, blue-sky weather is the real enemy, and storms are usually where the most interesting light in any given week is hiding.
That does not mean you walk toward a thunderstorm with a tripod over your shoulder and no plan. It means you learn three separate skills: reading a radar well enough to predict the gap in the clouds, respecting lightning the way the people who study it tell you to respect it, and protecting a camera that was never actually designed to be rained on for an hour straight. This guide covers all three, plus the actual camera settings that turn rain streaks, wave spray, and a stormy sky into a photograph instead of a blurry mess.
Key Takeaways
Storms are a light source, not just a hazard, but only if you handle the radar, the lightning risk, and the gear protection correctly first.
| Point | Details |
|---|---|
| Best light window | The 10 to 20 minutes before or after a storm cell passes, when low sun breaks under the departing clouds |
| Lightning rule | NOAA's flash to bang method: count seconds between flash and thunder, divide by five for distance in miles, shelter until 30 minutes after the last clap |
| Radar reality | A radar display like Windy shows where rain already is, not a true forecast. You still have to project its movement from the wind direction |
| Shutter speed for rain or spray | Fast, around 1/500s or quicker, to freeze individual drops and spray rather than smear them |
| Shutter speed for a silky look | Slow, beyond roughly half a second, to turn moving water or waves into a soft blur |
| Gear protection | Weather sealing resists spray and dust, not a downpour. A rain cover and a sealed bag for the cold to warm transition matter more than the camera's rating |
Table of Contents
- Why the best light often comes right before or after a storm
- Reading the radar: how to catch the gap in the clouds
- Lightning safety: what NOAA actually says
- Keeping your gear dry: weather sealing and the ziplock trick
- Camera settings for rain and waves: a shutter speed cheat sheet
- Reading the sky: storm structure as composition
- Is storm chasing for photography safe?
- Putting this into practice: Arctic storms in Lofoten
- Frequently asked questions about shooting in bad weather
Why the best light often comes right before or after a storm
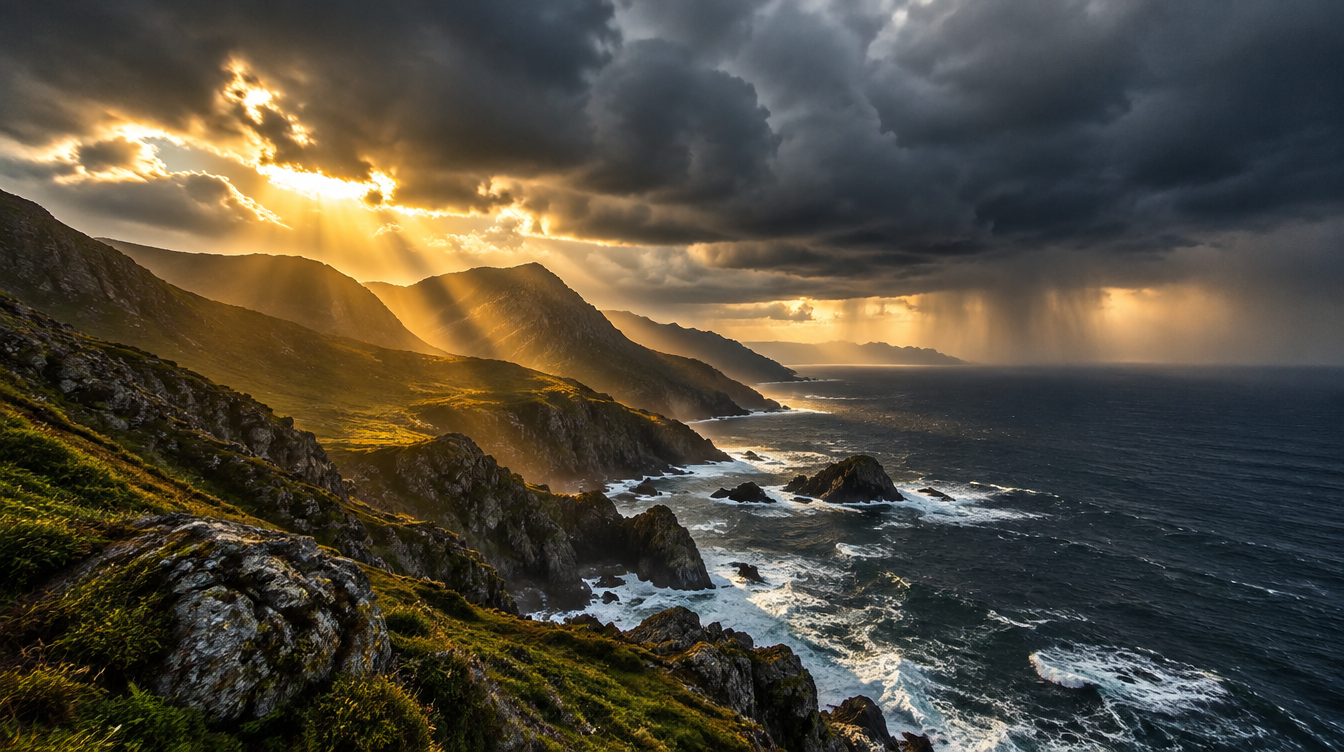
There is a specific window that every landscape photographer should learn to recognize: the ten or twenty minutes on either side of a storm cell, when the bulk of the cloud has moved on but the air is still thick with moisture and a low sun manages to sneak underneath the departing cloud deck. That is when you get shafts of light hitting rain still falling in the distance, a sky that is half bruised purple and half gold, and the kind of contrast you simply cannot manufacture on a clear afternoon.
Part of why the air looks so clean right after rain is physical, not just a feeling. Atmospheric aerosols, the fine particles of dust, smoke, and pollution that normally soften and haze the air, are short lived to begin with. NASA's Earth Observatory notes that aerosols typically remain suspended in the atmosphere for only a few days to about a week before they settle or get washed out (NASA Earth Observatory). A storm accelerates that process by scavenging particles out of the air as it falls, which is a large part of why the hills look so much crisper and more saturated in the hour after a downpour than they did the day before.
Pro Tip: Do not break down your tripod the moment the rain stops. The single best frame of the day is often the five minutes right after, when the ground is still wet and reflective, the sky is still dramatic, and every other photographer within sight has already packed up and left.
Reading the radar: how to catch the gap in the clouds
Most of the bad weather photography advice I read online tells you to "check a weather app," which is true but not very useful. The specific skill is learning to read a radar loop, not just a forecast icon. A tool like Windy is genuinely useful here, but it is worth understanding what it is actually showing you. Windy's own documentation is clear that its radar layer is an observation tool, not a forecasting one: it displays where precipitation currently is, and then extrapolates where it is likely to go next using wind speed and direction, rather than generating a true predictive model from scratch (Windy community documentation). In practice that means you have to do a bit of the projection yourself. Open the radar layer, note which direction the rain cell is moving and how fast, then check the wind layer separately to confirm that direction is holding steady. A fast moving, narrow cell that is tracking away from your location is exactly the kind of system that leaves a clean gap behind it.
I keep three layers open at once when I am planning a storm shoot: the radar layer to see where the rain actually is right now, the clouds layer to judge how much total cover is coming versus a short, isolated cell, and the wind layer to confirm the cell's direction of travel. Thunder and wave layers are useful add-ons if lightning risk or coastal water conditions matter for where you are standing, which on a trip like our Lofoten tour, they usually do.
Lightning safety: what NOAA actually says
This is the part of bad weather photography advice that gets glossed over far too often, so I am going to be direct about it. The National Weather Service's position is unambiguous: there is no safe place outside once a thunderstorm is close enough that you can hear it. Their lightning safety guidance states plainly that "there is no safe place outside when thunderstorms are in the area. If you hear thunder, you are likely within striking distance of the storm" (National Weather Service). Their core message, repeated across every page on the subject, is "when thunder roars, go indoors."
If you are genuinely caught outdoors with no shelter available, NOAA's guidance is to stay away from open fields, water, metal objects like fences and poles, and isolated tall trees, and to spread your group out so that a single strike cannot affect everyone at once (National Weather Service: lightning safety outdoors). That same guidance recommends waiting a full 30 minutes after the last rumble of thunder before resuming any outdoor activity, since lightning can strike from a storm that looks like it has already passed.
A practical field method NOAA publishes for estimating how close a storm actually is uses the gap between seeing a flash and hearing the thunder. Sound travels at roughly one mile every five seconds, so counting the seconds between the flash and the bang and dividing by five gives you a rough distance in miles (NOAA). If that number is shrinking shoot to shoot, the storm is approaching and it is time to pack the tripod into the bag, not swap to a longer lens for a better angle.
Pro Tip: A carbon fiber tripod does not make you safer in a lightning storm, and a metal tripod does not make you meaningfully more at risk either, once you are already standing in an open field under a thunderhead. The tripod material is not the variable that matters. Your location is. Get off the exposed ridge or beach entirely rather than trying to solve the problem with gear choices.
Keeping your gear dry: weather sealing and the ziplock trick
Weather sealing on a modern mirrorless body is genuinely good at what it is built for: resisting light rain, wind driven spray, and dust. It is not built to be submerged, and it is not built to have a hose of water run directly over the mount where the lens meets the body for an extended period. The honest way to think about a sealed camera is that it buys you time and margin in a drizzle or light rain, not that it turns your kit into a waterproof housing. If you are shooting in a genuine downpour rather than a passing shower, a simple rain cover, even an improvised one made from a clear plastic bag with a hole cut for the lens and secured with a rubber band, does more real-world protection per dollar than anything else in your bag.
The failure point photographers underestimate is not the rain itself, it is the transition afterward. Carrying a cold, wet camera from outside into a warm van or a heated hotel room causes condensation to form on and inside the body as the metal warms up faster than the air around it cools down, exactly the way a cold glass of water sweats on a humid day. The fix is simple and worth making a habit: before you go back inside, seal the camera in a plastic bag or dry it down with a cloth and let it sit in a cooler spot for ten or fifteen minutes to equalize temperature gradually, rather than walking it straight from a Lofoten rain shower into a heated cabin.
Camera settings for rain and waves: a shutter speed cheat sheet
Shutter speed is doing almost all of the work when you are photographing moving water, whether that is falling rain, spray off a wave, or a waterfall. The underlying principle is simple: a fast shutter speed freezes motion into distinct, sharp shapes, and a slow one blends motion into a smooth blur. Wikipedia's technical summary of shutter speed describes the slow end of that range well, noting that once you push beyond roughly half a second on running water, it takes on a soft, almost ghostly white appearance rather than showing distinct texture (Wikipedia: shutter speed). Everything else is just deciding where on that spectrum you want to land for the specific subject in front of you.
| Subject | Shutter speed range | Result |
|---|---|---|
| Freezing individual raindrops or wave spray | Fast, roughly 1/500s or quicker | Sharp, distinct droplets, a crisp and slightly aggressive look |
| A general storm scene with some motion | Moderate, around 1/60s to 1/250s | A natural amount of motion blur without losing all definition |
| The zone to avoid for flowing water | Roughly 1/8s to 1/90s | Neither sharp nor smoothly blurred, often just looks unintentionally soft |
| Silky waterfalls, waves, or rain streaks | Slow, beyond about half a second | A smooth, soft, ghostly look that reads as deliberate rather than a mistake |
For most storm scenes I am working handheld or on a tripod with a shutter speed somewhere in the moderate range, fast enough that the shot still looks sharp but slow enough that rain streaks read as motion rather than as stationary dots. If I want the aggressive, freeze frame look of a wave exploding against rocks, I push the shutter speed up and raise ISO if the light has gone flat and gray, since a clean but slightly noisy frame beats a motion blurred one every time. If I want the smooth, long exposure look across a stormy sea or a waterfall swollen with recent rain, that is when a solid neutral density filter earns its place in the bag, letting me drop the shutter speed well past half a second even in daylight without overexposing the frame.
Reading the sky: storm structure as composition
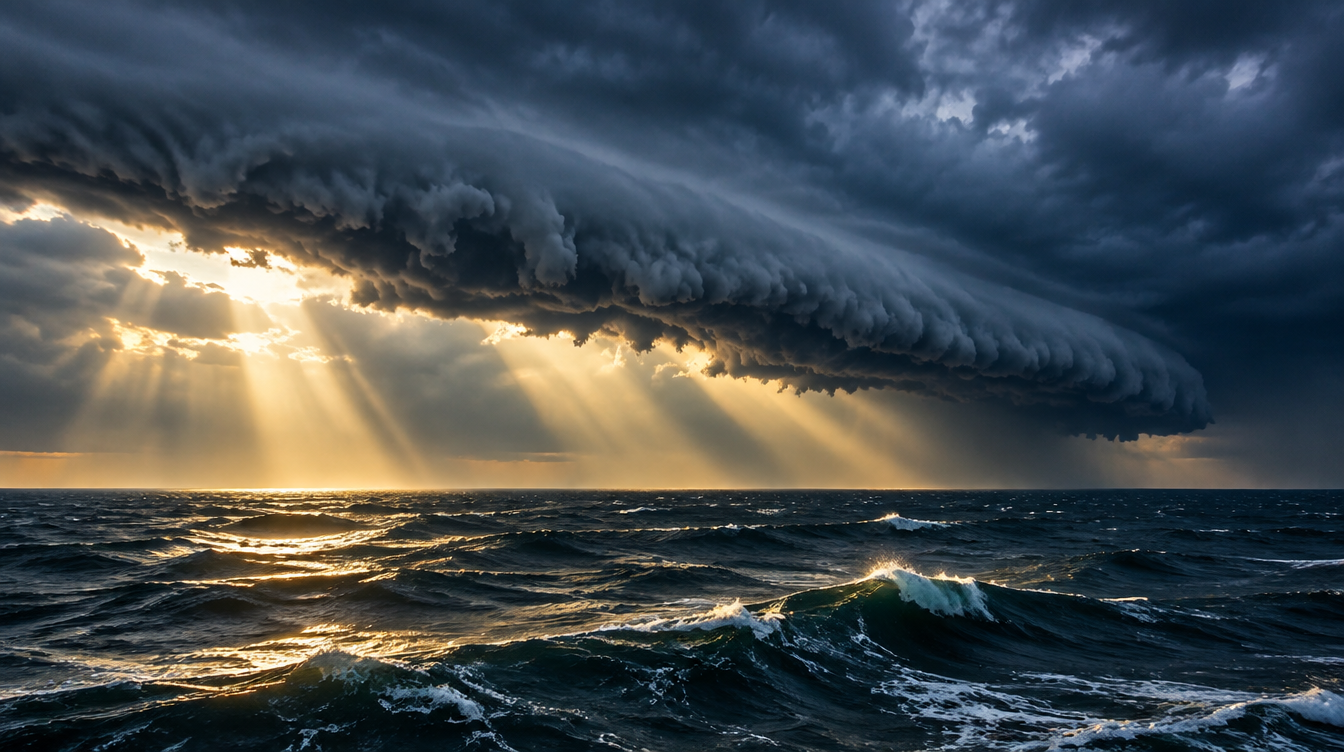
A storm sky is not one uniform gray mass if you actually look at it. Learning to recognize a handful of cloud shapes gives you a vocabulary for composing around them instead of just pointing the camera at "dramatic clouds" and hoping. A shelf cloud, the low, wedge shaped formation that sometimes rolls in ahead of a storm's leading edge, makes for one of the most striking skies you can photograph, precisely because it has a clean horizontal line that most landscape compositions are already built around. Mammatus clouds, the pouch like bulges that sometimes hang from the underside of a departing storm, are a reliable sign the worst of the weather has already passed and often coincide with that golden light window discussed earlier. A rainbow forming against a dark storm backdrop is one of the few situations where you genuinely want a darker, more threatening sky behind your main subject, since the contrast between the bright arc and the black clouds is what sells the image.
Composing with a storm sky usually means giving it more of the frame than you would on a calm day. A sky that is actively doing something interesting can carry forty or fifty percent of a wide landscape frame without the composition feeling unbalanced, something that would look wrong under a plain blue sky with nothing happening in it.
Is storm chasing for photography safe?
There is a meaningful difference between photographing dramatic weather that is already near you and actively chasing a storm cell to intercept it, the way dedicated storm chasers do in the American Midwest. For the kind of landscape and travel photography this guide is written for, the honest answer is that storm chasing in the pursuit sense is a specialized, higher risk activity that requires real training in storm structure and escape routes, and it is not something to improvise on a photography trip. What this guide is actually teaching, waiting out a passing storm from a safe, sheltered position and then shooting the aftermath or photographing a storm cell from a safe distance using the flash to bang method described above, is a very different and far lower risk activity. The line between the two is distance and intent: watching weather develop from indoors or from a vehicle and only stepping out once the lightning risk has passed is a sound practice. Deliberately closing that distance to get a more dramatic frame is not something I would ever ask a tour guest, or myself, to do.
Putting this into practice: Arctic storms in Lofoten
Lofoten is where I actually use everything in this guide on a weekly basis, not just in theory. Weather up there changes fast enough that checking the forecast once in the morning is close to useless. On our Lofoten Northern Lights photo tour, guide Lorenzo Ranieri Tenti and the group check forecasts repeatedly through the day and adjust the plan on the fly rather than committing to one location at sunrise and hoping. That is the radar reading habit from earlier in this guide, just applied in real time on a moving itinerary. The gear list for the trip reflects the same reality: a waterproof, breathable outer shell and waterproof boots are listed as requirements, not suggestions, and the briefing notes call out potentially icy, uneven terrain around locations like Reine, Hamnøy, and Uttakleiv Beach. Bad weather is simply the baseline condition up there, not an exception to plan around.
The current departure runs January 24 to 31, 2027, is eight days and seven nights, and is capped at just six participants, which matters more than it sounds like on a trip built around chasing fast moving weather. A smaller group can actually relocate together when a storm cell is tracking toward one beach and clearing over another, something that is close to impossible to coordinate with a van full of twenty people. The seascapes at Uttakleiv in particular are where the shutter speed table above gets used in the field constantly, slow exposures for the surf when the sea is heavy and dramatic, faster ones when spray off the rocks is the subject rather than the backdrop.
If a stable week of blue sky sounds more appealing than six days of genuinely unpredictable Arctic weather, this is probably not your trip. If the idea of reading a radar loop over breakfast and repositioning the whole group to catch a clearing gap sounds like the kind of photography trip you actually want, it almost certainly is.
Frequently asked questions about shooting in bad weather
Is it safe to photograph lightning or storms? It can be, from a safe distance and from inside shelter or a vehicle, using the flash to bang method to judge distance. It is not safe to stand in an open field or on an exposed ridge once thunder is audible. NOAA's own guidance is that there is no safe place outdoors once a storm is close enough to hear.
What is NOAA's flash to bang method and how do I use it in the field? Count the seconds between seeing a lightning flash and hearing the thunder that follows it, then divide that number by five to get a rough distance in miles. If the number keeps shrinking between strikes, the storm is approaching and it is time to seek shelter rather than keep shooting.
How do I protect my camera and lens without a dedicated rain cover? A clear plastic bag with a hole cut for the lens, secured with a rubber band or hair tie around the lens hood, is a genuinely effective improvised cover for a passing shower. For anything heavier or longer, a purpose built rain cover is worth the small cost and pack space.
Is a weather sealed camera actually waterproof in a downpour? No. Weather sealing is built to resist spray, drizzle, and dust, not sustained heavy rain or submersion. Treat the seal as margin for a surprise shower, not as a reason to leave a rain cover at home.
What shutter speed should I use for rain streaks or wave spray versus a smooth blur? Roughly 1/500s or faster freezes individual drops and spray into sharp shapes. Beyond about half a second, moving water turns into a soft, smooth blur. The range in between, roughly 1/8s to 1/90s, tends to look unintentionally soft rather than deliberately stylized, so it is usually worth picking a side rather than landing in the middle.
How do I stop my lens from fogging up coming in from the cold? Seal the camera in a bag or cover it with a dry cloth before moving from cold outdoor air into a warm vehicle or building, and let it warm up gradually over ten to fifteen minutes before opening it up. Moving a cold, wet camera straight into warm air is what causes condensation to form on and inside the body.
How do I know when a storm is about to clear so I can catch the best light? Watch the radar layer for the trailing edge of the rain cell, confirm its direction of travel against the wind layer, and watch the cloud base for mammatus clouds or thinning along the horizon, which often signal the worst of the weather has already passed and a clearing gap is close behind it.
Sources
- National Weather Service: lightning safety
- National Weather Service: lightning safety outdoors
- NOAA: estimating lightning distance
- Windy: how the radar layer works
- Wikipedia: shutter speed
- NASA Earth Observatory: atmospheric aerosols