Landscape Photography in Harsh Midday Light: How to Still Get the Shot
Harsh midday sun is not dead light. A practical playbook for polarizers, shade, black and white, heat haze, and using the middle of the day to scout instead of shoot.
Landscape Photography in Harsh Midday Light: How to Still Get the Shot
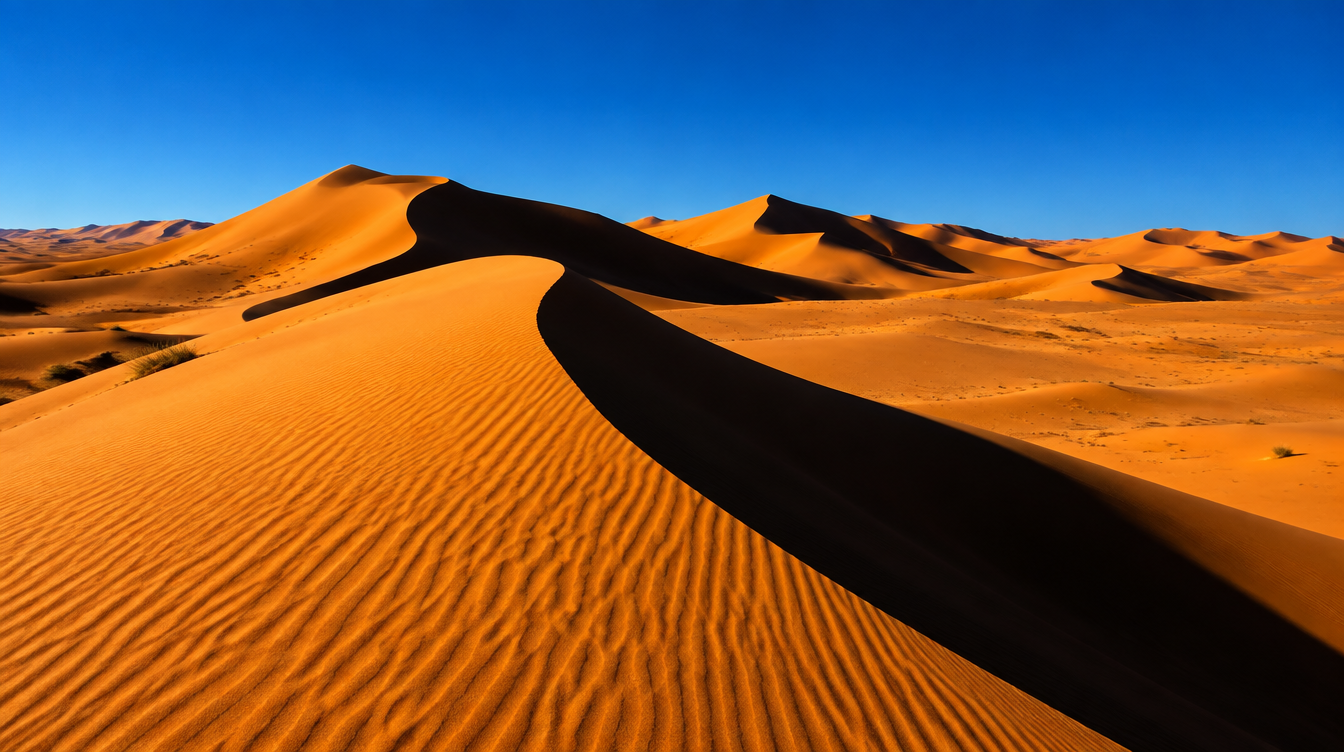
I have stood on top of a dune in the Djanet region of Algeria at noon, watching a group lower their cameras one by one because the light looked, in their words, "flat and ugly." The sand was blinding white, the sky was a featureless pale blue, and every shadow had shrunk to a hard black line at the base of each ridge. Ten minutes later I was crouched low with a polarizer twisted halfway round the barrel of my lens, shooting straight down the spine of that same dune, and the shot that came out of it is one I still show on slideshows. Midday light did not ruin that photograph. Not knowing what to do with midday light almost did.
This is the practical companion to our Landscape Photography Guide, which lays out the full day-to-night framework for reading light. That guide makes a point worth repeating here: the hard, high sun that photographers love to complain about also pushes color saturation and contrast higher than at any other point in the day. The problem is never that midday light is weak. The problem is that it is strong in ways that fight your sensor, your composition, and sometimes your own comfort in the heat. This article is the playbook for working with that strength instead of packing up your bag and waiting for sunset.
Key Takeaways
Midday light is not dead light. It is difficult light that rewards a different toolkit than golden hour.
| Point | Details |
|---|---|
| Why midday looks different | Sunlight passes through the least atmosphere near solar noon, which pushes color toward neutral and intensifies both contrast and perceived saturation |
| Main technical problem | Harsh contrast often exceeds a sensor's dynamic range, clipping highlights or crushing shadows |
| Best single tool | A circular polarizer, which cuts glare off sand, rock, and water and can deepen an overhead sky |
| Desert-specific hazard | Heat haze, a mirage effect that blurs telephoto shots of distant dunes and ridgelines |
| Smartest reframe | Use the hardest hours of light for scouting, resting, and gear prep rather than fighting for a hero shot |
| Safety note | UV exposure and heat risk both peak in roughly the same midday window as the harsh light itself |
Table of Contents
- Why midday light is different, not just worse
- The exposure problem: dynamic range and clipping
- Tool one: the circular polarizer, properly explained
- Tool two: chase shade and reflected light
- Tool three: go abstract or go black and white
- Tool four: watch for heat haze
- Tool five: use midday to scout, not shoot
- Staying safe in desert midday heat
- A midday to golden hour workflow for a desert tour day
- Frequently asked questions about shooting in harsh midday light
Why midday light is different, not just worse
Every photographer learns to love golden hour early, and for good reason. But it is worth understanding exactly what changes between 7am and noon, because once you understand the mechanism, midday light stops feeling like a problem and starts feeling like a different tool in the same box. Near solar noon, sunlight is traveling through the shortest possible path of atmosphere to reach your lens, a quantity astronomers call air mass, which is defined as reaching its minimum directly overhead. At sunrise and sunset, light travels through a much thicker slice of atmosphere, which scatters out the blue end of the spectrum and leaves the warm, soft, low-contrast glow we all chase.
At midday, none of that scattering softens the light on its way down. You get closer to the sun's raw spectrum hitting the sand, the rock, or the hillside directly, which is exactly why colors read as more saturated and contrast reads as more extreme at noon than at 7am. A red sandstone peak in Algeria genuinely looks more intensely orange under a hard noon sun than it does at dusk. The catch is that the same hard light creates shadows with almost no gradual falloff, because there is very little atmospheric scattering to soften the transition from lit to unlit. That combination, more intense color and harder-edged shadows, is the entire midday problem in one sentence, and every technique in this guide is really just a different way of managing it.
The exposure problem: dynamic range and clipping
The technical name for what happens to your exposure at noon is a dynamic range problem. Dynamic range is simply the luminance range of a scene compared to the limits your sensor can capture in a single exposure. A desert at midday routinely produces a scene where the brightest sand or sky and the darkest shaded rock face are further apart than any sensor can hold onto at once. Push your exposure to protect the shadows and the sand blows out to a featureless white. Protect the highlights and the shaded side of a dune turns to solid black with zero recoverable detail.
In the field, this means changing your metering habit for the middle of the day. I always expose to protect the brightest part of the frame first, usually the sky or the lit face of a dune, and let the shadows go as dark as they need to. Shooting RAW instead of JPEG gives you real recovery room in the shadows during editing, far more than you would get trying to lift a clipped highlight back from pure white. If your camera has a histogram or a highlight-warning overlay, check it every time at midday. You cannot trust your eyes alone in this kind of light, because your eyes adapt to contrast far faster than your sensor does.
Pro Tip: Set your camera to show blinking highlight warnings in playback, then deliberately underexpose by a third to a half stop on any midday shot with sky in the frame. It is far easier to brighten a slightly dark RAW file in post than to invent detail in a blown-out sky.
Tool one: the circular polarizer, properly explained
If there is one filter that belongs in your bag for midday shooting, it is a circular polarizer, and it is worth actually understanding why it works instead of treating it as a magic darkening ring. A circular polarizer for photography is built from a linear polarizer with a quarter-wave plate behind it, a design that exists specifically so your camera's autofocus and metering systems keep working correctly, according to the technical description of how the filter is constructed. Skylight scattered through the atmosphere is partially polarized, and that polarization is strongest in a band roughly ninety degrees from the sun, which is exactly where you get the most usable effect from a polarizer, typically within fifteen to thirty degrees of that optimal angle.
Rotate the filter while watching your sky through the viewfinder or in live view and you will see the blue deepen and the glare cut, while clouds stay comparatively unaffected because light scattered off water droplets is less polarized. The second thing a polarizer does, and the one that matters most in a desert, is cut glare off non-metallic surfaces like sand, rock, and water. That glare peaks at a specific angle called Brewster's angle, the incidence angle at which reflected light is most strongly polarized, and a correctly rotated filter will absorb much of that reflected glare rather than letting it wash out your foreground. On a dune field at noon, that means the difference between a flat, hazy, washed-out sand surface and one with real texture and contrast in the ripples.
There are two honest limits to know. A polarizer cannot fix the dynamic range problem from the previous section, it only reduces glare and deepens certain blues. And on a very wide lens, the band of maximum effect is narrow enough relative to your field of view that you can get an uneven, banded sky, darker on one side of the frame than the other. Watch for that specifically on anything wider than about 24mm and back off the rotation slightly if you see it. It is exactly the kind of filter our guide to the filters that actually matter for landscape work recommends keeping in a travel kit, and it is not a coincidence that a polarizer is already on the official gear list for our own Algeria Sahara Desert PhotoTour.
Tool two: chase shade and reflected light
When the light overhead is simply too harsh for a wide, open composition, the fastest fix is to go looking for shade and let reflected light do the work instead of direct sun. A canyon wall, the shadowed face of a dune, or an overhang in a rock formation all become soft, even light sources in their own right at midday, because light bouncing off a sunlit surface nearby fills in the shadow side without the harsh directionality of the sun itself. In the canyon systems around El Berdj, this is often the single best midday option, since the canyon walls themselves provide both shade and a warm, bounced fill that would be impossible to fake with direct sunlight.
This is also where smaller, more intimate compositions start to outperform the big sweeping wide shots you would go for at golden hour. A tight frame on textured rock in open shade, lit only by reflected light off a sunlit dune nearby, often reads as more intentional and more painterly than the same scene shot in full sun. Treat midday as the hour to work close rather than wide, and you will come away with frames that complement your sunrise and sunset wides rather than competing with them for the same look.
Tool three: go abstract or go black and white
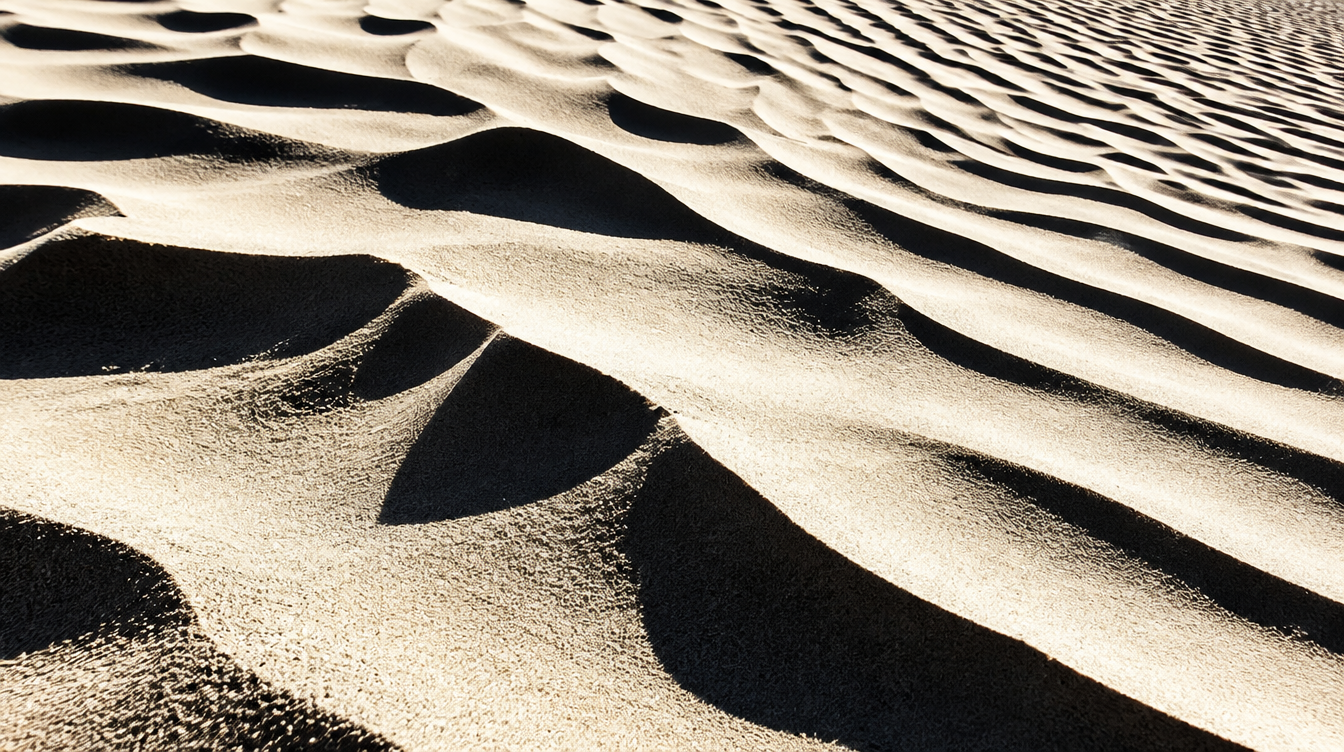
Sometimes the honest answer is that a scene is simply too contrasty to hold together as a realistic, full-color landscape at noon, and the smarter move is to stop trying to make it look like a golden hour photo and lean into what midday actually gives you: graphic shapes, hard edges, and extreme contrast. Dune ridgelines, repeated rock patterns, and the geometric shadows cast by midday sun all make excellent abstract or near-abstract compositions, where the subject is really the shape and the contrast itself rather than a sense of atmosphere.
Black and white conversion is the other honest option, and it works for a very specific technical reason. Once a scene's dynamic range has exceeded what you can hold in color without clipping, converting to monochrome lets you push local contrast hard without worrying about color casts in blown highlights or muddy shadows, because you are no longer trying to preserve color accuracy at the extremes. We cover this approach in detail in our piece on when black and white works better than color, and the exact conditions that article describes for flat, overcast light in Tuscany apply just as directly to the opposite extreme of a harsh, contrasty desert midday. Both situations share the same underlying cause: color is fighting the composition instead of helping it, and dropping it out lets the shapes and contrast carry the photograph on their own.
Tool four: watch for heat haze
This is the one problem almost nobody warns you about, and it is purely a desert, midday issue. Heat haze, the shimmering distortion you see over hot sand or asphalt, is technically an inferior mirage, caused by light bending as it passes through air layers at sharply different temperatures close to the ground. The effect produces a blurred, shimmering distortion that gets worse the more you magnify the image, which means your telephoto shots of distant dunes or ridgelines are exactly where this problem hits hardest. A 700mm compression shot of a dune field that looked perfectly sharp on your camera's small screen can come home looking soft and wavy once you view it at full size, and it is not a focus mistake. It is physics, and no amount of sharpening fixes it.
There is no real cure for heat haze beyond avoiding the conditions that cause it. Shooting wider rather than zooming in reduces the problem significantly, since the distortion compounds with magnification. If you need a specific distant subject at midday, get physically closer rather than relying on reach, or simply wait and come back to that same composition closer to golden hour, when the ground has cooled and the temperature gradient that causes the shimmer has relaxed.
Tool five: use midday to scout, not shoot
The single most useful mental shift for midday light is to stop treating it as wasted shooting time and start treating it as the best scouting window of the day. The light is bright and even enough to see a composition clearly without the drama of shadow and color that can trick your eye into liking a shot that will not hold up later. I use midday hours on every desert trip to walk a dune field, test different vantage points, and note exactly where I want to be standing when the light turns gold a few hours later, rather than arriving at golden hour and improvising under time pressure.
This is also the ideal time to deal with everything that is tedious to do in the dark: cleaning sensors, double checking batteries, dusting sand out of filter threads, and backing up the previous day's cards. None of that is glamorous, but doing it at noon instead of at 5am means you walk into golden hour with a clean, charged, ready camera instead of fumbling with a dead battery just as the light turns perfect.
Staying safe in desert midday heat
All of the technique above matters less if you are not taking the heat itself seriously, and this is the part almost no photography guide covers. The National Park Service's own desert safety guidance for Death Valley recommends drinking at least a gallon of water a day and avoiding strenuous activity at low elevations during the hottest hours, and it lists dizziness, nausea, and headache as the signs that you need to stop and rest immediately. None of that is specific to one park. It applies anywhere you are hauling a camera bag across sand in direct sun.
The UV index tracks closely with the same hours that give you the harshest light. The index itself is a forecast of the probable intensity of skin-damaging ultraviolet radiation around the solar noon hour, and the standard guidance on high and very high index days is to avoid unprotected sun exposure between roughly ten in the morning and four in the afternoon, which happens to be almost exactly the window this entire article is about. On top of that, the National Weather Service notes that direct sun exposure alone can add as much as fifteen degrees Fahrenheit to the heat you actually feel compared to shade, which is a meaningful number when you are standing on open sand with no shade for an hour trying to nail a composition. A wide-brimmed hat, sunscreen reapplied more often than feels necessary, and water you are drinking before you feel thirsty are not optional extras on a desert shoot. They are what let you keep shooting competently instead of cutting the session short.
A midday to golden hour workflow for a desert tour day
Put all of the above together and a typical midday on a desert photography trip looks less like downtime and more like a different, quieter kind of work session. Mid morning, once the light has gone hard, is when I scout the next composition, test a few abstract or black-and-white frames in open shade, and keep an eye out for heat haze if I am considering any telephoto compression shots later in the week. Early afternoon is maintenance time: gear cleaning, battery charging, card backups, and genuine rest in shade, because shooting well at golden hour requires being rested, hydrated, and not already exhausted from fighting the heat since sunrise.
This is almost exactly the rhythm built into our own Algeria Sahara Desert PhotoTour, a trip through the Djanet region that mixes 4x4 travel, walks, and camping under genuinely dark, light-pollution free skies among the Erg Tin Merzouga dunes, some of which rise close to 600 meters, plus the canyon systems and sandstone peaks around El Berdj and Tikobawin. The official packing list for that trip already recommends a 24-70mm lens, a tripod, and a polarizer filter, which is the same core kit this article has been building a case for all along, and it is led by Lorenzo Ranieri Tenti, a two-time Milky Way Photographer of the Year, so the midday hours on that itinerary double as prep time for the night shooting the trip is equally built around. If you want to practice this exact rhythm of scout, rest, and shoot in a place built for it, that itinerary is a direct, hands-on way to do it.
Frequently asked questions about shooting in harsh midday light
Is midday really the worst time for landscape photography? Not always. It is the worst time for soft, directional light, but it is often the best time for abstract compositions, graphic dune or rock patterns, polarized skies, and scouting tomorrow's golden hour composition.
Does a polarizing filter actually work at noon? Yes, and sometimes better than at other times, since skylight is most strongly polarized roughly ninety degrees from the sun. Rotate the filter while watching the effect live and stop as soon as the sky or glare looks right, rather than twisting to the maximum setting by default.
Why do colors look more saturated at midday but shadows look terrible? Because the sun is highest and sunlight is passing through the least atmosphere of the day, color reads as more neutral and intense, but that same intensity creates contrast that can exceed your camera's dynamic range, clipping highlights or crushing shadows to black.
What causes the shimmering, wavy look over dunes in midday desert photos? Heat haze, a mirage caused by light bending through sharply different air temperatures just above hot sand. It gets worse the more you zoom in, it is not a focus error, and it cannot be sharpened away in editing.
Should I shoot color or black and white in harsh midday light? When contrast is too extreme to hold detail in both highlights and shadows in color, converting to black and white lets you use that same contrast as a graphic strength instead of fighting it, the same principle we describe for flat, overcast Tuscan light in the opposite direction.
What camera settings help in harsh midday sun? Protect your highlights first by exposing so the brightest sand or sky does not clip, shoot RAW for shadow recovery room, and watch for diffraction softening if you stop down very far chasing extra depth of field.
How do I stay safe photographing in desert heat at midday? Drink water steadily rather than only when thirsty, avoid strenuous walking in full sun during the hottest hours, wear real sun protection, and stop immediately if you feel dizzy, nauseous, or get a bad headache.
What does the UV index have to do with my photography day? The UV index is measured and peaks around the same solar noon hour that gives you the harshest photographic light, so the hours you are protecting your skin during are usually the same hours you are adapting your technique for anyway.
Sources
- Wikipedia: Polarizing filter (photography)
- Wikipedia: Brewster's angle
- Wikipedia: Dynamic range
- Wikipedia: Air mass (astronomy)
- Wikipedia: Ultraviolet index
- Wikipedia: Mirage
- NOAA Climate Prediction Center: UV Index information
- National Park Service: Death Valley safety guidance
- National Weather Service: Heat Index safety information
- WeShoot: Algeria Sahara Desert PhotoTour