Photographing Glacier Ice on Diamond Beach: From Macro to Wide Angle
The ice chunks on Diamond Beach work at every focal length, wide for the black sand and surf, macro for the bubbles and cracks inside a single piece. Here is how to shoot both, safely.
Photographing Glacier Ice on Diamond Beach: From Macro to Wide Angle
The first time I knelt down next to a piece of glacier ice on Diamond Beach, I had my 16-35mm on the camera and a plan to shoot the whole scene wide: black sand, white surf, a scatter of ice chunks catching the low winter sun. Then I actually looked at the ice in front of me. There was a crack running through the middle of it that caught the light like a vein of glass, and a cluster of trapped air bubbles that looked like something out of a jewelry catalog. I swapped lenses on the spot and spent the next twenty minutes three inches from a single piece of ice while the wide shot sat untaken.
That is the thing almost nobody tells you about this beach. Most guides treat it as one photograph: wide lens, long exposure, surf dragging past dark ice on black sand. It is a great photograph, and you should absolutely take it. But the same pieces of ice that make the wide shot work are, up close, some of the strangest and most photogenic subjects in landscape photography anywhere. This guide covers both ends of that range: how to read the beach and the surf for the wide composition, and how to turn a single block of ice into a macro subject, with the filter and exposure choices that make both work.
Key Takeaways
Diamond Beach is really two different photography sessions in one location: a wide, slow-shutter beach scene and a fast, close-up study of a single piece of ice.
| Point | Details |
|---|---|
| Two approaches, one location | Wide angle for the black sand, surf, and ice together; macro or close focus for the internal structure of a single chunk |
| Ice color is not random | Blue ice is dense and bubble-free, white ice is weathered and eroded, black or brown ice carries rock and debris picked up by the glacier |
| Safety comes first | Sneaker waves can surge far past where they look like they will stop; watch the water for a while before you set up a tripod |
| A polarizer helps, with a cost | It cuts the glassy glare off wet ice so the internal detail shows, but it also costs you roughly 1.5 to 2 stops of light |
| Best light | Low winter sun, early or late in the day, separates the ice from the black sand and lights up the translucent edges |
Table of Contents
- What you're actually standing on
- Read the surf before you read the light
- Why the same ice looks blue, clear, and black
- The wide angle approach: black sand, surf, and ice together
- The macro approach: getting inside a single piece of ice
- The polarizer problem on wet, curved ice
- Timing your shot against the surf
- One visit, two approaches: a sample session
- Where Diamond Beach fits on a winter Iceland trip
- Frequently asked questions
What you're actually standing on
Diamond Beach sits on Iceland's south coast, right where the channel from the Jökulsárlón glacier lagoon meets the open Atlantic. Its local name is Eystri-Fellsfjara, and it earned the tourist nickname because of the ice chunks scattered across the black volcanic sand, which from a distance really do look like scattered diamonds. Wikipedia's entry on Diamond Beach confirms both the name and the basic geography: icebergs calve off the Breiðamerkurjökull glacier, drift through Jökulsárlón, and are eventually pushed out to sea through the channel, where the surf breaks them apart and throws pieces back up onto the sand.
That journey matters for how you shoot the beach, because every piece of ice in front of you has already traveled from glacier to lagoon to ocean and back to shore. Some pieces are only hours old. Others have been tumbling in the surf for days, polished smooth, cracked, or worn down to a fraction of their original size. No two visits to Diamond Beach look the same, which is part of why it rewards repeat trips rather than a single quick stop. Our broader guide to photographing Jökulsárlón and Diamond Beach covers the wider lagoon and the logistics of the area; this piece goes deeper into one specific skill. Our complete Iceland winter photography guide is the place to start if you are still planning the broader trip.
Read the surf before you read the light
Before I talk about lenses or filters, I want to talk about the water, because this is the part of the Diamond Beach experience that actually gets people hurt. The surf here is not gentle. It is cold Atlantic water pushing through a narrow channel, and it produces exactly the kind of wave that the National Weather Service calls a sneaker wave, a wave that "surges further up the beach than expected, overtaking the unaware." The name is accurate. A wave that looks like every other wave can suddenly run twice as far up the sand as the ones before it, and it will do that without warning.
The official guidance for sneaker-wave-prone coastlines is simple: watch the surf for at least twenty minutes before you settle into a shooting spot, and never turn your back on the ocean. In practice, that means standing back from the waterline and timing a few sets before you commit a tripod to the sand, and composing your shot so you can glance up from the viewfinder every few seconds rather than burying your face in the camera with your back to the water. Ice blocks add a second hazard: a large piece can be shifted or thrown by an incoming wave, and standing directly next to one when the water surges is a bad place to be.
Pro Tip: Pick your shooting spot, then pick a retreat path before you set up anything. On a beach this flat and open, it only takes a second to step back, but you need to already know which direction that step is in rather than figuring it out with a wave at your ankles.
Why the same ice looks blue, clear, and black
Walk the length of Diamond Beach for ten minutes and you will see ice in almost every color except white snow. Some chunks are a deep, saturated blue. Others are nearly clear, like glass. Some are streaked gray, brown, or almost black. This is not random, and understanding it will change which piece of ice you choose to photograph.
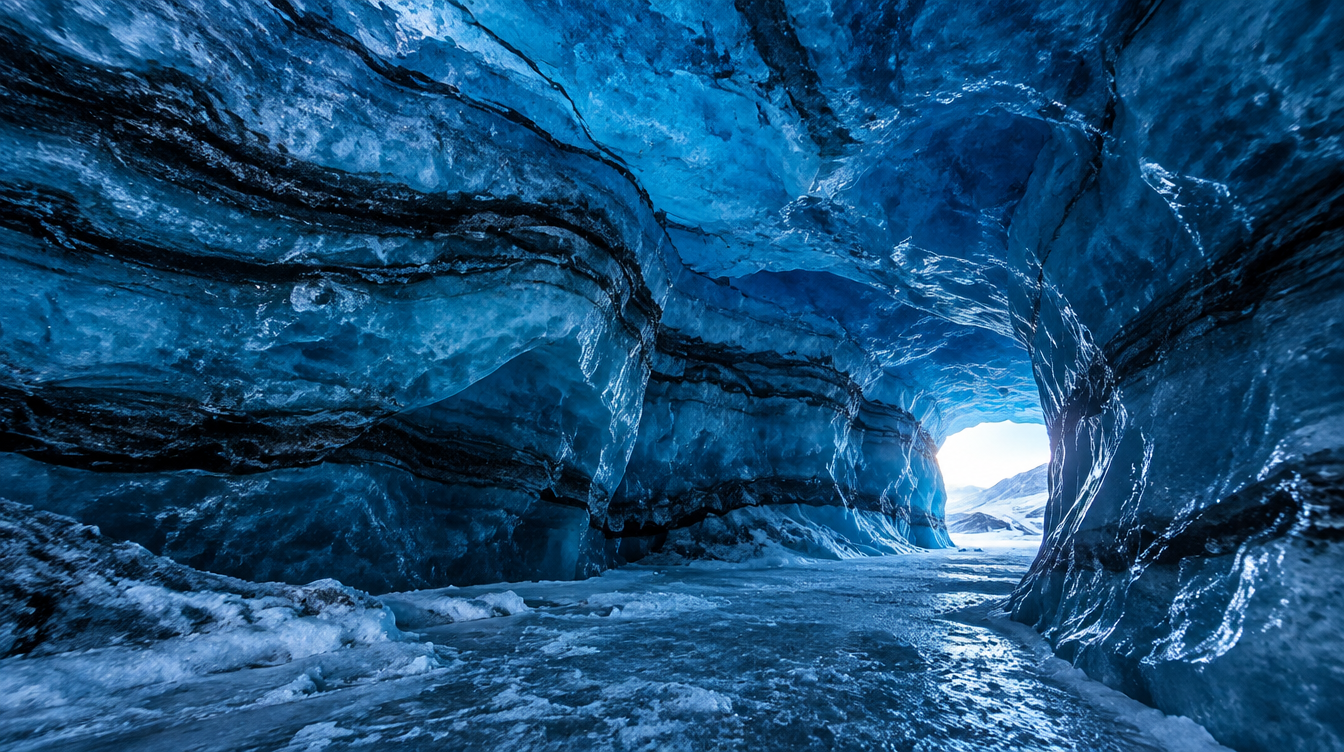
According to the U.S. National Park Service's explanation of glacier ice color, blue ice is "the color of pure glacier ice, compact with few air bubbles." That density is what matters: as snow compresses into glacier ice over years, the air gets squeezed out, and the remaining ice absorbs red light and scatters blue, the same basic physics that makes the ocean and a clear sky look blue. Rougher, more weathered ice "appears white" because its surface scatters light in every direction instead of transmitting it. And the black or brown streaks come from rock and debris: as the glacier grinds down the valley it carries sediment with it, and that material "gets mixed into the flowing ice, which darkens its appearance."
For your photography, this translates into a simple rule of thumb. If you want a macro subject with visible internal structure, cracks, bubbles, light passing through, look for the clearest, bluest ice you can find, since that density and clarity is exactly what lets light travel through instead of bouncing off the surface. If you want a strong dark shape for a wide composition, a black or heavily streaked piece reads as a bold foreground silhouette against the pale sand and white surf. Knowing the difference in advance saves you real time once you are standing on the sand with the light changing.
The wide angle approach: black sand, surf, and ice together
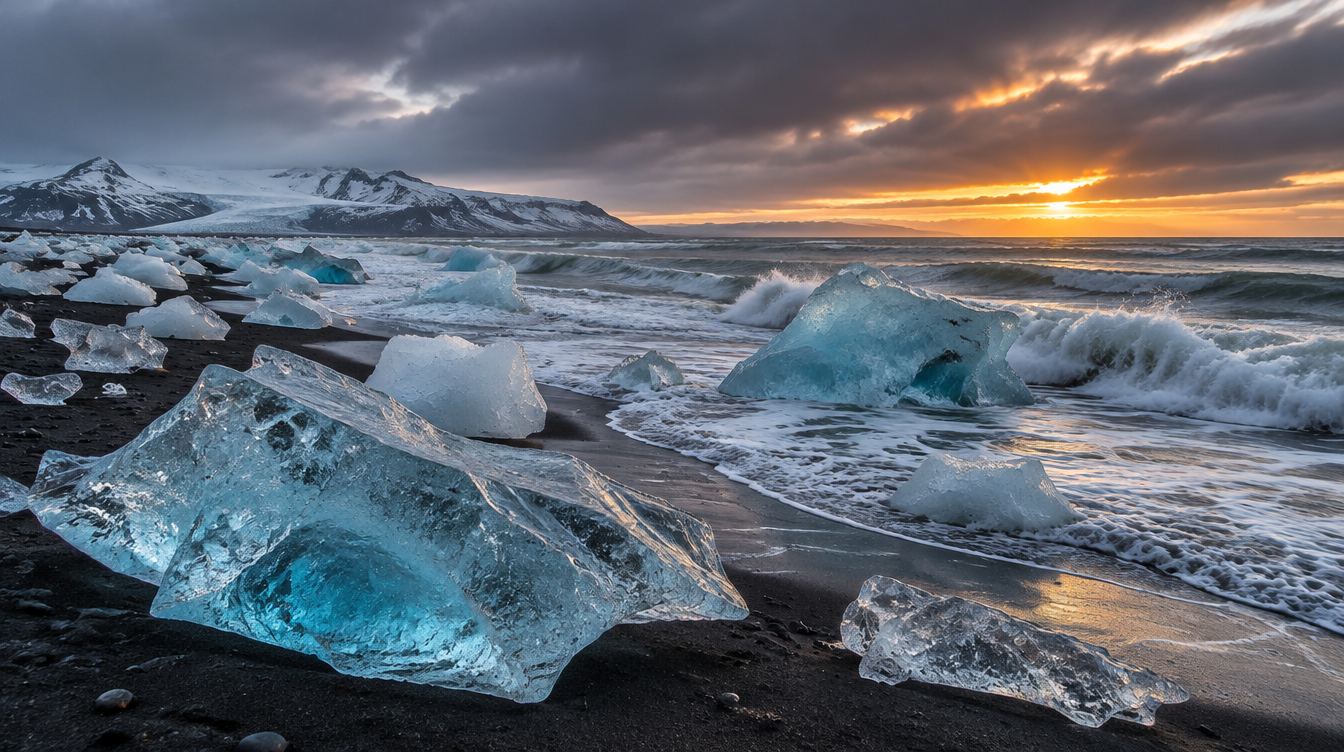
The classic Diamond Beach photograph uses a wide lens, something in the 16-35mm range on a full-frame body, to hold the black sand, a foreground piece of ice, and the surf moving around and through it all in one frame. A few things make this version of the shot work.
First, get low. Shooting from standing height flattens the ice and makes it look small against the beach. Getting down near sand level, often lying flat or kneeling with the camera close to the ground, makes the foreground ice loom larger in the frame and puts you at the same level as the surf, which reads as more immersive. Second, pick your shutter speed based on what you want the water to do. A faster shutter, around 1/250 to 1/500 of a second, freezes individual droplets of spray as a wave hits ice, dramatic but busy. A slower shutter, anywhere from half a second to two or three seconds, smooths the water into streaks and veils around the ice, calmer and more intentional. I shoot both on every visit and decide later which suits the shot.
A sturdy tripod matters more here than almost anywhere else I shoot. The sand is soft and wind off the ocean is near constant, so a lightweight travel tripod will shift mid-exposure. Spread the legs wide, push each foot into the sand rather than resting on top of it, and recheck your composition after a few waves, since the sand around the legs can shift as water runs past.
| Approach | Typical lens | Typical settings | What you're after |
|---|---|---|---|
| Wide, fast shutter | 16-35mm | f/8 to f/11, 1/250 to 1/500s, ISO 100-400 | Frozen spray, dramatic impact of wave on ice |
| Wide, slow shutter | 16-35mm | f/8 to f/16, 0.5s to 3s, ND filter, ISO 50-100 | Smooth, veiled water around a static ice shape |
| Macro, handheld | 90-105mm macro or extension tubes | f/8 to f/16, 1/160s or faster, ISO 400-1600 | Bubbles and cracks, minimal camera shake |
| Macro, tripod | 90-105mm macro | f/11 to f/22, slower shutter, ISO 100-200 | Maximum depth of field through a thick piece of ice |
The macro approach: getting inside a single piece of ice
This is the part of the Diamond Beach visit most people skip entirely, and it is my favorite half hour on the whole trip. Pick a clear or blue piece of ice, ideally one sitting still rather than rocking in the surf, and get close. A true macro lens, something like a 90mm or 105mm, lets you fill the frame with a few square inches of ice. If you did not pack a macro lens, extension tubes on your standard lens get you most of the way there, and even a kit lens's minimum focus distance will surprise you with how much detail a piece of this ice holds.
Expose manually rather than trusting your meter. Ice, like snow, tends to fool a camera's metering into underexposing, because the meter assumes the scene averages to mid-gray and ice is much brighter than that. Check your histogram, not just the rear screen, and dial in positive exposure compensation if you are shooting automatic. Stop down to around f/11 to f/16 for these close-up shots, since depth of field gets extremely shallow at macro distances, and you want enough of the crack or bubble structure in focus to read clearly.
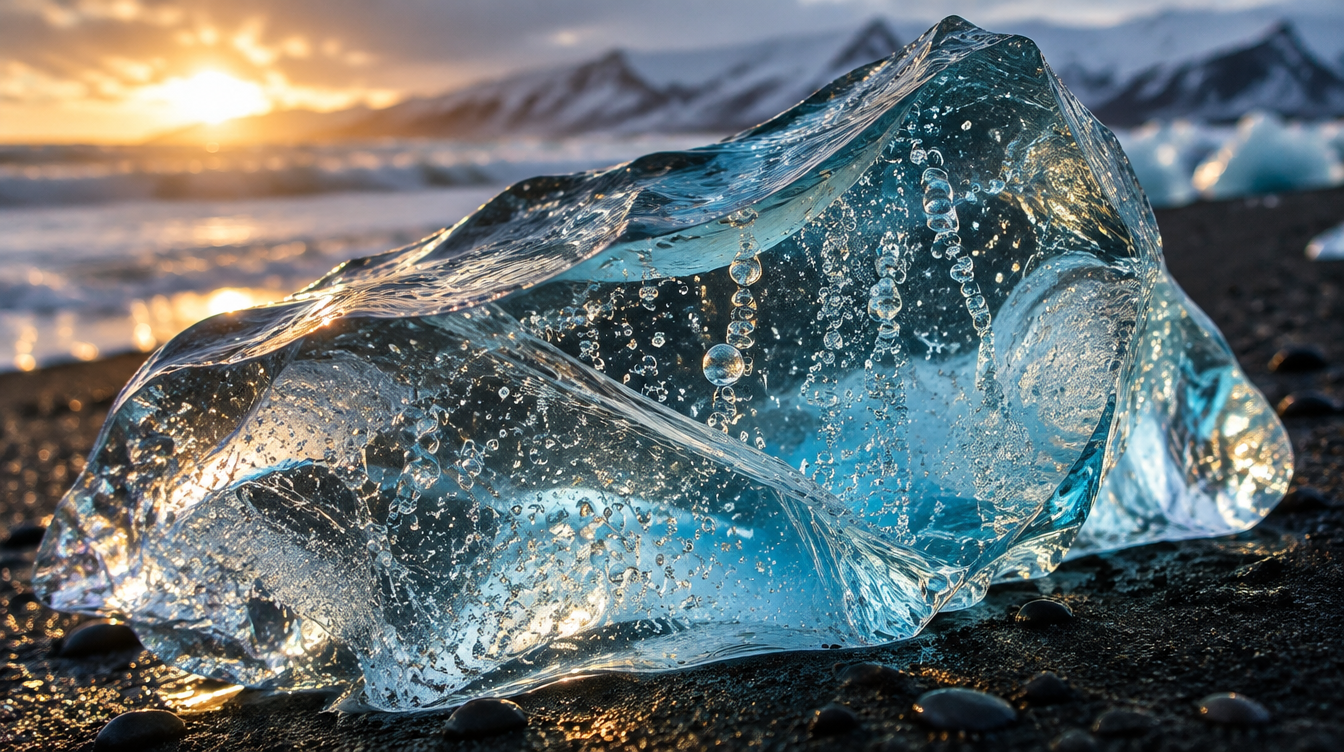
What you are actually looking for inside the ice: air bubbles trapped in neat chains or clusters, which look almost like a string of beads when backlit; cracks and fracture lines that bend light differently than the surrounding clear ice; and the boundary where clear ice meets a cloudier, whiter section, often the most interesting composition of the three. Try backlighting a thinner section by positioning yourself so the low winter sun comes through the piece toward your lens rather than bouncing off its surface. That is usually when the internal structure actually becomes visible instead of just implied.
Pro Tip: Bring a small brush or a cloth to wipe sand off a chunk of ice before you shoot it at macro distances. Black volcanic sand sticks to wet ice constantly, and at a few inches' working distance, a handful of stray grains reads as distracting clutter across an otherwise clean, glassy surface.
The polarizer problem on wet, curved ice
A circular polarizer is one of the few filters I consider close to mandatory at Diamond Beach, and it behaves a little differently here than it does on a lake or a window. Polarizing filters are built to reduce oblique reflections specifically from non-metallic surfaces, which includes water, wet rock, glass, and ice. We go into the broader mechanics of polarizers and other filters in our guide to the best filters for landscape photography, but the short version for ice is this: a recently splashed piece of ice has a thin, glassy sheet of water sitting on its surface, and that sheet reflects the sky back at your lens, masking the internal structure you are trying to photograph.
Nikon's own guide to polarizing filters demonstrates this with a lily pad shot through still water, where turning the filter revealed detail beneath the surface that the reflection had hidden, the same basic effect you get wiping glare off wet ice. The catch is that the effect is directional rather than fixed. Polarization strength depends on your angle relative to the sun, and on a curved, irregular piece of ice, that angle changes across the surface, so what kills glare on one side of the block might do nothing on the other. Rotate the filter slowly while watching the result, and expect to compromise: partial glare reduction across a curved surface rather than one perfect setting.
There is also a real cost. A circular polarizer typically costs you one and a half to two stops of light, which matters at a location where you also want a fast shutter speed to freeze surf spray or handhold a macro shot steady. On a bright day this is a non-issue. On an overcast winter afternoon, which is common in Iceland, you may need to choose between the glare reduction and a shutter speed fast enough to avoid blur. I keep the polarizer on for wide shots, where I am usually on a tripod and can afford the light loss, and pull it off for handheld macro work in flatter light, where I would rather have the shutter speed.
Timing your shot against the surf
Ice on Diamond Beach looks noticeably different wet than dry. The instant a wave recedes, the surface is dark, glossy, and saturated, almost like the ice was just polished. Within a minute or two of sun and wind, that wet sheen starts to fade and the surface goes matte and pale again. Both looks can work, but they are different photographs, and the window for the "just wet" look is short.
For the wide composition, I watch a full wave cycle before I press the shutter: the wave arrives, peaks around the ice, and recedes. The moment right after it recedes, with water still sheeting off the ice, tends to produce the most dynamic wide shots, since you get the glossy wet surface and visible motion in the same frame. For the macro shots, I prefer ice that has had a minute to settle after the last wave, calm enough that I am not worried about a splash hitting the front element three inches away.
One visit, two approaches: a sample session
Here is roughly how I structure an hour and a half on Diamond Beach when the light and tide allow it. First twenty minutes: walk the beach without the camera up, watching the surf and scouting ice. This doubles as the safety observation window and as scene selection. Next thirty minutes: set up the wide shot. Pick a strong foreground piece, usually dark or richly colored, get low, and work through a few shutter speeds while waves cycle past it. Next thirty minutes: switch to the macro setup. Find a separate, clear or blue piece away from the main surf line if possible, wipe off any sand, and work the internal structure from a few angles, checking the polarizer's effect as you rotate around the sun's direction. Last ten minutes: walk back along the beach one more time, since the light and ice arrangement will have changed, and the best shot sometimes shows up on the way out rather than where you started.
Where Diamond Beach fits on a winter Iceland trip
Diamond Beach rewards unhurried time far more than most Iceland stops, which is exactly why a drive-by visit on a packed self-guided itinerary rarely does it justice. On our Iceland Winter Aurora photo tour, a 7 day, 7 night trip for a maximum of 10 participants with one professional photographer guide, day 5 of the itinerary is dedicated specifically to Jökulsárlón and Diamond Beach, with the day before spent at the neighboring Fjallsárlón lagoon. That dedicated day is exactly the kind of time this location needs, enough to work both a wide composition and a macro session properly, rather than squeezing the ice into a few rushed minutes between other stops. The guided structure also means someone who already knows this beach can help you spot which piece of ice is worth the macro attention before the light changes, and the built-in image review sessions give you a chance to work through your wide and close-up frames with a guide the same evening. The tour runs at $4,500 per person with a $1,350 deposit, meets at Keflavík Airport, and includes ground transportation, most meals, and a post-processing workshop alongside the shooting days.
Frequently asked questions
Is Diamond Beach dangerous to photograph at? It carries the same general risk as other Icelandic black sand coastlines. Sneaker waves can surge much farther up the beach than they appear they will, and the water is near freezing. Diamond Beach has a somewhat calmer reputation than nearby Reynisfjara, but the safe practice is identical: watch the surf for at least twenty minutes before setting up, never turn your back on the ocean, and keep clear distance from large ice blocks when a wave is incoming.
Why is some glacier ice on the beach blue, some clear, and some almost black? It comes down to density and what is trapped inside. Compact ice with very few air bubbles reads blue. Rougher, weathered ice scatters light and reads white. Ice that picked up rock and volcanic debris on its way down the glacier reads black or brown. Knowing this helps you pick which chunk is worth a macro close-up and which works better as a dark foreground shape in a wide shot.
Do I need a polarizer at Diamond Beach, and does it actually work on wet ice? Yes, and yes. A circular polarizer cuts reflections from non-metallic surfaces, which includes wet ice the same way it includes water or glass. It is most useful for cutting the glare off a recently splashed piece of ice so the internal bubbles and cracks show through instead of a sheet of reflected sky. The trade-off is losing roughly one and a half to two stops of light, which matters if you also want a fast shutter to freeze spray.
What is the single best lens for Diamond Beach, wide or macro? Neither alone. The point of this location is that both work on the exact same pieces of ice. A wide lens in the 16-35mm range tells the story of ice against surf and black sand. A macro lens, or extension tubes on a standard lens, turns the same block into an abstract study of bubbles and fracture lines once you get within inches of it.
When is the best time of day to shoot the ice at Diamond Beach? Low, warm light early or late in the day separates the ice from the black sand and lights up translucent edges, which matters more here than at most beaches because the ice itself is semi transparent. It also keeps contrast manageable for the wide shots, where you are dealing with surf motion, and the macro shots, where harsh midday light can blow out the highlights inside the ice.
Diamond Beach is one of the few places I have photographed where I genuinely cannot decide which lens to bring, and the honest answer is to bring both and plan the time to use them. Treat the wide shot and the macro shot as two separate assignments on the same beach, watch the water the whole time you are out there, and you will come home with a set of images that looks nothing like the single postcard shot most visitors settle for.
Sources
- U.S. National Park Service: Why is the Ice Blue in Glacier Bay?
- Wikipedia: Diamond Beach, Iceland
- Wikipedia: Polarizer
- National Weather Service: Sneaker Waves
- Nikon USA: Polarizing Filters Add POW to Pictures