Desert Landscape Photography: Dunes, Heat, and Endless Night Skies
How to photograph desert dunes well: timing the side light that reveals ripple texture, protecting gear from sand and heat, working with heat shimmer, and why deserts are among the best places on earth for night sky photography.
Desert Landscape Photography: Dunes, Heat, and Endless Night Skies
The first time you stand on top of a dune at sunrise, you understand why deserts photograph so differently from anywhere else. There is no foliage to soften the shapes, no buildings to break the lines, just sand sculpted by wind into ridges that catch light like nothing else on earth. I have led groups into the Algerian Sahara more than once now, and the pattern repeats every trip: people arrive expecting "dunes and heat" and leave talking mostly about the stars.
This guide covers the three things that actually matter if you want strong images from a desert: reading the light on dune ridges correctly, protecting your gear and yourself from conditions that will punish both, and understanding why the same remoteness that makes deserts hard to shoot by day makes them exceptional by night. None of this is theoretical. It is built from the Djanet region of the Algerian Sahara, the gateway to the Tassili n'Ajjer plateau, where WeShoot runs its desert photography trips.
Key Takeaways
Deserts reward a narrow window of side light, punish careless gear handling, and quietly offer some of the darkest skies you will ever point a camera at.
| Point | Details |
|---|---|
| Best shooting window | The 20 to 40 minutes of low, raking side light right after sunrise or before sunset, when ripple texture shows |
| Dune types in the Algerian Sahara | Crescent-shaped barchan dunes, complex star dunes, and long linear ridges, depending on wind history and location |
| Midday problem | Flat overhead light erases texture, and heat shimmer softens distant detail through telephoto lenses |
| Night sky potential | Remote deserts sit far from the artificial skyglow that national park researchers have measured spreading more than 200 miles from city light sources |
| Heat risk | Heat exhaustion and heat stroke are real medical emergencies, not minor discomfort, and the warning signs are specific |
| Access | Remote Algerian ergs around Djanet require a local guide and 4x4 travel for both safe navigation and site access |
Table of Contents
- Why desert dunes are a different kind of landscape
- Side light on dune ridges: timing it right
- Protecting gear from sand and heat
- Heat shimmer: working around and with it
- The desert after dark: Milky Way and dark sky potential
- Planning and safety for a desert shoot
- Frequently asked questions about desert landscape photography
Why desert dunes are a different kind of landscape
A dune field, or erg, behaves nothing like the rolling hills of Tuscany or the jagged ridgelines of the Dolomites. Sand is not fixed terrain. The National Park Service explains that dunes form when water and air pile loose sand against a barrier, such as foothills or tall mountains, and then keep changing shape as the wind keeps blowing. That single fact changes how you should think about composing in a desert: the exact ridge you photograph this week may look slightly different in a year, and the shadow pattern you see at 7:14am will be gone by 7:40am.
The Algerian Sahara around Djanet is a genuinely varied erg, not a single uniform dune type. Around Erg Admer the dunes run gold and classically crescent shaped. At Tin Merzouga the dunes turn red and climb to roughly 600 meters, among the tallest in the region. Moula Naga has a softer, pink cast to its sand. According to the National Park Service's breakdown of dune types, star dunes form only where wind blows from three or more directions over the course of a year, building several ridges down from a central summit, while barchan dunes (the word comes from the Arabic for "horns") form under one dominant wind direction with little or no vegetation to anchor the sand, and reversing dunes form where two opposing winds flip the crest back and forth. NASA's imaging of the broader Sahara region, including the neighboring Erg Iguidi sand sea, shows individual dunes more than 500 meters wide, wind-sculpted ridges that stretch for hundreds of miles across the Algeria-Mauritania border region. That scale is part of what makes a wide shot of an erg feel almost abstract, and it is also why a single compositional trick, isolating one ridge with a longer lens, tends to produce the strongest single frames rather than trying to capture the whole sand sea at once.
Pro Tip: Walk up the back, or leeward, side of a dune whenever you plan to shoot its face. Footprints on the lit side of a dune ruin a composition for the rest of the day, and in a place with no rain to reset the sand, that mistake does not wash away quickly.
The scale of an erg also changes how you should pack and plan. A single dune field can stretch for miles, and what looks like a short walk from a vantage point on a map can take 30 to 40 minutes on foot through soft sand that swallows your stride the way firm ground never does. Build that into your timing. If sunrise is at 6:40am and your target ridge is a 25 minute walk from the vehicle, you need to be moving by 6:00am at the latest, with a headlamp, well before the first side light actually appears on the sand.
Side light on dune ridges: timing it right
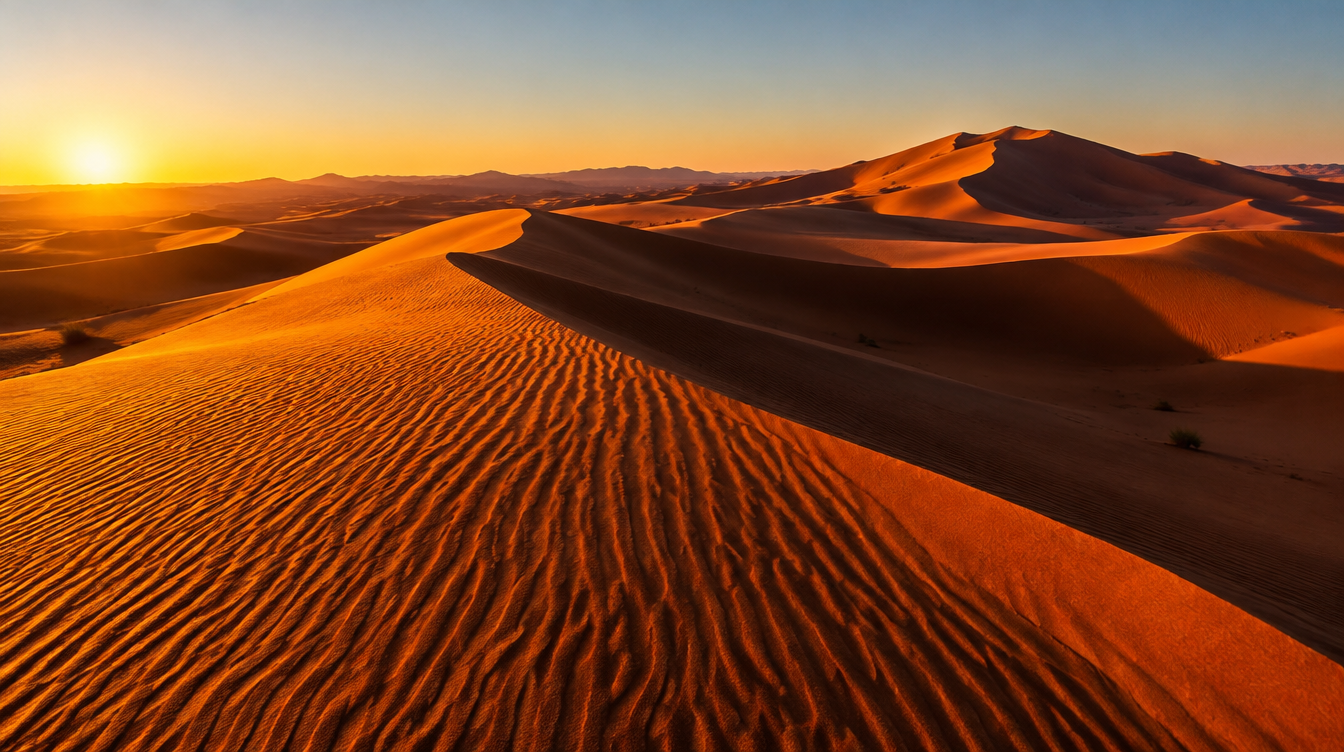
Every generic photography article tells you to shoot dunes at golden hour. That advice is not wrong, but it skips the actual mechanism, and understanding the mechanism is what lets you use it well instead of just hoping it works. Dune ripples are only a centimeter or two of relief. Overhead light, the kind you get from roughly 10am to 4pm, hits that texture from almost directly above and casts almost no shadow, so the ripples simply disappear and the dune reads as a flat, featureless slope. Low side light, by contrast, rakes across those same ripples nearly parallel to the ground, and every tiny ridge throws a shadow on the side away from the sun. That is the entire trick behind every striking sand-texture photograph you have ever seen: light angle relative to the ripple direction, not light color.
In practice this gives you a working window of roughly 20 to 40 minutes right after sunrise and again right before sunset, shorter than the loosely defined "golden hour" most people picture. Scout your dune and your vantage point the evening before in daylight, because stumbling across soft sand in the dark, trying to find a ridge you only saw once in a photo, wastes the best minutes of the light. Shoot with the sun low and roughly to your side rather than directly behind you. Light coming from behind the camera flattens the scene the same way midday light does, just with warmer color. Light from the side is what carves the ripples into visible relief.
If you want the sun itself in the frame rather than off to the side, the dynamics change again, and that is a deliberately separate topic. Our guide to shooting into the sun covers sunstars, controlled flare, and silhouette exposure in detail, all of which apply directly to a dune crest with the sun sitting right on top of it.
On gear, this is where a telephoto earns its place in a desert kit, maybe more than in any other landscape environment. A 24-70mm covers the wide establishing shot of a dune field, but a 70-200mm, or a 100-400mm if you are carrying one, is what isolates a single rippled slope and compresses a run of overlapping ridges into the layered, almost abstract pattern that makes the strongest single-dune images. I shoot most ridge-texture frames at f/8 to f/11, enough depth of field to hold the ripple detail sharp without pushing into the diffraction softening that creeps in past f/13 or so on most full-frame bodies. Keep ISO at base, usually 100 or 200, since the low side light is still bright enough at that hour that you rarely need to compromise there. A polarizer helps more than most photographers expect even without water in the frame: rotated correctly it cuts the faint atmospheric glare off sand at a distance and deepens the blue of a clear desert sky, which in turn makes the warm tone of the sand itself read more strongly by contrast.
Protecting gear from sand and heat
Fine Saharan sand gets into places you would not expect, and most photography articles mention this only in passing. After several desert trips, here is the actual field protocol I use and teach:
- Minimize lens changes outdoors. Every open-sensor moment in wind is an opportunity for sand to land on the sensor or in the mount, and desert sand is fine enough to work past basic weather seals over a multi-day trip.
- Carry a dry bag or a dedicated rain cover and use it as a dust cover, not just for weather. Between shooting bursts, bag the camera rather than letting it hang exposed against your side where sand kicked up by wind settles into zoom barrels and buttons.
- Never brush sand directly off a sensor or front element. A blower only, held so you are not forcing grains across the glass, is the only safe field-cleaning tool. Save the deeper clean for the end of each shooting day in a tent or vehicle out of the wind.
- Batteries drain faster in heat than in cold, counter to what most photographers expect from cold-weather warnings. Keep spares in a shaded bag, not a black pocket sitting in direct sun, and expect your LCD to wash out and be hard to judge in bright midday light regardless of brightness setting.
- Tripod legs pick up sand in their locking collars. A quick wipe at the end of each session keeps the leg locks from grinding, which matters more on a week-long trip than a single afternoon shoot.
Heat shimmer: working around and with it
If your midday or late-morning desert photos look slightly hazy or wavy in the distance, even on a cloudless day, you are seeing an inferior mirage, the same optical effect responsible for the shimmer above a hot asphalt road. Desert sand surfaces routinely run far hotter than the air just above them. The air in direct contact with that hot surface expands and becomes less dense than the cooler air a meter or two up, and light passing through that steep density gradient bends. Add the natural turbulence of hot air rising and mixing with cooler air above it, and you get the visible wobble and softening that ruins fine detail, particularly through a telephoto lens, which magnifies the distortion along with the subject.
The practical upshot is simple: this effect is strongest within a couple of hours either side of solar noon and largely gone by the time you reach the low, cool side-light window described above. If you want to shoot distant ridgelines with a longer lens for compression, do it in that early or late window, not at midday. If you are stuck shooting in the heat of the day for some reason, either embrace the shimmer as atmosphere in a wide environmental frame, where it reads as heat and scale rather than a flaw, or switch to wider compositions and closer subjects where the distortion matters less. Midday is also, frankly, a reasonable time to put the camera away and scout tomorrow's sunrise location instead of fighting conditions that are working against you anyway.
The desert after dark: Milky Way and dark sky potential
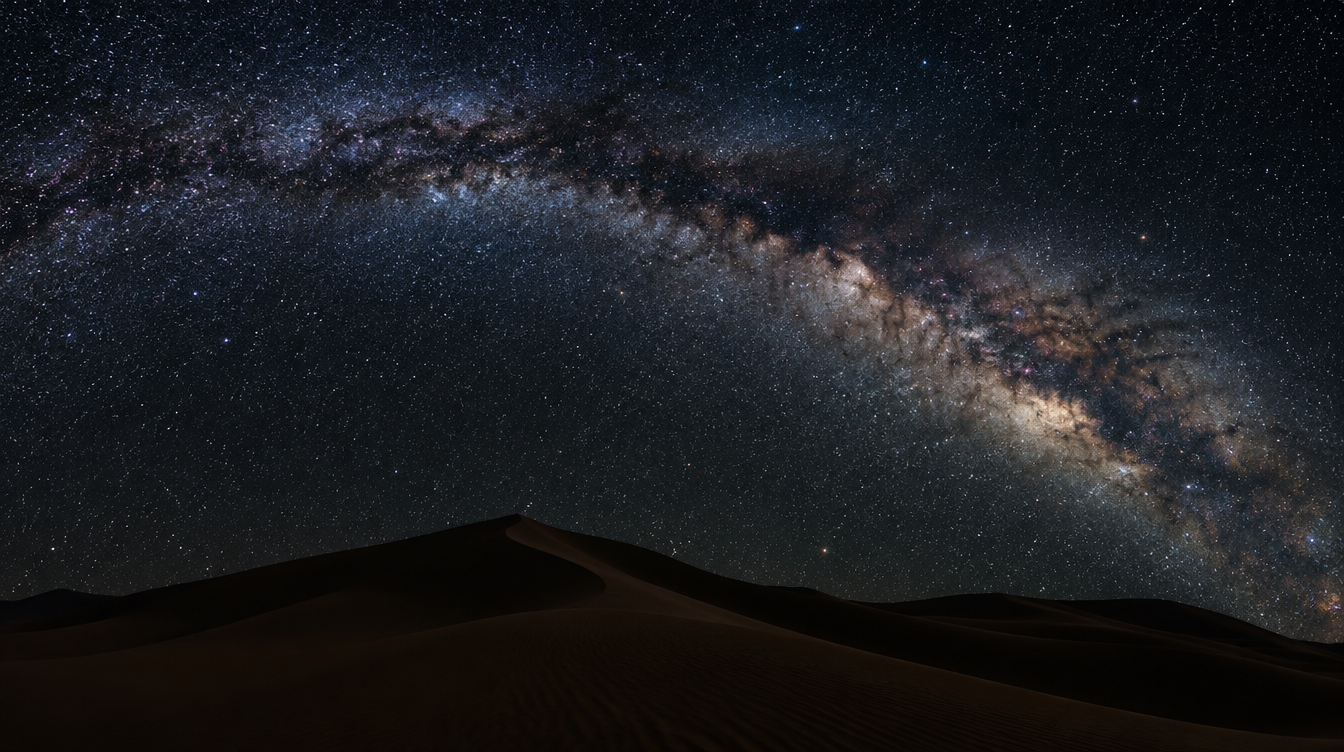
Deserts are difficult by day for the same reason they are extraordinary by night: there is almost nothing around them. No cities, no highway glow, no humidity haze scattering light back down from the horizon. The National Park Service's own research on light pollution has documented city skyglow visible more than 200 miles from some national parks, and the same body of research tracked average night-sky brightness increasing roughly 9.6 percent per year between 2011 and 2022 through citizen-scientist measurements, a rate that roughly doubles skyglow every eight years in many populated regions. A remote Saharan erg sits outside almost all of that. There is no faster way to understand how dark modern dark skies can still get than standing on a dune at 2am with the Milky Way arching directly overhead and no artificial light source anywhere on the horizon.
I will not re-explain the full Bortle scale and how to judge sky darkness here, since we cover that properly in our guide to light pollution and the Bortle scale. What matters for desert work specifically is that a dune ridgeline makes an unusually strong astro-landscape foreground. Unlike a flat horizon, a dune crest gives you a clean, graphic silhouette line to anchor a wide Milky Way composition, and because the sand holds almost no residual heat glow visible to a camera sensor after dark, your foreground stays genuinely black rather than fighting a faint ambient wash the way some rock or snow foregrounds do.
This is exactly the shift most guests on our Algeria Sahara desert tour describe. The itinerary is built around named dune fields including Moula Naga, Erg Admer, and Tin Merzouga specifically because they offer both the side-lit dune photography described above and a dedicated night sky and astro program, with guide Lorenzo Ranieri Tenti, a landscape and nightscape specialist, and an optional star tracker available in the gear list. If the idea of photographing a desert sunrise one morning and the unobstructed Milky Way that same night sounds like the kind of contrast worth traveling for, that is the trip to look at directly: the Algeria Sahara Desert PhotoTour.
For the night session itself, the settings are a different starting point entirely. On a clear, moonless Saharan night I usually start around 15 to 20 seconds at f/2.8, ISO 3200, adjusting from there once I check the histogram and the star points on the rear screen at full zoom. Wider glass helps more than fast glass alone, since a wider field of view both gathers more of the Milky Way's arch and lets you use a slightly longer shutter speed before star trailing becomes visible, an exposure-time tradeoff dictated by focal length that is worth knowing before you are standing on a dune in the dark trying to work it out from scratch. Focus manually, using live view zoomed into the brightest star you can find, since autofocus has essentially nothing to lock onto in a scene this dark.
Planning and safety for a desert shoot
Desert heat is not a minor inconvenience, and it deserves to be treated as the real medical risk it is. The National Weather Service lays out a clear progression worth knowing before you go. Heat cramps show up as painful muscle cramping and heavy sweating, and the Weather Service recommends seeking medical help if cramps last longer than an hour. Heat exhaustion follows with heavy sweating, skin that turns cool, pale, or clammy, a fast but weak pulse, dizziness, and nausea. Heat stroke, the most severe stage, involves a body temperature above 103 degrees Fahrenheit, hot and red or damp skin, confusion, and slurred speech, and the Weather Service describes it bluntly as a severe medical emergency requiring an immediate call for help, with no fluids given to someone in that state.
| Stage | Warning signs | What to do |
|---|---|---|
| Heat cramps | Painful muscle cramps, heavy sweating | Rest, hydrate, seek help if cramps last over an hour |
| Heat exhaustion | Heavy sweating, cool/pale/clammy skin, weak fast pulse, dizziness, nausea | Move to shade, cool down, hydrate, monitor closely |
| Heat stroke | Body temp above 103°F, hot red or damp skin, confusion, slurred speech | Medical emergency: call for help immediately, do not give fluids |
In practical terms for a shoot day, that means carrying more water than feels necessary, treating the hours around solar noon as rest and scouting time rather than shooting time, and knowing the early signs before they progress. It also means not underestimating how remote a real erg is. Around Djanet and the wider Tassili n'Ajjer plateau area, navigation is genuinely difficult without local knowledge, dune fields shift, there are no road signs, and a local guide with a 4x4 is the standard and sensible way to reach sites like Tin Merzouga or the Stone Forest camp safely, not an upsell. It is also usually how access and permits for a given area actually work in practice.
Pro Tip: Pack a headlamp with a red-light mode for any pre-dawn or after-dark shoot. It preserves your night vision for framing a Milky Way shot and keeps you from flashing a white beam across someone else's long exposure if you are shooting in a group.
Frequently asked questions about desert landscape photography
What is the best time of day to photograph sand dunes? The 20 to 40 minutes of low, raking side light right after sunrise or before sunset. Midday overhead light flattens ripple texture, and heat shimmer degrades distant detail during the hottest hours.
How do you protect a camera from sand in the desert? Minimize lens changes in wind, keep the camera in a dry bag or rain cover between shots, never brush sand directly off a sensor, and run a full cleaning pass at the end of each shooting day rather than mid-session.
Why do my desert photos look hazy or wavy in the distance? That is heat shimmer, an inferior mirage caused by light bending through the steep temperature gradient just above hot sand. It is strongest near solar noon and essentially gone during the cool low-light shooting windows.
Can you photograph the Milky Way in the desert, and when? Yes, and deserts are among the best places to try it. Their remoteness keeps them far from the artificial skyglow that affects skies near cities. See our Bortle scale and dark skies guide for how to judge and plan a specific night.
Is desert photography dangerous? What heat precautions do I need? Extreme heat causes a real medical progression from cramps to exhaustion to heat stroke. Carry more water than feels necessary, avoid exposed shooting during peak midday heat, and learn the warning signs before you travel.
Do you need a permit or guide to photograph dunes in the Sahara? In remote Algerian ergs around Djanet and Tassili n'Ajjer, yes. A local guide and 4x4 travel are standard for safe navigation and for reaching specific dune fields and camps.
Sources
- National Park Service: how dunes form
- National Park Service, Great Sand Dunes: dune types (barchan, star, reversing)
- NASA Science: Sea of Sand, Erg Iguidi dune imagery
- National Park Service: light pollution and skyglow research
- National Weather Service: heat illness symptoms and warning signs