Blue Hour Photography: Settings and Subjects for the Best Light of the Day
What civil and nautical twilight actually are, how long blue hour lasts depending on your latitude, and the settings, white balance, and village subjects that make the most of it.
Blue Hour Photography: Settings and Subjects for the Best Light of the Day
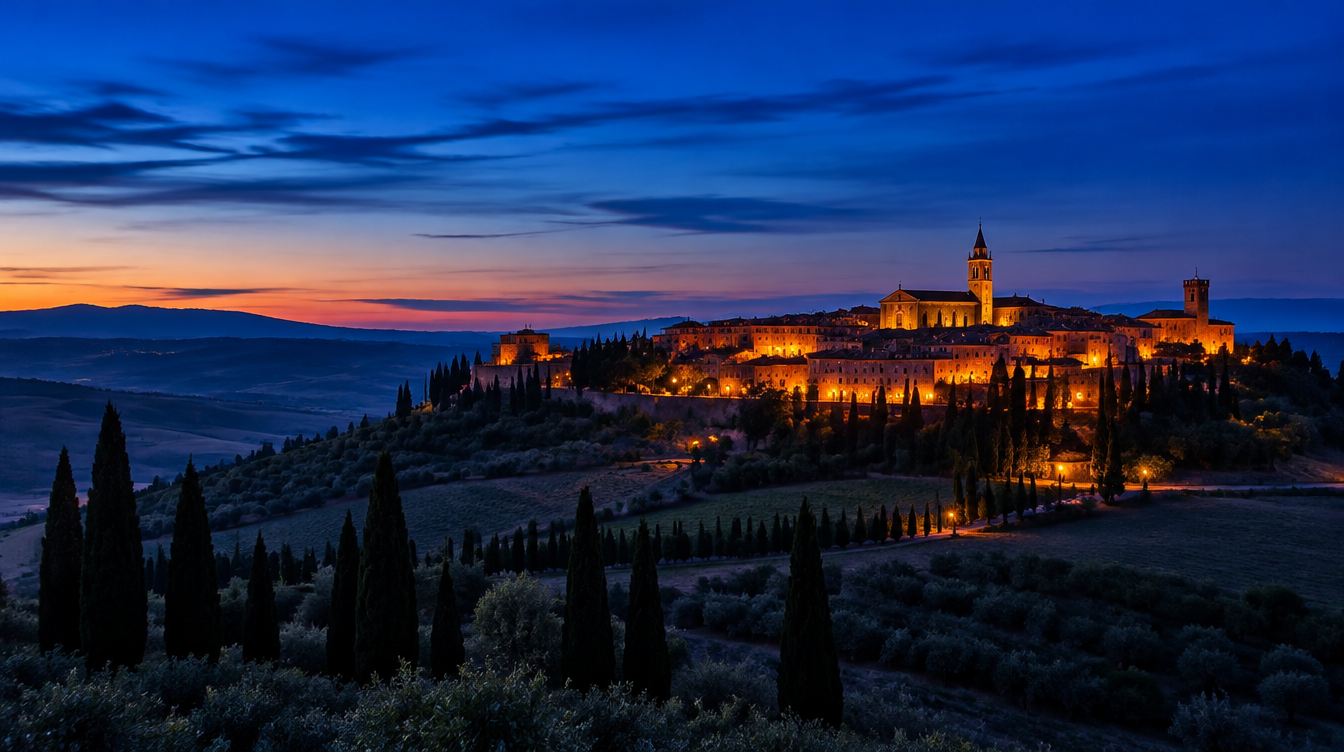
Ask most photographers what the best light of the day is and they will say golden hour, and I will not argue with them, because warm low sun is hard to beat. But ask me, and I will tell you to wait twenty more minutes. Once the sun actually drops below the horizon, the sky does something golden hour never does: it turns a deep, saturated blue while the lit windows of a hill town, the warm glow of a streetlamp, or the last amber line on the horizon stay warm against it. That overlap, cool sky against warm light, is blue hour, and it is the window I plan around on every single tour I lead, not just the sunset itself.
This guide covers what blue hour actually is in scientific terms, how long it lasts depending on where you are standing on the planet, the camera settings that work as a starting point rather than a rule, and the specific problem of balancing warm artificial light against a cooling sky, which is exactly the situation you run into in a hill town like San Quirico d'Orcia.
Key Takeaways
Blue hour is a photographer's term for the overlap of civil and nautical twilight, and treating it as a fixed twenty minute window is the single biggest mistake photographers make with it.
| Point | Details |
|---|---|
| What blue hour actually is | Photographers' shorthand for civil twilight sliding into nautical twilight, sun 0 to roughly 12 degrees below the horizon |
| Typical duration at mid latitudes | Roughly 33 to 48 minutes depending on the season, measured for civil twilight alone |
| Starting settings | ISO 100 to 400, f/8 to f/11, shutter rising from a couple of seconds early on to 10 to 30 seconds as the sky darkens |
| White balance | Avoid Auto; shoot RAW and set a fixed Kelvin value so you can push toward blue or neutral later without quality loss |
| Non-negotiable gear | A tripod, since blue hour shutter speeds run well past any handheld range |
| Best subjects | Hill towns and villages with warm window and streetlight glow, where the artificial light contrasts against the cooling sky |
Table of Contents
- What blue hour actually is (and isn't)
- Civil twilight vs nautical twilight: the science behind the blue
- How long does blue hour last? It depends where you're standing
- Blue hour camera settings: a real starting point
- White balance and color temperature: why "just use auto" fails
- Balancing artificial light against the sky
- Blue hour vs golden hour: same session, different light
- Planning your shoot: margins, not guesses
- Frequently asked questions about blue hour
- Shooting blue hour in Val d'Orcia
What blue hour actually is (and isn't)
Here is something that surprises most people: "blue hour" is not an official astronomical term at all. It is a photographers' nickname for a window that overlaps two real, defined phases of twilight, and almost every photography blog gets this slightly wrong because none of them actually cite where the degree thresholds come from. The window photographers mean when they say blue hour starts around sunset and runs through most of civil twilight into the early part of nautical twilight, which is the stretch where the sky is still bright enough to shoot handheld-adjacent exposures but dark enough that it has turned a rich, saturated blue rather than the warm colors of golden hour.
Unlike golden hour, which at least loosely tracks the sun sitting low on the horizon, blue hour's color comes from a different mechanism entirely. Once the sun has set, you are no longer seeing direct sunlight at all, only sunlight scattered through the upper atmosphere and bounced back down, and blue wavelengths scatter more efficiently than red ones, which is why the sky reads blue rather than orange once the sun itself is gone. That is also why blue hour has no sharp start or end point the way a sunset does. It is a gradient, and the best photographs usually come from the middle third of it, not the first or last few minutes.
Pro Tip: Do not pack up the moment the sun disappears. The ten minutes right after sunset are usually still golden hour's warm light fading out, and the richest blue sky, the kind that pairs best with warm village lights, typically shows up ten to twenty minutes after that. Plan to shoot through the transition rather than treating sunset as your finish line.
Civil twilight vs nautical twilight: the science behind the blue
If you want a precise definition rather than a vibe, the National Weather Service lays out the three recognized phases of twilight by exactly how far the sun's geometric center sits below the horizon. Civil twilight runs from sunset until the sun is 6 degrees below the horizon, and during this phase there is usually enough ambient light that artificial lighting is not strictly necessary outdoors, and the brightest stars and planets start to become visible. Past that point you enter nautical twilight, which runs to 12 degrees below the horizon. A second NWS office's definition matches this exactly, describing nautical twilight as the period when "the horizon is still visible" without moonlight, which is the phase that let sailors navigate by the stars while still keeping a visual reference to the horizon line (per a second NWS office's twilight guide, which cross confirms the same 6, 12, and 18 degree thresholds). Astronomical twilight, the final phase, runs from 12 to 18 degrees below the horizon, and by the time you are deep into it, the National Weather Service notes that sky brightness is faint enough that most observers near city lights would already call it fully dark.
What photographers call blue hour sits mostly inside civil twilight, with the richest, deepest blue typically showing up as you cross into the early minutes of nautical twilight, right before the sky gets too dark to hold detail in anything but the brightest highlights. Once you know you are chasing a specific sun angle rather than a vague feeling, you can plan around it instead of guessing.
| Twilight phase | Sun position | What you see |
|---|---|---|
| Civil twilight | 0 to 6 degrees below horizon | Bright blue sky, brightest stars and planets starting to show, little need for artificial light |
| Nautical twilight | 6 to 12 degrees below horizon | Deeper blue to near dark, horizon still visible, sky brightness falling fast |
| Astronomical twilight | 12 to 18 degrees below horizon | Faint glow only, most observers near any light pollution call it fully dark |
How long does blue hour last? It depends where you're standing
Nearly every photography guide gives you a flat number, usually "twenty to forty minutes," and leaves it there. The real answer depends heavily on latitude, and the gap between locations is bigger than most photographers realize. Civil twilight near the equator can be over in as little as 24 minutes, because the sun drops almost straight down rather than at a shallow angle. Move to a mid latitude city like Greenwich and that window stretches to between 33 and 48 minutes depending on the season, since the sun crosses the horizon at a shallower angle the farther you get from the equator (per Wikipedia's entry on twilight, drawing on standard navigational references).
Push further toward the poles and the effect compounds dramatically. Above roughly 48.5 degrees north or south latitude, near the summer solstice, twilight can last from sunset all the way through to sunrise without the sky ever reaching full darkness, and at the poles themselves civil twilight alone can stretch to two or three weeks. That is an extreme case, but it illustrates the mechanic: the closer you are to the pole, the more shallowly the sun's path crosses the horizon, and the longer every phase of twilight runs.
For a trip to Tuscany, sitting at roughly 43 degrees north, you are solidly in the mid latitude range, so plan on something close to the Greenwich numbers rather than the short equatorial window. A trip to Iceland or Lofoten, both much further north, gives you a noticeably longer and more forgiving blue hour, especially in summer, which is one of the real practical differences between shooting golden hour in Tuscany versus Iceland that we cover in our comparison of golden hour in Tuscany and Iceland. The short version: in Tuscany you have maybe thirty five to forty five minutes of genuinely usable blue hour light depending on the season, and you should treat that window as precious rather than casual.
Blue hour camera settings: a real starting point
Settings advice across the photography world for blue hour is surprisingly consistent once you strip out the noise, and it comes down to a progression rather than a single fixed exposure, because the sky is getting darker by the minute the whole time you are shooting. Early in the window, right as the sun has just set, you can often get away with ISO 100 to 200, an aperture around f/8 to f/11 for a sharp, front to back landscape, and a shutter speed of only a couple of seconds. As the sky darkens through the middle of the window, that same aperture and ISO combination will push your shutter speed out to somewhere between 10 and 30 seconds, which is well past anything you can hold by hand.
That shutter speed progression is the whole reason a tripod stops being optional during blue hour. Early blue hour might need only a quarter of a second, but by the time the sky has deepened into a rich saturated blue, you are commonly looking at shutter speeds of a full second or longer, and a genuinely stable tripod is the only way to keep a wide landscape sharp at those speeds. Pair it with a two second self timer or a remote release so you are not introducing shake by pressing the shutter button directly, and shoot in RAW the entire time so you have room to fix white balance and recover shadow detail afterward without the banding and noise that comes from pushing a JPEG.
If your scene includes both a bright sky and much darker foreground, common in a hill town where the buildings sit in shadow against a still bright sky, bracket a couple of exposures a stop or two apart rather than trying to nail one frame that holds everything. A simple blend of a sky exposure and a foreground exposure in Lightroom looks more natural than forcing a single frame to do both jobs.
White balance and color temperature: why "just use auto" fails
Auto white balance is built to neutralize color casts, which is exactly the opposite of what you want during blue hour. Point a camera on Auto WB at a deep blue sky and it will often try to warm the image back toward neutral, quietly erasing the exact color you traveled to photograph. The fix is simple: shoot RAW, set a fixed Kelvin value rather than Auto, and adjust it in post rather than trusting the camera's guess in the moment.
Understanding where that Kelvin number actually comes from helps more than memorizing a single setting. Daylight balanced film, the long standing reference point for what "neutral" white light looks like, is calibrated to 5600 Kelvin, and the D65 standard used for calibrated viewing sits at 6500 Kelvin, while a tungsten studio lamp runs much warmer at 3200 Kelvin (per Wikipedia's entry on color temperature). The traditional fix for a scene that is reading too blue, going back to film era warming filters, was a yellowish orange filter, which is the same correction your white balance slider is doing digitally when you push the Kelvin value up. Golden hour light itself sits around 3500 Kelvin, warm and low, while the sky during blue hour swings the other direction entirely, reading as a predominantly blue, cool light with no sharp shadows because the light is no longer coming directly from the sun at all (per Wikipedia's entry on golden hour in photography, which also notes the effect has no fixed duration and varies by season and latitude, the same point covered above).
In practice, setting white balance somewhere in the 3800 to 4500 Kelvin range for most blue hour scenes gives you a believable, rich blue sky without crushing warm light sources into an ugly orange smear. Go lower, closer to 3200 Kelvin, to lean harder into the blue and let village lights read warmer by contrast. There is no single correct number, which is why every blog disagrees on it; the right answer depends on how blue you want the sky against how warm you want the lights to look, and RAW files let you make that call later.
Balancing artificial light against the sky
This is the single most useful skill blue hour rewards, and it is also the reason a hill town is a better blue hour subject than an empty field. The moment warm artificial light enters the frame, streetlamps, lit windows, a floodlit church facade, you get a genuine color contrast for free: warm orange light against a cooling blue sky, with no editing required to create it. The trick is exposing so that neither element overwhelms the other.
Expose too early and the sky is still bright enough to wash out the contrast with the lights. Wait too long and the sky goes dark enough that the lights blow out into featureless orange blobs with no detail left in the windows. The sweet spot is almost always the middle third of the window, once the sky has deepened into a real blue but before it has gone fully dark, which gives enough separation in brightness to hold detail in both with a single well metered exposure, or an easy two frame blend if the range is still too wide.
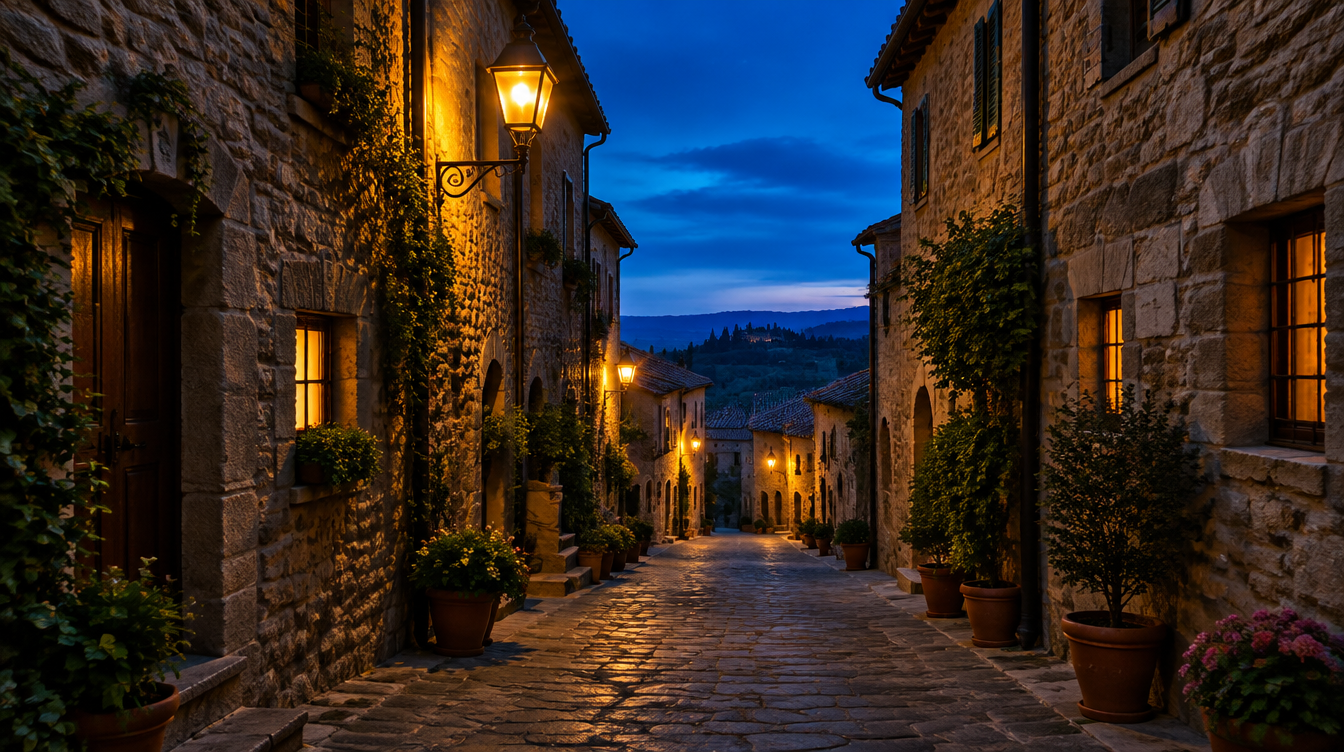
Pro Tip: Scout your hill town composition in daylight so you already know which windows and streetlamps actually turn on at dusk. Showing up cold at blue hour and hoping the right lights are lit wastes the short window you have; a five minute daylight walk the evening before saves you from discovering the composition does not work until it is too dark to fix it.
Blue hour vs golden hour: same session, different light
The most productive way to think about an evening shoot is as one continuous color temperature arc rather than two separate events. In the final stretch before sunset, light runs warm, often close to that 3500 Kelvin golden hour reference point, with long shadows and strong directional light. As the sun dips below the horizon, that warmth fades quickly, and within ten to twenty minutes you are standing in the cooler, shadowless light of early blue hour. Keep shooting and the sky continues cooling and darkening through civil twilight into the start of nautical twilight, which is usually where the richest blue shows up before the light gets too thin to hold detail without very long exposures.
Treating these as one session rather than packing up after sunset gives you two completely different looks from the same evening: the warm, high contrast drama of golden hour, and the cool, even, almost painterly light of blue hour twenty minutes later. On every tour I lead, the blue hour frames are consistently the ones that surprise people in the edit, simply because most visitors never stick around long enough after sunset to shoot them.
Planning your shoot: margins, not guesses
Because the best minutes sit in the middle of a window with no hard start or stop, planning margins matter more here than for almost any other kind of landscape photography. Know your sunset time, then be in position and fully set up, tripod level, composition checked, settings dialed in, at least ten minutes before sunset, so you cover the whole golden hour to blue hour transition without scrambling while the light is already fading.
Build in a buffer on the back end too. Civil twilight alone can run anywhere from a little over twenty minutes to nearly fifty, depending on season and latitude, so do not assume the shoot is over the moment it looks dark through the viewfinder. Some of the richest blue shows up later than expected, right as the sky crosses from civil into nautical twilight, so stay a few extra minutes past the point where you think you are done.
Frequently asked questions about blue hour
Is blue hour before or after golden hour? Blue hour follows golden hour at sunset, and precedes it at sunrise. In the evening, the sequence runs from golden hour's warm light through a brief neutral transition and into the cooling blue of civil and early nautical twilight.
How long does blue hour actually last? It depends heavily on latitude. Civil twilight alone can be as short as about 24 minutes near the equator, stretches to roughly 33 to 48 minutes at mid latitudes like Tuscany depending on the season, and can run for weeks near the poles. Treat any flat "20 to 40 minutes" rule of thumb as a mid latitude approximation, not a universal number.
What white balance should I use for blue hour? Avoid Auto White Balance, which tends to fight the blue you are trying to capture. Shoot RAW and set a fixed Kelvin value, generally somewhere in the 3800 to 4500 range as a starting point, then fine tune in post depending on how blue you want the sky versus how warm you want any artificial lights to read.
Do I need a tripod for blue hour photography? Effectively yes. Shutter speeds commonly run from a couple of seconds early in the window to 10 to 30 seconds or longer as the sky darkens, well beyond any realistic handheld range for a sharp landscape.
Can you shoot blue hour with a phone? Yes, particularly with newer phones that have dedicated night or low light modes, but the same long exposure problem applies. A small tripod or at minimum a stable surface still makes a real difference, since even phone night modes are typically combining several seconds of exposure behind the scenes.
What's the difference between civil and nautical twilight? Civil twilight runs from sunset to 6 degrees below the horizon and is usually still bright enough that artificial light is not strictly necessary. Nautical twilight continues from 6 to 12 degrees below the horizon, darker and historically the phase sailors used to navigate by stars while the horizon line was still visible.
Why do blue hour photos of villages look best with warm lights on? The contrast between warm artificial light, from windows, streetlamps, or a floodlit facade, and the cooling blue sky is a genuine color contrast that costs you nothing to create. It reads most strongly during the middle of civil twilight, before the sky darkens enough to blow out the lights into featureless orange blobs.
Does blue hour last longer in some destinations than others? Yes. Because twilight duration lengthens the further you move from the equator, destinations at higher latitude than Tuscany, Iceland and Lofoten among them, give you a longer, more forgiving blue hour window, especially in summer.
Shooting blue hour in Val d'Orcia
Val d'Orcia is close to an ideal blue hour location, precisely because it is full of small hill towns with warm lit windows that sit against open sky from almost any approach road. On our Val d'Orcia photography tour, the itinerary already builds golden hour and sunrise sessions into nearly every day, and day two includes a twilight stroll through the ancient streets around San Quirico d'Orcia, which is exactly the kind of warm light against cooling sky scene this guide is built around. The current departure runs October 24 through 31, 2026, priced at $4,800 per person with a 30 percent deposit, capped at a group of seven so there is real one on one time with a guide at the exact minutes blue hour is changing fastest, with further departures already on the calendar through 2027.
To practice before a trip, pick any hill town near you with a church, a bell tower, or a cluster of lit windows, and go back on a clear evening. Set up before sunset, shoot through the color shift, and do not leave until the sky has gone properly dark. The difference between a forgettable blue hour frame and a strong one is almost always patience, not gear.
Sources
- National Weather Service: Types of Twilight, civil/nautical/astronomical sun angle definitions
- National Weather Service (Sioux Falls office): Twilight definitions, cross confirming the same thresholds
- Wikipedia: Twilight, duration by latitude and season
- Wikipedia: Color temperature, Kelvin values for daylight and tungsten light
- Wikipedia: Golden hour (photography), color temperature and duration by latitude