Autumn Foliage Photography: How to Capture Fall Color in the Mountains
Why mountain fall color is a moving, elevation-driven event rather than a fixed date, how to time larch season in the Dolomites, and the polarizer and white balance choices that keep color honest.
Autumn Foliage Photography: How to Capture Fall Color in the Mountains
Every autumn I get the same question from guests before a Dolomites trip: "when exactly do the larches turn?" I wish I had a single date to give them. I do not, and neither does anyone else, because fall color in the mountains is not a date on a calendar. It is a moving line that climbs down a mountainside over several weeks, and the photographers who come home with the strongest images are the ones who understand that line rather than the ones who booked a specific Tuesday because a blog post told them to.
This guide is about photographing fall color at altitude, specifically the larch forests of the Dolomites, which behave completely differently from the vineyard and hardwood autumn you might already know from lower elevation. If you have read our piece on autumn in Tuscany, treat this as the alpine companion to it, not a repeat. Different trees, different light, different problems to solve with your gear.
Key Takeaways
Mountain fall color is a moving, elevation-driven event, not a fixed date, and the gear choices that matter most are a circular polarizer and a deliberate white balance decision.
| Point | Details |
|---|---|
| What actually triggers color change | Lengthening nights shut down chlorophyll production, unmasking carotenoids already in the leaf and letting fresh anthocyanins form |
| Why the date moves every year | Temperature, moisture, and frost timing shift the peak, even though night length is the underlying trigger |
| The mountain variable | Color starts near treeline first and migrates downslope over two to four weeks, so elevation buys you a longer window than any single valley offers |
| Larch season | Larches are the one conifer that turns gold and drops its needles, typically from early to mid October through early November depending on elevation and year |
| Best light for color fidelity | Overcast skies give even, saturated color with no glare; direct sun gives drama but needs a polarizer to control glare |
| Gear that matters most | A circular polarizer for wet and waxy leaves, and a deliberate white balance choice instead of leaving the camera on Auto |
Table of Contents
- Why leaves change color, the short science
- Peak timing, and why it moves every year
- The mountain variable: elevation changes the clock
- Larch season in the Dolomites: the signature shot
- Overcast vs sun: choosing your light
- Polarizers on wet, glossy leaves
- White balance that keeps color honest
- Composition and lens choice for alpine foliage
- Dolomites larch autumn vs Tuscany harvest autumn
- Gear checklist for an autumn mountain shoot
- Frequently asked questions
- Sources
- Recommended
Why leaves change color, the short science
It helps to actually know what is happening in a leaf before you try to photograph it, because the mechanism explains almost every piece of practical advice later in this guide. According to the USDA Forest Service, chlorophyll is continually produced and broken down through the growing season, which is why leaves look green all summer. Yellow and orange carotenoids are present in the leaf the entire time, they are just masked by all that green chlorophyll. As night length increases in autumn, chlorophyll production slows and then stops, the existing chlorophyll breaks down, and the carotenoids that were hiding underneath finally show through.
Reds and purples work differently. Most anthocyanins are not sitting in the leaf waiting to be unmasked. They are produced fresh in autumn, triggered by bright light and the sugars that get trapped in leaf cells once the veins carrying nutrients out of the leaf begin to close off for the season. That is why a maple in full sun can turn a deeper red than the same tree's shaded branches, which often stay a flatter yellow. Larches do not produce anthocyanins the way maples do, which is part of why larch gold reads as such a pure, clean color rather than the layered red-orange-yellow mix you see in a hardwood forest.
Peak timing, and why it moves every year
The trigger for color change is night length, and night length is fixed by the calendar. So why does peak color arrive on a different date every year? Because night length only starts the process. How fast it finishes, and how vivid the result looks, depends on weather. NOAA puts it plainly: cool nights and sunny days under calm, dry high pressure lengthen fall color displays, and a wet growing season followed by a dry autumn with cool, frostless nights produces the brightest palette of all. The opposite conditions work against you. A late-summer drought can trigger an early shutdown in trees, so leaves drop before they ever develop full color, and strong wind or heavy rain from a passing front can strip a forest bare in a single bad weekend.
The National Weather Service adds a detail worth remembering if you are chasing a specific look: warm sunny days paired with cool, but not freezing, nights favor the brightest color, while warm, cloudy, and rainy weather dominating the season tends to leave leaves duller. Frost is not required for the color change to begin, leaves start turning before any frost arrives, but a few hard frosts in a row can make leaves wither and drop without ever fully changing color at all. This is why a "peak foliage" date from last year tells you almost nothing reliable about this year. Treat any specific calendar date you read, including the ones in this article, as a planning estimate rather than a guarantee, and watch the actual weather pattern in the two or three weeks before your trip.
The mountain variable: elevation changes the clock
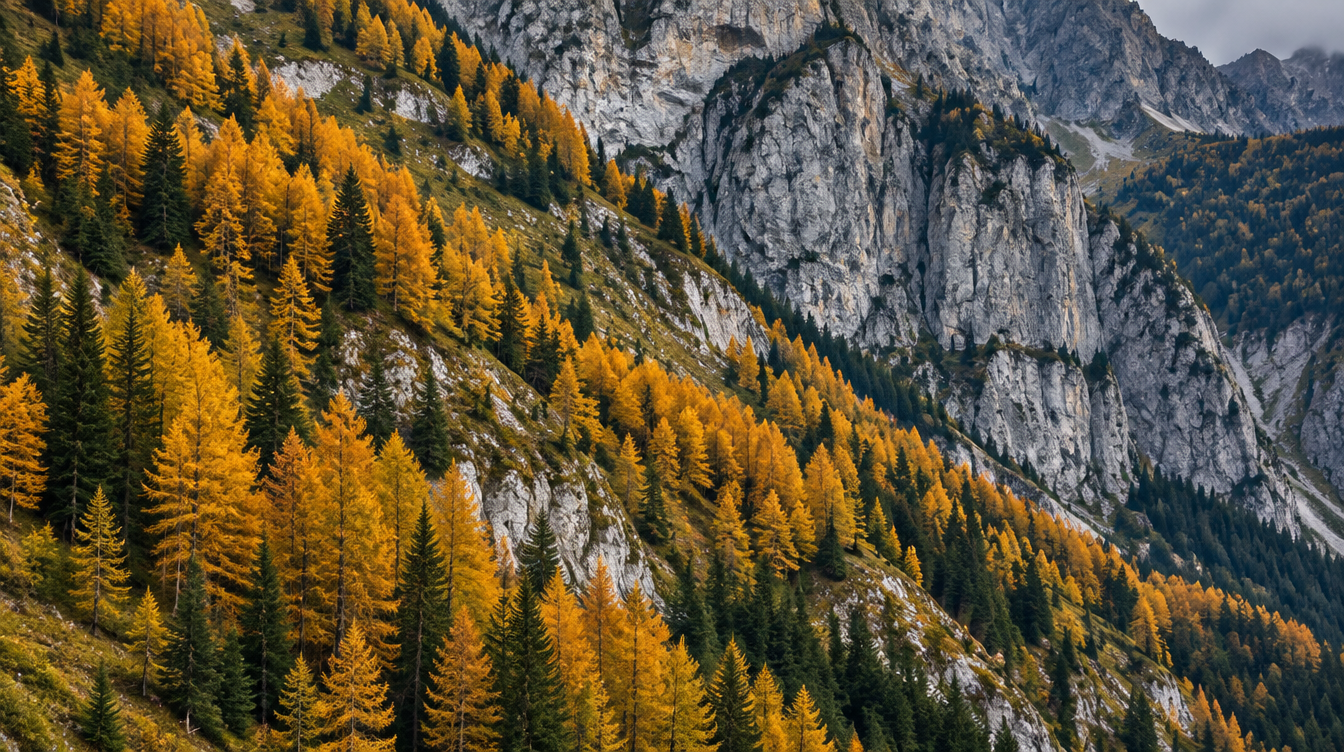
This is the part flat-ground foliage guides never mention, because it does not apply to them. In the mountains, elevation acts like a second clock running alongside the calendar. Higher ground cools faster and experiences the effective trigger for chlorophyll shutdown earlier than the valley floor, so color change starts near treeline first and then migrates downslope over roughly two to four weeks. The USDA Forest Service flags this directly when discussing mountain fall color, warning that conditions can change quickly, especially at higher elevations.
The practical upside is huge if you plan around it instead of against it. A single Dolomites valley can offer something close to a month of usable color if you are willing to chase elevation: shoot the high alpine meadows and treeline larch stands in late September and early October, then follow the color down to the mid-elevation forests through mid October, and finish in the lower valleys toward the end of the month. We covered the broader relationship between altitude and light in our guide to mountain landscape photography in the Dolomites, and the same logic applies here: do not think of "peak foliage" as a single week, think of it as a window that you can extend by moving up or down the mountain.
Pro Tip: If your trip dates are fixed and you cannot chase the color up or down the mountain, pick one elevation band and plan your whole itinerary around it rather than trying to hit every altitude in one short trip. You will come home with a more consistent, cohesive set of images than if you spread yourself across three different stages of the season.
Larch season in the Dolomites: the signature shot
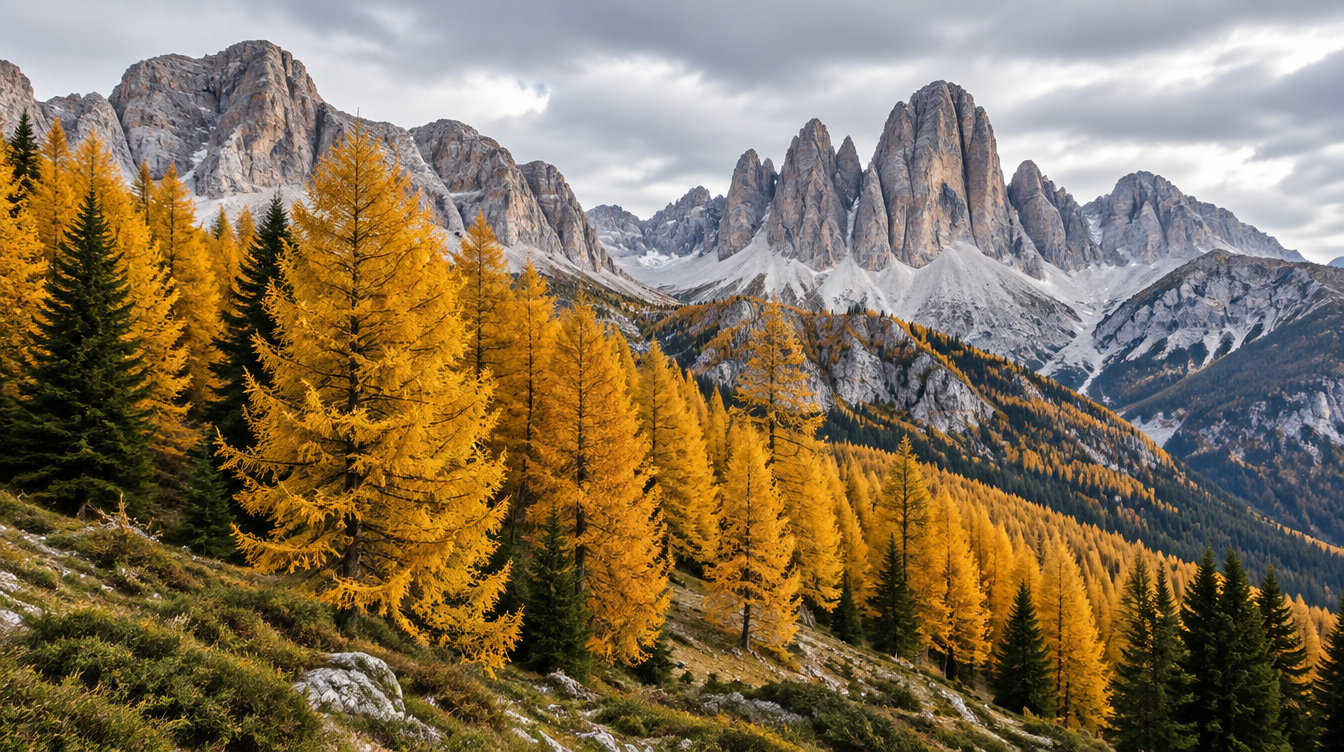
Larches are the one genuinely strange character in this whole story. Nearly every other conifer stays green year round, but the larch (Larix decidua) behaves like a deciduous hardwood: its needles turn a deep gold and then drop completely, leaving bare branches through winter. The USDA Forest Service describes the related western larch in North America as having golden needles in late fall that are "unique among conifers," and that same behavior is what paints entire Dolomites slopes gold every autumn, usually running from early to mid October through early November depending on elevation and how the year's weather has gone. I want to be careful with that window, because it shifts meaningfully from year to year for exactly the reasons described above, so treat it as a planning estimate and check current conditions as your trip approaches rather than booking around a fixed date.
What makes larch season visually distinct from a hardwood autumn is the contrast. A maple forest gives you color against color, reds next to oranges next to yellows. A larch forest gives you gold against grey limestone rock and gold against the dark green of the spruce and pine that share the same slope, which is a much cleaner, more graphic kind of image. Around Seiser Alm and the high passes that our own Dolomiti Photo Tour travels through, that gold-against-rock pairing is the single most requested shot of the whole season, and it rewards exactly the elevation-chasing approach described above since the same larch stand looks completely different as its color develops over several weeks.
Overcast vs sun: choosing your light
Every foliage guide tells you overcast light is good for fall color, but almost none of them explain why, which makes it hard to know when to break the rule. Overcast skies work because the light is diffuse and even, which means no harsh specular glare bouncing off wet or waxy leaf surfaces and a dynamic range your camera can actually hold in one frame. That makes overcast the right choice for forest interior shots, close-up detail work on individual larch needles or fallen leaves, and any composition where you want saturated, honest color without fighting contrast.
Direct sun earns its place when you want drama rather than documentary color. Backlighting a larch stand so the needles glow translucent gold, or raking sidelight across a slope to reveal texture in the rock, are both sun-only effects. The catch is that sun also creates the glare that overcast light avoids, which is exactly the problem a polarizer is built to solve. In practice I treat the choice as connected rather than separate: if the forecast gives me sun, I pack the polarizer and plan for glare control; if it gives me overcast, I leave the polarizer off and focus on even, saturated color instead.
Polarizers on wet, glossy leaves
A polarizing filter reduces oblique reflections from non-metallic surfaces, which is the physical mechanism behind the deep blue skies and glare-free water you associate with polarizers, and it applies just as directly to leaves. Wet or waxy leaf surfaces reflect light in a way that washes out the color underneath, and rotating a polarizer at the right angle to the light source cuts that reflection and lets the actual leaf color through. According to the physics of how polarizers work, the effect is strongest at roughly ninety degrees to the light source and essentially disappears when you are shooting straight into or away from the sun, so rotate the filter while watching the leaves themselves, not just the sky, to find the sweet spot.
Use a circular polarizer, not a linear one, on any modern camera with through-the-lens autofocus or metering. Linear polarizers pass light that is still linearly polarized when it reaches the camera's internal optics, which can confuse autofocus and exposure systems that rely on that same light path. Circular polarizers add an extra layer that converts the light before it reaches those systems, avoiding the problem entirely while still cutting the glare you came for. One honest limitation worth knowing before you buy: the effect on leaves is less dramatic and more angle-dependent than it is on open water or sky, so do not expect the same night-and-day difference you might have seen in a seascape shot.
Pro Tip: After dialing in the polarizer's angle, check your exposure again before you shoot. A polarizer costs you roughly one to two stops of light, and on an overcast mountain morning that can be the difference between a clean shot and one that needs a tripod you did not bring.
White balance that keeps color honest
Color temperature, measured in Kelvin, describes the hue and intensity of a light source, and your camera's white balance setting is your tool for controlling how that light renders in the final image. Nikon's own guidance on white balance notes that a typical Sunny preset is calibrated around 5000K, representative of mid-day sun, while Auto white balance is the camera's best guess at reading the scene and can misfire noticeably in mixed light. Nikon demonstrates this with an interior lit by incandescent bulbs: Auto rendered it warmer than it actually looked, while the matching Incandescent preset kept tones closer to reality. Alpine autumn light is exactly this kind of mixed scenario, cool open sky, warm low sun, and shade from nearby peaks all in the same frame, which is why Auto often skews foliage color cooler and flatter than what you actually saw standing there.
You have two legitimate choices here, not one correct answer. The documentary approach is to read the actual light with a known Kelvin value or a matching preset like Cloudy or Shade, which keeps your colors close to what a neutral observer would have seen. The deliberate approach is to push white balance warmer on purpose, which is a legitimate creative choice as long as you are making it consciously rather than leaving the camera to guess. Shoot RAW either way. A RAW file keeps the white balance decision fully reversible back at your laptop, so you are never locked into whatever the camera guessed in the field.
Composition and lens choice for alpine foliage
A wide lens, something in the 16-35mm range on a full frame body, earns its place when you want to show the relationship between a larch forest and the peak behind it, the kind of shot that establishes scale and place in one frame. Get low and use a foreground element, a boulder, a cluster of fallen gold needles, or the edge of an alpine lake, to anchor the composition instead of leaving the foreground empty.
A telephoto in the 70-200mm range solves a different problem: compressing a larch-covered slope so the gold and the dark conifer green read as graphic blocks of color rather than a cluttered scene, or isolating a single glowing tree against bare rock. This is also the lens I reach for to avoid what I call the flat-color trap, where a wide shot of an entire hillside in uniform gold ends up looking less interesting than a tighter frame that finds genuine contrast, whether that is color against rock, light against shadow, or one tree standing apart from its neighbors.
Dolomites larch autumn vs Tuscany harvest autumn
If you are deciding between an alpine autumn trip and a Tuscany autumn trip, it genuinely comes down to palette and subject, not just destination. Our guide to autumn in Tuscany covers harvest light, vineyard color, and the valley fog that defines that season at lower elevation. The table below lays out how differently the two seasons actually shoot.
| Factor | Dolomites larch autumn | Tuscany harvest autumn |
|---|---|---|
| Dominant palette | Gold larch needles against grey limestone and dark conifer green | Turning vineyard leaves, plowed earth tones, and harvest-gold fields against cypress green |
| Typical window | Early to mid October through early November, shifting with elevation and year | Late September through October, with fog becoming likely from mid October |
| Signature subject | Larch forests at treeline and high alpine passes | Vineyard rows, harvest activity, and morning fog over Val d'Orcia |
| Light quality | High-altitude clarity, fast-moving weather, strong sun-to-shadow contrast | Softer valley light, with the famous fog window on cold, calm, clear mornings |
| Gear emphasis | Circular polarizer, layered clothing, wide and telephoto lenses | Graduated filters for sky, warmer white balance for harvest tones |
| Access and difficulty | Moderate hiking at altitude, access to high passes by road or trail | Easy access by car, minimal walking required |
Neither season is objectively better, they are simply different photographs. If gold against rock and a sense of real altitude is what you are after, the Dolomites are the right call. If you want the softer, warmer story of a working agricultural landscape, Tuscany in autumn is hard to beat.
Gear checklist for an autumn mountain shoot
Autumn in the mountains swings between warm midday sun and a genuinely cold morning at altitude, often within the same day, so pack for both. A circular polarizer, a sturdy tripod for the low-light forest interior shots, layered clothing you can add and remove as you climb or descend, and spare batteries are the essentials. Batteries drain faster in cold air, and an alpine dawn shoot above 2,000 meters is colder than it looks from the trailhead. For the broader logistics of shooting at altitude, including how fast weather can turn and how to plan around it, our Dolomites mountain photography guide covers the ground conditions this article does not repeat.
If a Dolomites larch season is on your list, our Dolomiti Photo Tour runs through exactly the high-alpine terrain where this kind of color shows up best, Alpe di Siusi and Seiser Alm, Passo Gardena, Passo Giau, and the lakes and peaks around Cortina and Tre Cime di Lavaredo. The tour does not currently list a fixed autumn departure, so if you want to time a trip specifically to larch season, join the waiting list on the tour page and ask directly about autumn dates rather than assuming one is already scheduled.
Frequently asked questions
When is peak fall foliage in the mountains, and why does the date change every year? Night length sets the underlying trigger for chlorophyll breakdown everywhere, but temperature, moisture, and frost timing shift the actual peak date from year to year. A warm, wet spring followed by a sunny autumn with cool, non-freezing nights produces the most vivid and longest-lasting color, while drought or an unusually warm fall dulls or shortens the display.
Does elevation change when leaves and larches turn? Yes. Higher, cooler ground reaches the trigger first, so color starts near treeline and works down the mountain over roughly two to four weeks, which is why a single mountain region can offer an extended window if you chase elevation rather than a single calendar date.
When do larches turn gold in the Dolomites? There is no single fixed date. Regional reports commonly point to early-to-mid October as a starting window, shifting earlier or later depending on the year's temperatures, with higher slopes turning first. Treat any specific date as a planning estimate and check current-year conditions as your trip approaches.
Should I shoot fall foliage in overcast light or sun? Overcast gives even exposure and saturated, glare-free color with no polarizer needed, which suits forest interior and detail shots. Direct sun gives you sidelight and backlight drama, and is also when a polarizer actually has glare to remove. The right choice depends on the shot, not a blanket rule.
Does a polarizing filter actually help with leaves, or just water and sky? It helps with any non-metallic reflective surface, including wet or waxy leaves. It blocks the glare bouncing off that surface, which otherwise washes out color, though the effect is less dramatic and more angle-dependent on leaves than on still water or open sky, so rotate the filter while watching the leaves themselves.
Circular or linear polarizer? Circular, on any modern autofocus camera with through-the-lens metering. Linear polarizers can disrupt those systems because of how the light they pass interacts with the camera's internal optics, while circular polarizers avoid that problem and still cut glare.
What white balance setting keeps fall color honest instead of oversaturated or too cool? Auto white balance often skews cool in mixed sun, shade, and overcast alpine light. Using a Cloudy or Shade preset, or dialing in a specific Kelvin value, keeps warm tones closer to what you actually saw, and shooting RAW keeps that decision fully reversible later.
What is the real difference between a Dolomites autumn shoot and a Tuscany autumn shoot? Different palette and subject entirely. Tuscany's autumn is vineyard leaves, plowed earth, and harvest light against cypress green at low elevation. The Dolomites' autumn is larch gold against bare rock and evergreen conifer, at altitude, with a shorter and more elevation-dependent window.
Sources
- USDA Forest Service: The Joy and Science of Fall Colors
- USDA Forest Service: Fall Colors 2018 regional science pages
- NOAA: Cool autumn weather reveals nature's true hues
- National Weather Service (Quad Cities): Fall Colors
- Nikon USA: Setting White Balance
- Wikipedia: Polarizer