How to Photograph the Fog in Val d'Orcia (Without Wasting Your Trip)
A tactical guide to predicting, chasing, and photographing Val d'Orcia's famous autumn fog, including which weather signs to trust, which apps to check, and where to stand once a good morning shows up.
How to Photograph the Fog in Val d'Orcia (Without Wasting Your Trip)
I have stood on a farm road outside San Quirico at 6:40 in the morning, coffee going cold in the cup holder, watching a perfectly clear sky and thinking "this is it, this has to be the morning." It was not the morning. The valley stayed stubbornly clear, the light came up flat and ordinary, and I drove back to the apartment annoyed at myself for losing an hour of sleep for nothing. I have also woken up on a whim, half convinced it was not worth the alarm, and driven straight into the single best fog I have ever photographed in Val d'Orcia, with Pienza floating on a sea of white below the terrace and not another photographer in sight.
That is the honest version of fog chasing here. It is not random, but it is not a sure thing either, and most visitors either give up on it entirely or burn two or three mornings guessing badly. This guide is the checklist I wish I had the first time I tried to plan a trip around Val d'Orcia's fog: how it actually forms, which signs to trust, which apps to check and when, and where to stand once you have a morning that looks right. None of it guarantees fog on any single day. All of it will dramatically improve your odds over a week long trip.
Key Takeaways
Val d'Orcia's valley fog is a predictable weather pattern, not luck, if you know the three conditions that trigger it.
| Point | Details |
|---|---|
| Best window | Mid October through late November, with a secondary chance in early spring |
| The three triggers | Clear sky overnight, calm wind, and a temperature drop of 15°F or more between day and night |
| Where to check forecasts | An hourly meteogram (Windy or similar), checked the night before, not days in advance |
| Where to stand | Hilltop viewpoints above the valley floor, not inside the villages themselves |
| How fast it disappears | Usually within 60 to 90 minutes of direct sunlight hitting the valley floor |
| Realistic trip planning | Budget at least 4 to 5 mornings if fog is a must-have shot, not a nice-to-have |
Table of Contents
- Why Val d'Orcia's fog looks the way it does
- The three conditions that actually matter
- The fog checklist
- Which apps to check, and when
- Where to stand: the best hilltop viewpoints
- Camera settings for fog
- Lens choice, and why telephoto wins
- Timing your morning, minute by minute
- Mistakes that waste a fog morning
- How many mornings should you budget
- Frequently asked questions about Val d'Orcia fog
Why Val d'Orcia's fog looks the way it does
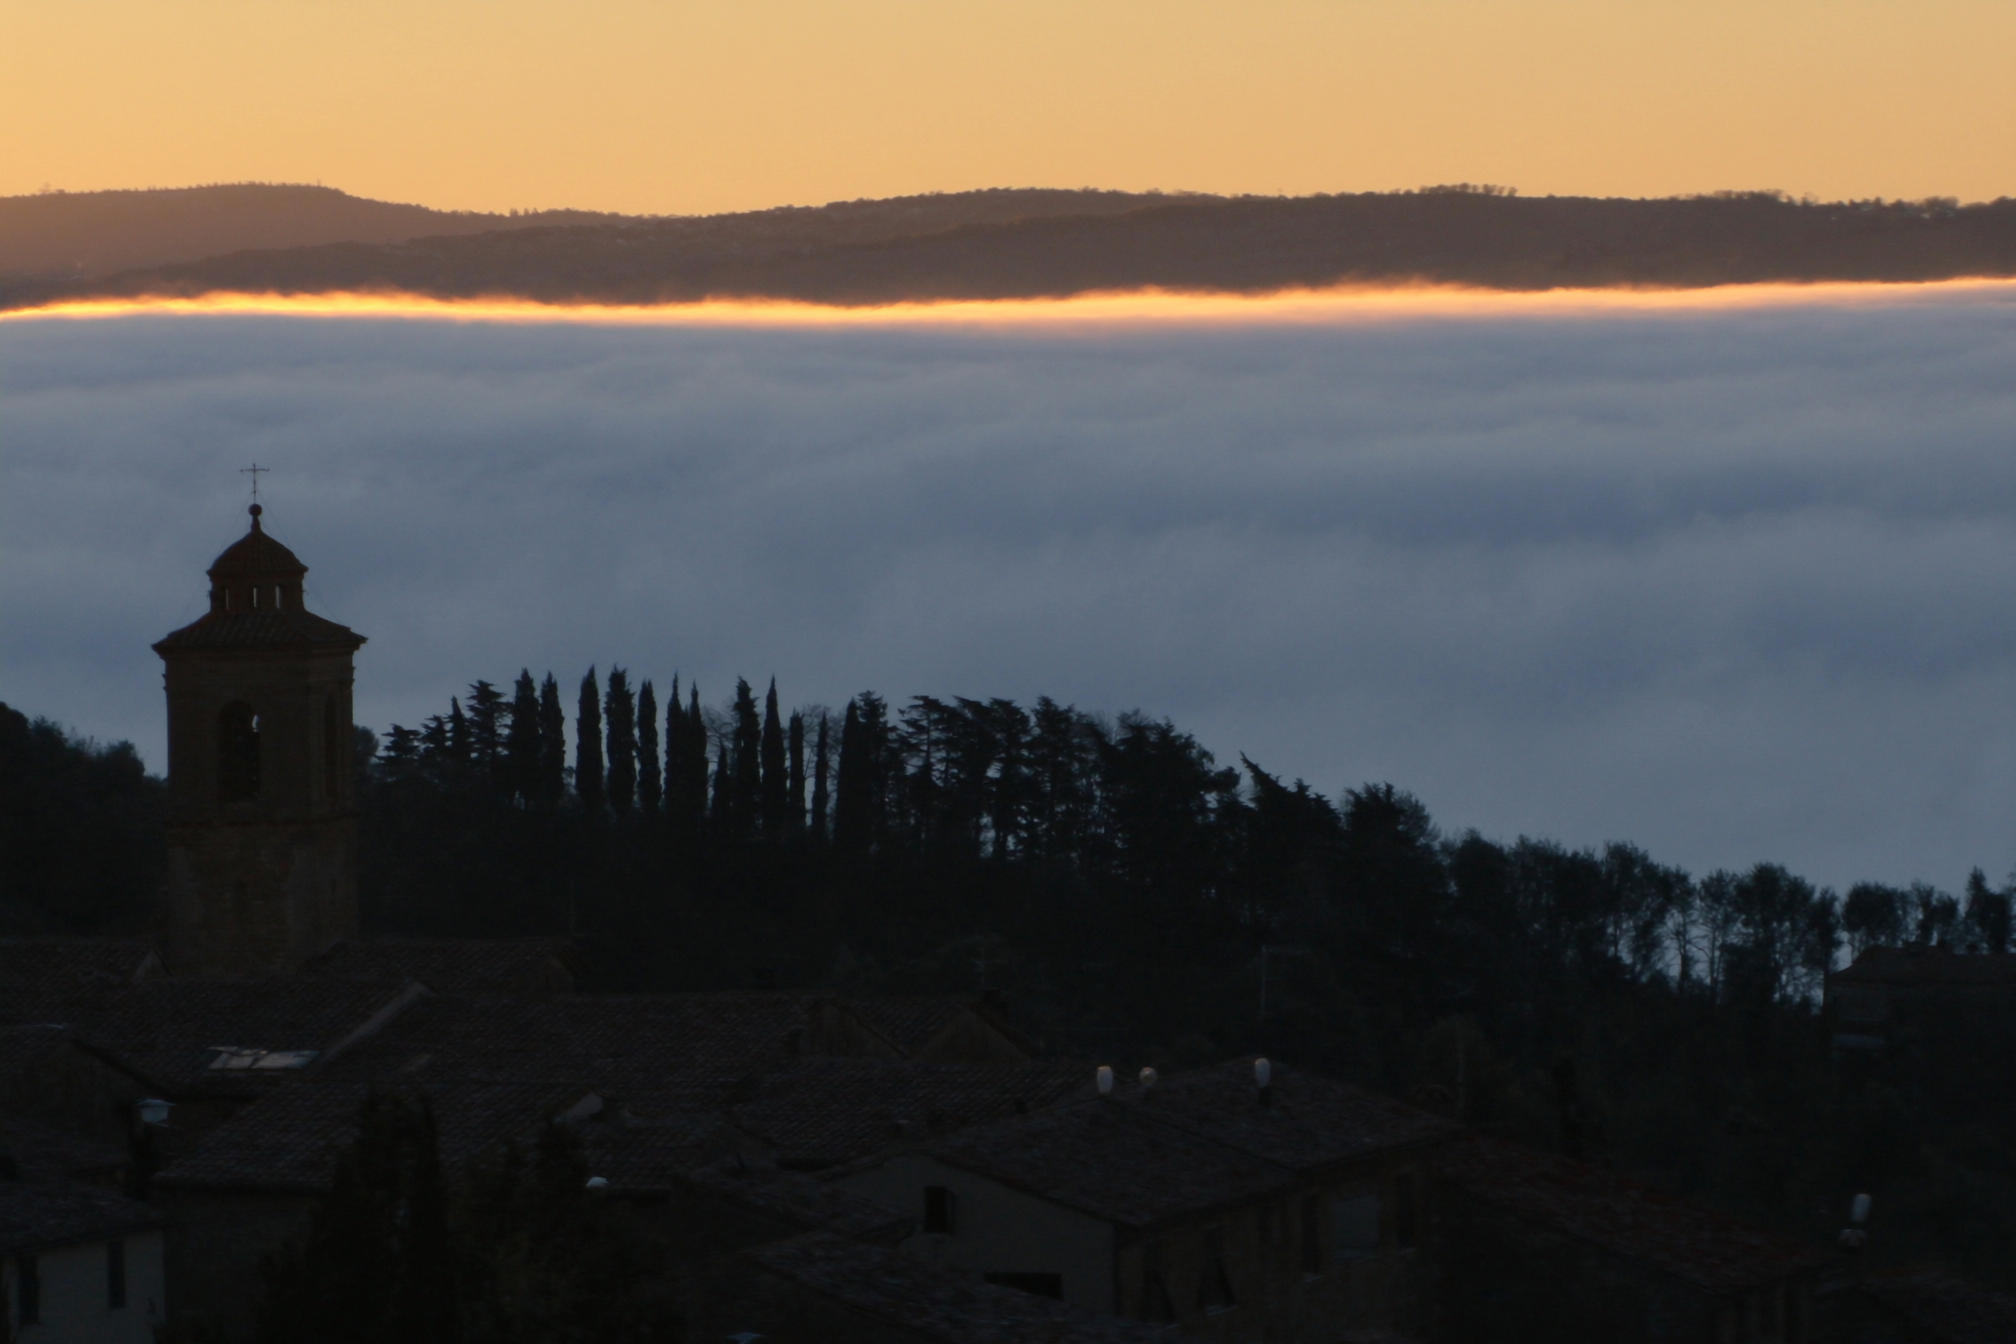
Most people who have seen a Val d'Orcia photograph in a magazine or on Instagram have seen this exact scene without realizing it is a specific, predictable weather event: a hilltop town like Pienza or San Quirico sitting above a flat white layer of fog, cypress trees poking through it like islands, the sun just starting to burn gold along the top edge. It looks almost too perfect to be real, which is part of why so many photographers assume it is rare or lucky. It is not. It is a textbook case of valley fog, also called radiation fog, and Val d'Orcia's geography happens to be almost ideally shaped to produce it.
The region is a wide, shallow river valley carved by the Orcia river, ringed by hills with the historic villages perched on the ridgelines rather than down in the low ground. That shape matters enormously. Cold air is denser than warm air, so on a still night it drains downhill and pools in the lowest parts of the valley, exactly like water settling into a basin. If the air near the ground is also humid enough, that pooled cold air condenses into fog right where the valley floor sits lowest, while the hilltop towns above stay clear. That is the entire mechanism behind the shot everyone wants. You are not chasing weather so much as chasing physics that repeats itself reliably once you understand the setup.
The three conditions that actually matter
I used to overcomplicate this by watching every number in a weather app. After a few seasons of trial and error, it really comes down to three things, and if all three line up the night before, I set an alarm with real confidence instead of a coin flip.
A clear or nearly clear sky overnight. Cloud cover acts like a blanket, trapping heat near the ground and preventing it from radiating away into the atmosphere. Without a clear sky, the ground never cools enough to trigger condensation. Look for less than 20 to 25 percent cloud cover through the overnight hours in your forecast.
Calm wind. Even a light breeze of 8 to 10 mph is often enough to mix the cold pooled air with the warmer air above it, which prevents the fog layer from forming cleanly or keeps it too thin and patchy to photograph well. You want wind forecasts showing 5 mph or less through the night and into early morning.
A big temperature swing. This is the one most visitors miss entirely. You need a meaningful gap between the daytime high and the overnight low, ideally 15°F or more. A big swing means the ground loses a lot of heat overnight relative to how warm it was during the day, which is exactly the setup that produces a strong temperature inversion, cold air trapped near the ground under a layer of warmer air above it. That inversion is the actual physical cause of fog formation, and meteorologists and forecasters describe the mechanism well if you want the fuller explanation of how temperature inversions trap moisture near the surface.
Pro Tip: Of the three conditions, the temperature swing is the one that predicts fog density best in my experience. A five or six degree overnight drop might give you thin wisps in the low ground. A fifteen to twenty degree drop after a warm, dry day is when you get the thick, photogenic layer that actually swallows the valley floor and leaves the hilltop towns floating clear above it.
The fog checklist
Here is the same three conditions laid out as a quick reference you can run through the night before, along with the threshold I actually use and why each one matters.
| Signal | What to look for | Why it matters |
|---|---|---|
| Cloud cover overnight | Under 20-25% | Clear sky lets ground heat radiate away, cooling the air near the surface |
| Overnight wind speed | 5 mph or less | Calm air lets cold air settle and pool instead of mixing away |
| Day-to-night temperature swing | 15°F or greater | A bigger swing produces a stronger inversion and thicker, longer lasting fog |
| Relative humidity overnight | Above 80-85% | The air needs enough moisture present to actually condense once it cools |
| Time of year | Mid October through late November | This window combines the humidity, clear nights, and temperature swings all at once |
Which apps to check, and when
I check forecasts on two different timelines, and conflating them is the most common planning mistake I see from visiting photographers. Days out, I am only looking at the general pattern: is a high pressure system settling in, which usually means clear skies and calm wind for several days in a row, or is a front moving through, which usually means wind, cloud, or rain that rules fog out entirely. This is useful for deciding which nights of your trip to build flexibility around, but it is not precise enough to set an actual alarm by.
The night before, I switch to an hourly meteogram rather than a daily forecast icon. An app like Windy gives you overnight wind speed, cloud cover percentage, and temperature broken down hour by hour, which is exactly the resolution you need to check all three conditions from the checklist above in one screen. If you want a second opinion, or if you are staying somewhere with patchy data signal and want an offline-friendly option, a local Italian service like IlMeteo or 3Bmeteo often has more granular short-term data for small towns like Pienza or San Quirico than the big international apps, since they are built specifically for Italian microclimates.
Set your actual decision point for around 9 or 10 PM the night before. That gives the overnight forecast time to stabilize while still leaving you enough evening to prep gear, set an alarm, and get to bed at a reasonable hour if you are going.
Where to stand: the best hilltop viewpoints
Fog forms in the low ground, which means you want to be anywhere but the low ground when it happens. The classic shot is a hilltop town or a raised viewpoint looking down and across at another hilltop town, with the fog filling the space between them. San Quirico d'Orcia's approach roads, particularly the farm roads running along the ridge to the south, give you clean sightlines toward the valley and toward Pienza in the distance. The cypress-lined road itself becomes a completely different subject in fog, with the tree line rising out of a white layer instead of standing against open sky, which is one of my favorite variations on that composition once you have shot it in clear weather a few times.
Pienza's terrace along Via del Casello, looking south over Val d'Orcia, is another reliable spot because the elevation drop toward the valley floor is significant enough that fog pools well below the town on most fog mornings. Monticchiello, being smaller and quieter, gives you a similar elevated vantage without the small crowd of other photographers you will sometimes find at the more famous viewpoints once word gets around that fog is likely that morning.
Bagno Vignoni is worth a special mention here too, since the thermal water in the town's central square produces its own localized steam on cold mornings, completely separate from valley fog, which means you can sometimes get a photogenic atmospheric effect there even on mornings when the wider valley fog does not materialize. It is a good backup plan if your primary fog forecast falls through.
Camera settings for fog
Fog scenes are deceptively tricky to expose correctly because the dynamic range is unusual. You typically have a bright, glowing fog layer and sky, a dark silhouetted foreground of hills or trees, and not much in between. Your camera's default metering will often try to average the whole frame and end up underexposing the fog into a dull gray instead of the bright, luminous white you actually want.
I shoot in manual mode or aperture priority with exposure compensation dialed in, usually adding half a stop to a full stop of positive exposure compensation once the sun starts lighting the top of the fog layer, since I want that highlight to read bright without clipping completely. Spot metering on a mid-tone area, like a shadowed hillside rather than the brightest part of the fog itself, gives you a more reliable starting point than evaluative or matrix metering in this kind of scene. Shoot RAW without exception here. The dynamic range in a good fog scene, especially right as the sun breaks through, is wide enough that you will want the latitude to recover shadow detail or pull back highlights in post.
For aperture, I stay in the f/8 to f/11 range for most fog compositions, since you usually want everything from a foreground tree to the distant hilltop town in reasonable focus, and fog itself has a way of softening detail at a distance regardless of your aperture, so you do not need to push past f/11 chasing sharpness the fog will obscure anyway. ISO stays low, 100 to 400, since you have enough ambient light once the sky starts brightening before sunrise, and a tripod handles anything slower than you can hand hold cleanly. White balance is worth setting manually rather than trusting auto white balance, which tends to swing between too cool and too warm as the fog color shifts through blue hour into sunrise. I generally start around 5500K in the pre-dawn blue light and warm it up manually as the sun starts hitting the fog layer directly.
Pro Tip: Bring a microfiber cloth and keep it dry in an inside pocket, not your camera bag's outer pocket. Fog mornings are humid enough that condensation on your front element is a real and constant problem, especially if you have been sitting in a warm car right before you set up. Give your gear a few minutes to acclimate to the outside temperature before you start shooting, and check your lens glass every few minutes rather than after you notice a whole frame is soft.
Lens choice, and why telephoto wins
This surprises people who assume landscape photography always means wide angle. Fog compositions in Val d'Orcia are one of the clearest cases where a telephoto lens, something in the 70-200mm range, consistently outperforms a wide angle. Fog is fundamentally about layering, distant ridgelines and cypress rows stacking on top of each other with visible separation between them, and a telephoto lens compresses that depth, pulling the layers closer together in the frame and making the stacking effect read far more dramatically than it does to the naked eye.
A wide angle lens, by contrast, tends to spread those same layers apart and shrink the hilltop town into a small, less impactful element in a much bigger frame. I still bring a standard zoom, something like a 24-70mm, for wider establishing shots and for compositions where I want a strong foreground element like a cypress row or a stone wall leading into the misty middle ground, but if I had to choose one lens for a fog morning in Val d'Orcia, it would be the telephoto every time. If you are trying to decide what to actually pack for the whole trip rather than just fog mornings specifically, our Tuscany Photography Guide covers the broader gear picture in more depth.
A polarizing filter is generally not useful in fog and can actually work against you, cutting into the soft, glowing quality that makes fog photographs work in the first place. Save the polarizer for clear or partly hazy days. A basic UV or protective filter is fine to leave on, but skip graduated ND filters for fog work specifically, since the transition zone between fog and sky is rarely a clean horizontal line the way a grad ND is designed to handle.
Timing your morning, minute by minute
Arrive at your viewpoint at least 30 to 40 minutes before official sunrise. Fog is often at its thickest and most complete right before first light, and the pre-dawn blue hour light, cool and soft, produces its own distinct mood that is worth photographing separately from the golden hour version everyone expects. Use this window to find your composition, set up your tripod, and take a few test exposures while the light is stable and you are not racing against a rapidly changing scene.
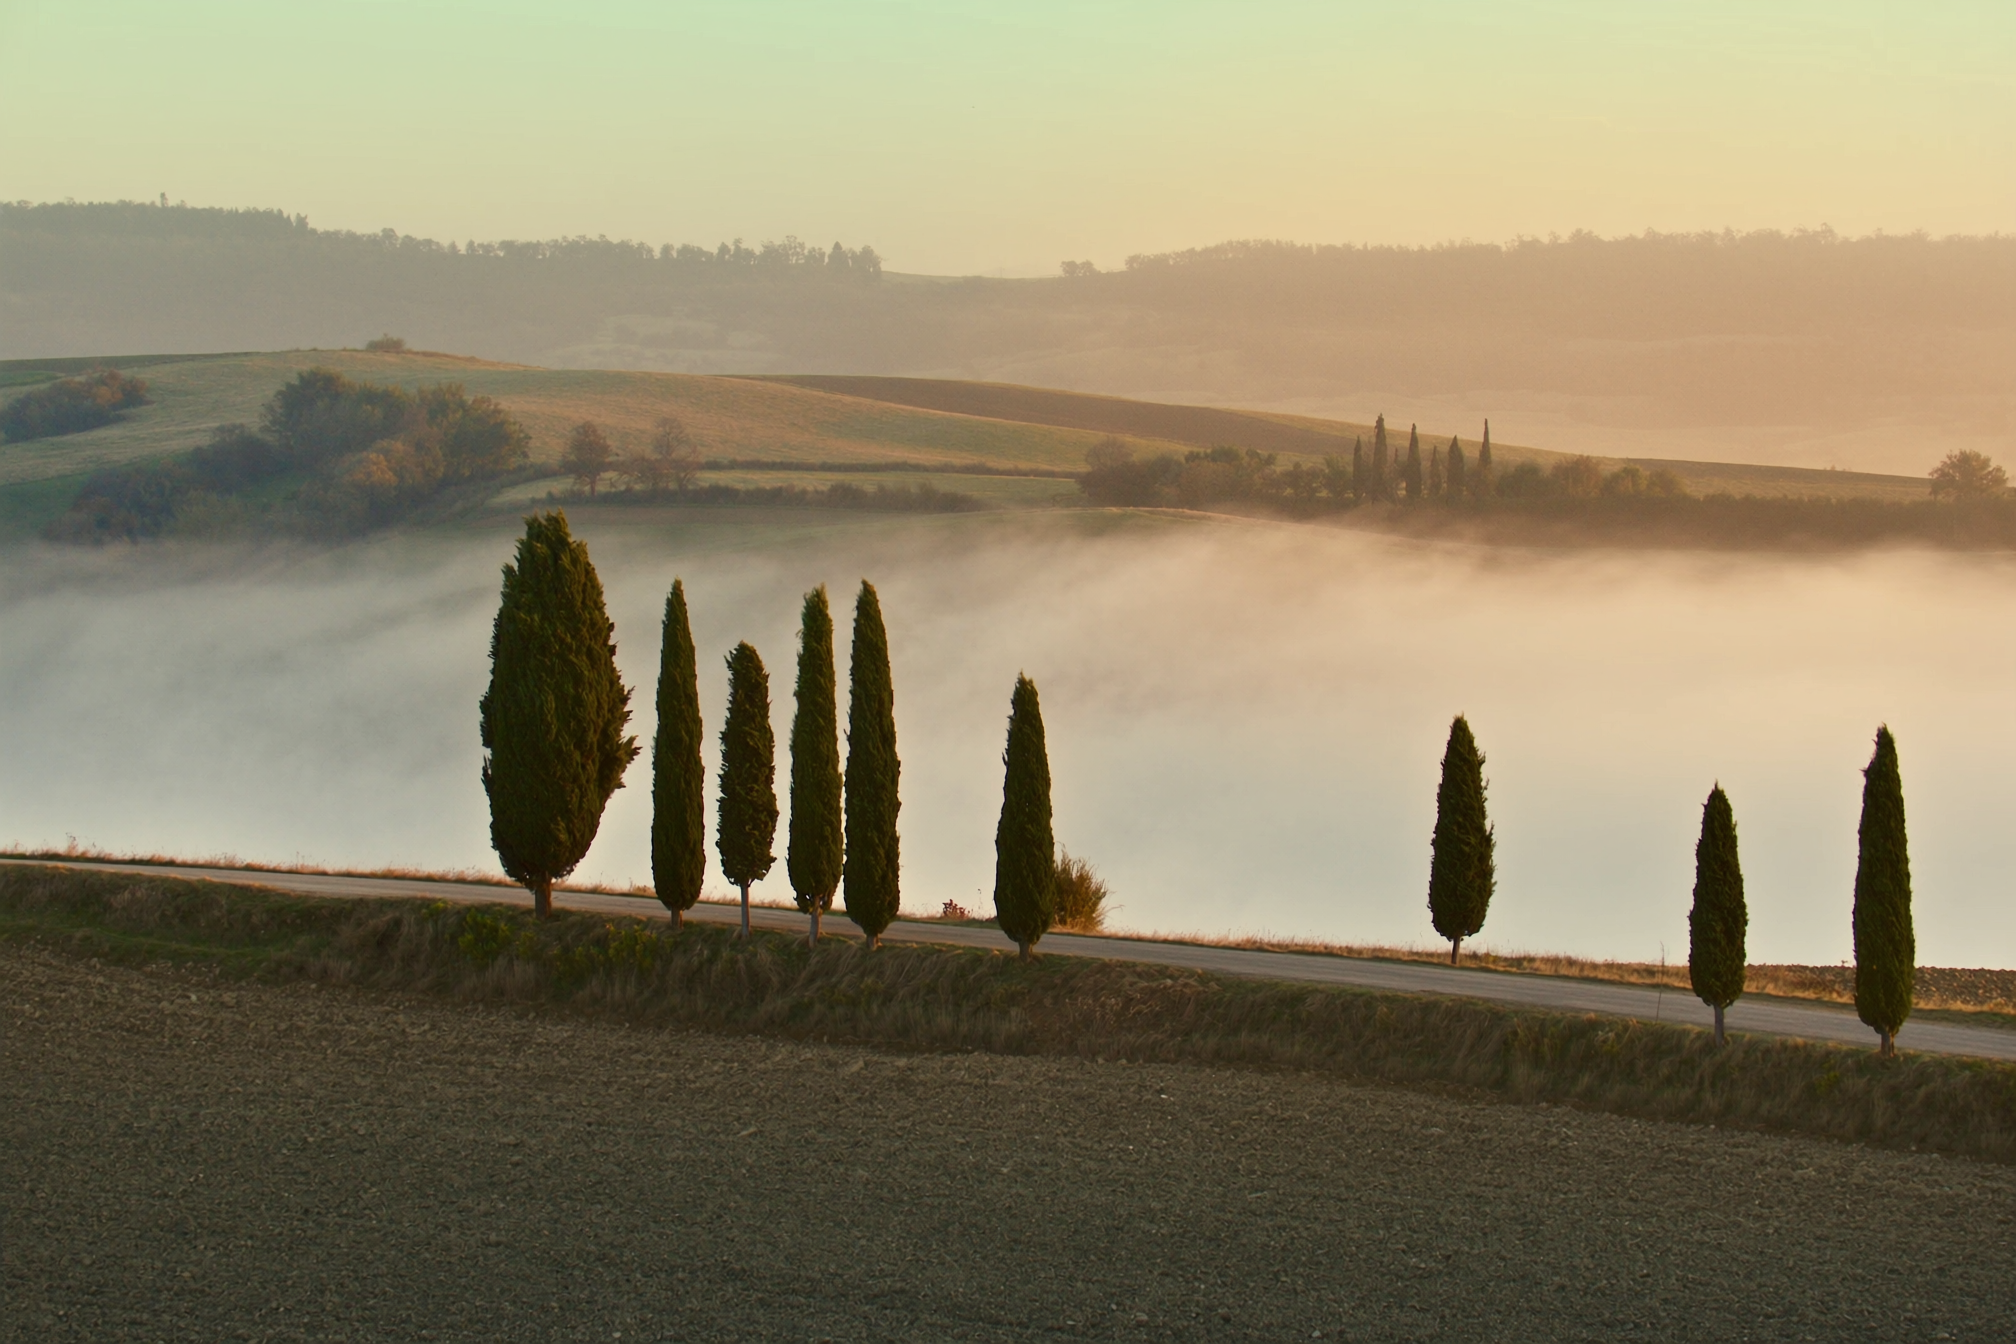
As the sun clears the horizon, watch the top edge of the fog layer. This is usually where the first color appears, a thin gold or pink line along the highest part of the fog before it spreads. This transition, typically the ten to fifteen minutes right around actual sunrise, is when I get my strongest frames, with warm directional light hitting the fog from a low angle and throwing long shadows from any trees or towers poking through it. Keep shooting through this whole window rather than stopping after your first good frame, since the fog's density and the light's color both keep shifting in ways that are hard to predict exactly.
Within roughly 60 to 90 minutes of sunrise, direct sunlight starts heating the valley floor faster than the air above it, which is the same temperature dynamic that created the fog in reverse, and the layer begins thinning and lifting. Some mornings it burns off in patches, giving you a completely different, more painterly kind of shot as gaps open up in the fog. Other mornings it lifts as a solid sheet and is simply gone within twenty minutes. Either way, do not pack up the moment the fog starts changing. Some of the most interesting frames happen in that transitional ten or fifteen minutes as the scene shifts from a solid white layer to something more broken and dynamic.
Mistakes that waste a fog morning
The single biggest mistake is checking the forecast too early and trusting a five day outlook instead of the night-before hourly data. Conditions this localized simply are not reliable that far out, and I have seen photographers skip a genuinely great fog morning because a five day forecast icon showed rain, when the actual overnight conditions turned out clear and calm.
The second mistake is standing in the wrong place, specifically down inside a village or on the valley floor itself rather than above it. If you are standing inside the fog, you are photographing gray soup with poor visibility, not the layered view everyone is chasing. You need elevation and distance to see the fog as a shape rather than being inside it.
The third mistake, and the one I still catch myself making occasionally, is treating a single fog morning as the whole plan. If your itinerary only has one morning with any flexibility built in and the forecast does not cooperate, you simply do not get the shot, and there is no way around that other than building in more mornings from the start. This is also exactly the kind of local timing knowledge that a guided trip has a real advantage on. On a WeShoot Val d'Orcia photography tour, your guide is already watching the forecast for the whole group, already knows which specific ridge or farm road works best for that morning's wind direction, and can shift the plan overnight rather than you trying to make that call alone from an apartment with an unfamiliar app and no local reference points.
How many mornings should you budget
If a fog photograph is genuinely on your must-have list, I would not plan a trip shorter than five or six nights during the October to November window and expect to get it. Even with everything in your favor, you will likely have two or three mornings that look promising on paper but do not quite deliver a thick, clean layer, one or two washouts from a front moving through, and if you are fortunate, one or two mornings where everything lines up. That ratio matches what I have seen across multiple autumn trips here, not a worst case estimate.
If your trip is shorter, or fog is a nice bonus rather than the main goal, build in whatever flexibility you can around sunrise regardless, since even a clear morning in Val d'Orcia at first light is a strong photograph on its own. Treat fog as a bonus outcome of good general planning rather than the sole reason for the trip, and you will come home happy either way.
Frequently asked questions about Val d'Orcia fog
What time of year has the most fog in Val d'Orcia? Mid October through late November is the most reliable window, when the combination of humidity, clear nights, and large day-to-night temperature swings happens most consistently. Early spring, particularly March, can produce it too, but less predictably.
Can you predict fog more than a day in advance? Not with much confidence. You can identify favorable multi-day patterns, generally a stable high pressure system with clear, calm nights, but the specific go or no-go decision should be based on the hourly overnight forecast checked the evening before.
Does fog happen every morning in autumn? No. Even in the strongest week of the fog season, you will typically see clear conditions on most mornings and genuine valley fog on a smaller number of them, tied directly to the three conditions covered above.
Is fog only visible from famous viewpoints like Pienza and San Quirico? Those are reliable and accessible, but any elevated point looking down over the valley works in principle. Some of my favorite fog frames have come from quiet farm roads with no name, simply because I had the elevation and a clean sightline.
Do I need a drone to get a good fog photograph? No. Ground level shots from hilltop viewpoints, especially with a telephoto lens compressing the layers, are the classic and most reliable version of this shot. A drone can add a different perspective, but it is not required and comes with its own access rules worth understanding before you fly.