Tuscany Photography Guide: Best Spots, Seasons, Tips & PhotoTour Itinerary
Discover the best places to photograph in Tuscany, from the rolling hills of Val d’Orcia to the cypress roads, medieval villages and quiet countryside scenes that make this region so special for landscape photographers. In this guide, you will find practical tips on the best seasons, locations, gear and planning advice for creating stronger images during your Tuscany photography trip.
The Ultimate Tuscany Photography Guide: Best Photo Spots, Seasons, Gear and Photo Tour Tips
Tuscany is one of those places that feels almost designed for landscape photography. Rolling hills, lonely cypress trees, old farmhouses, medieval villages, soft morning fog and warm golden light. It is the kind of landscape that looks simple at first, but becomes more and more interesting the longer you stay with your camera.
If you are planning a photography trip to Tuscany, this guide will help you understand where to go, when to visit, what to photograph, what gear to bring and how to make the most of your time in the field.
Tuscany is not only about famous viewpoints. Some of the best photographs often happen between locations, along small country roads, when the light changes quickly or when a layer of mist suddenly appears over the hills.
That is why good planning matters. And if you are coming from the United States or from another country, having a clear idea of the best areas, seasons and logistics can make a huge difference.
In this guide we will focus mainly on landscape photography, with special attention to Val d’Orcia, Crete Senesi and the classic countryside scenery that makes Tuscany one of the most beautiful photography destinations in Europe.
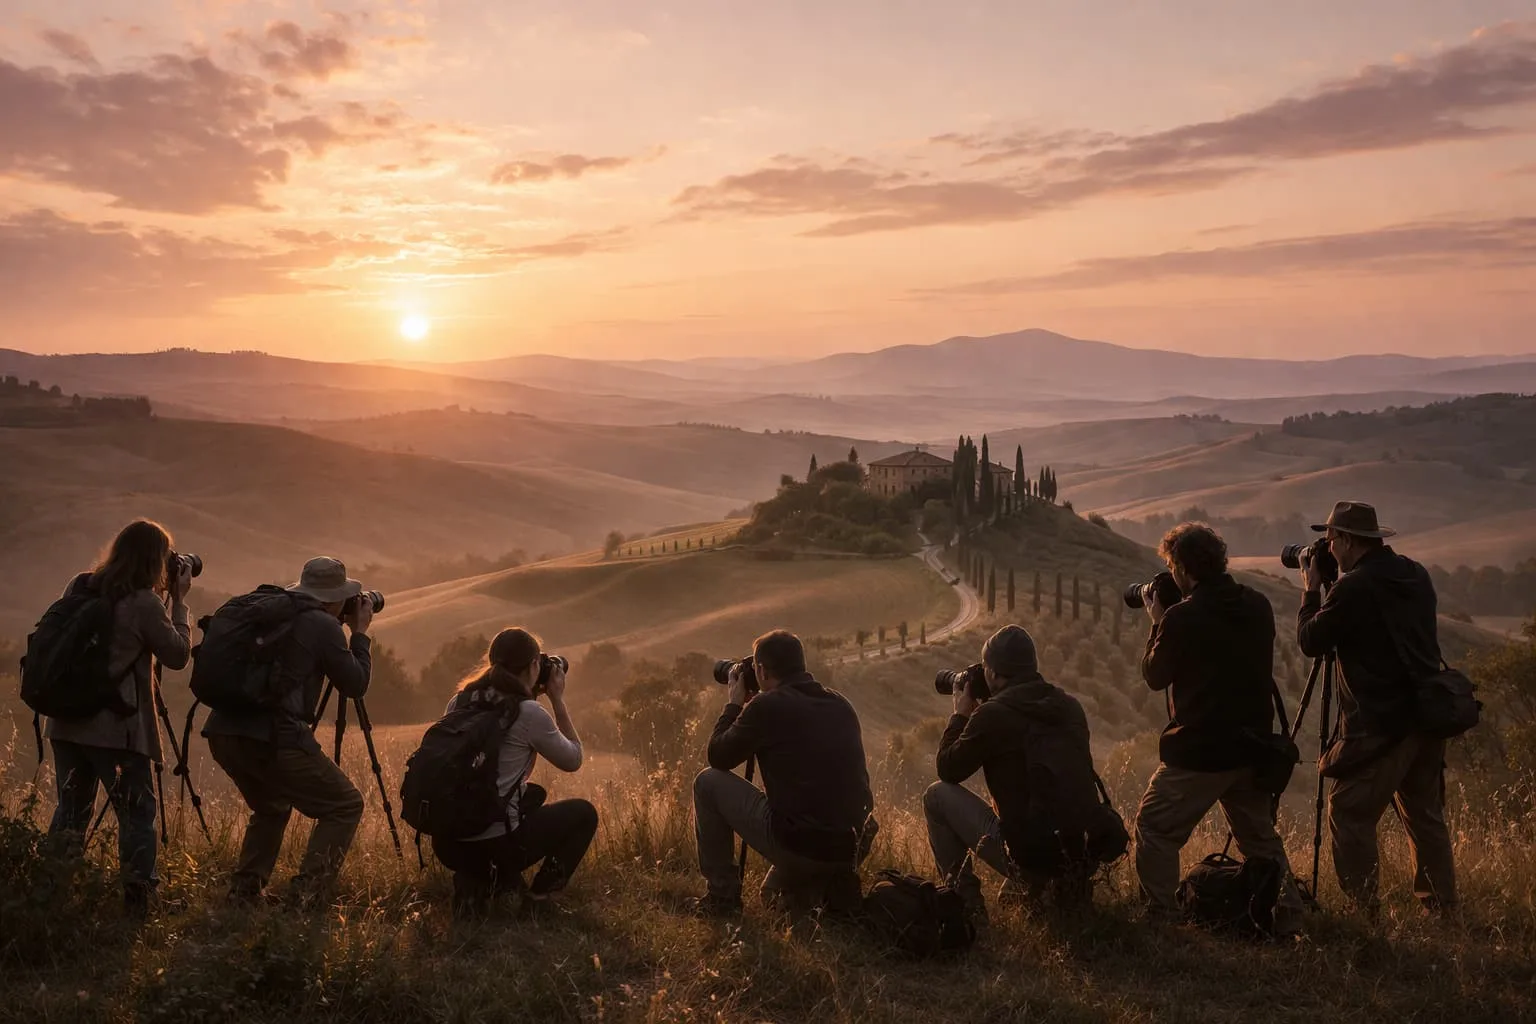
If you want to photograph Tuscany with local landscape photographers, you can also explore our Tuscany Photography Tour. We designed it for photographers who want to be in the right place at the right time, with guidance in the field and enough time to create meaningful images.
Why Tuscany Is So Special for Landscape Photography
Tuscany has a rare combination of elements that work beautifully in landscape photography. The hills are soft and elegant, the roads create natural leading lines, the cypress trees add rhythm and shape, and the old farmhouses give the landscape a strong sense of place.
What makes Tuscany different from many other destinations is that the landscape is not dramatic in an obvious way. There are no huge mountains, glaciers or wild cliffs in the classic Tuscan countryside. Instead, Tuscany asks you to slow down.
You begin to notice curves, layers, textures, shadows and small changes in light. A simple hill can become powerful when the sun hits it from the side. A row of trees can become the main subject of the image. A farmhouse in the distance can give scale and emotion to the whole scene.
For this reason, Tuscany is a wonderful place to improve your composition. It teaches you to simplify, to wait, and to build images with balance rather than chaos.
Best Areas in Tuscany for Landscape Photography
Tuscany is a large region, but if your goal is landscape photography, there are some areas that should be at the top of your list. You do not need to cover everything. In fact, one of the biggest mistakes photographers make is trying to see too much in too little time.
The best approach is to choose a few key areas and return to them in different light conditions. Tuscany changes a lot from sunrise to sunset, and even the same location can look completely different from one morning to the next.
Val d’Orcia
Val d’Orcia is probably the most iconic area for landscape photography in Tuscany. When people imagine the classic Tuscan countryside, they are often thinking of this valley.
Here you will find rolling hills, cypress roads, isolated chapels, farmhouses, wheat fields, vineyards and beautiful viewpoints near places like Pienza, San Quirico d’Orcia and Montalcino.
Val d’Orcia is especially beautiful at sunrise, when low fog can move through the valley and separate the hills into soft layers. The landscape becomes almost painterly, with gentle shapes and a quiet atmosphere.
If you only have a few days for photography in Tuscany, Val d’Orcia should be your main base.
Crete Senesi
Crete Senesi has a more minimal and graphic feeling. The hills are smoother, the lines are cleaner, and in some seasons the landscape can look almost abstract.
This area is perfect if you enjoy minimalist landscape photography. You can work with curves, shadows, lone trees, small buildings and negative space.
Crete Senesi is also excellent for black and white photography, especially when the light is strong enough to create contrast between the fields and the shapes of the hills.
Pienza
Pienza is one of the best bases for photographers in Val d’Orcia. It is close to many classic locations and it also offers beautiful views from the town itself.
The area around Pienza is full of small roads, cypress trees, farmhouses and open views. It is a great place for sunrise sessions, sunset scouting and quiet walks with the camera.
San Quirico d’Orcia
San Quirico d’Orcia is another important area for photographers. Some of the most recognizable cypress tree locations are nearby, and the surrounding countryside offers many possibilities for both wide landscape images and tighter compositions.
It is a good place to work with telephoto lenses, because many of the scenes are built around distant hills, trees and farmhouses.
Montalcino
Montalcino is known for wine, but it is also a beautiful area for photography. The vineyards, country roads and views over the surrounding hills can be very rewarding, especially in autumn.
If you like combining landscape photography with a sense of culture and place, Montalcino is worth including in your itinerary.
Montepulciano
Montepulciano is another great location for photographers who want a mix of landscapes, architecture and old town atmosphere. The countryside around the town is beautiful, and the village itself can be interesting during blue hour or early morning.
It is not only about wide views. Narrow streets, stone walls, doors, windows and small details can help you tell a richer story of Tuscany.
Best Photo Spots in Tuscany
There are many well known photography spots in Tuscany. Some are popular for a reason, but it is important to approach them with patience and your own eye. Do not just copy the classic frame. Use it as a starting point, then look for your own version.
Podere Belvedere
Podere Belvedere is one of the most famous sunrise locations in Val d’Orcia. The small farmhouse, surrounded by soft hills and morning mist, has become an iconic image of Tuscany.
It works especially well with a medium telephoto or telephoto lens. A wide angle can include too much empty space unless the sky is very interesting. With a longer lens, you can compress the hills and give more importance to the farmhouse.
The best conditions are usually at sunrise, especially when there is mist in the valley. Arrive early, because the light changes quickly.
Chapel of Madonna di Vitaleta
The Chapel of Madonna di Vitaleta is another classic Tuscan subject. It is a small chapel surrounded by cypress trees, sitting in the middle of the countryside between San Quirico d’Orcia and Pienza.
This location can be photographed in different ways. You can use a wider view to include the surrounding landscape, or a longer lens to isolate the chapel and create a cleaner composition.
It can work at both sunrise and sunset, depending on the season and the direction of light. The key is to avoid thinking only about the chapel. Look at the fields, the lines, the sky and the relationship between all the elements.
The Cypress Roads near San Quirico d’Orcia
Cypress trees are one of the strongest visual symbols of Tuscany. Near San Quirico d’Orcia you can find several roads and groups of cypress trees that create beautiful compositions.
These scenes are perfect for working with leading lines. The road can guide the eye into the image, while the trees create rhythm and structure.
Try different focal lengths. A wide lens can show the full road and sky. A telephoto lens can compress the trees and make the pattern stronger.
Agriturismo Baccoleno
Agriturismo Baccoleno, in the Crete Senesi area, is another popular photography location. The winding road lined with cypress trees creates one of the most elegant compositions in Tuscany.
This is a place where a telephoto lens is very useful. From the right viewpoint, you can compress the curves of the road and create a more graphic image.
Sunset can be beautiful here, especially when the warm light hits the hills from the side.
Gladiator Road
Many photographers know this location because of the famous scene from the movie Gladiator. It is a beautiful road near Pienza, surrounded by rolling fields and cypress trees.
It can be very atmospheric in the early morning, especially with fog or soft light. The road gives a strong sense of depth and can lead the viewer directly into the landscape.
Pienza Viewpoints
Pienza has several viewpoints over Val d’Orcia. These are excellent for both sunrise and sunset, depending on the light and weather.
From here you can photograph layers of hills, distant farmhouses, roads and fields. A telephoto lens is often more useful than a wide angle, because it allows you to isolate details within the wider landscape.
Country Roads and Unknown Corners
Some of the best Tuscany photographs are not taken from famous spots. They happen while driving between locations, during scouting, or when you stop because a simple scene catches your attention.
A lonely tree. A road disappearing behind a hill. A farmhouse with beautiful side light. A field with fresh lines after plowing.
This is why it is important to leave space in your itinerary. Tuscany rewards curiosity.
Best Time of Year to Photograph Tuscany
Tuscany can be photographed all year, but the mood of the landscape changes a lot from season to season. Choosing the right time depends on the kind of images you want to create.
Spring
Spring is one of the best seasons for landscape photography in Tuscany. The hills are green, the fields are fresh, the flowers begin to appear and the temperatures are comfortable.
This is a wonderful time for soft, elegant images. The landscape feels alive, and the colors are gentle rather than harsh.
April and May are especially beautiful months. You can often find good conditions for sunrise photography, with mist in the valleys and clean light over the hills.
Autumn
Autumn is another excellent season for photography in Tuscany. The vineyards change color, the light becomes warmer, and fog can create a very atmospheric mood in the morning.
October and early November are especially interesting if you want a more intimate and poetic version of Tuscany. The landscape is less fresh than in spring, but it can have more depth and character.
Autumn is also a great time to photograph vineyards, country roads and old villages.
Summer
Summer can be beautiful, but it is also more challenging. The light can be harsh during the day, temperatures can be high, and some areas are busier.
The best strategy in summer is to focus on sunrise and sunset, then use the middle of the day for scouting, resting, editing or visiting villages.
The dry golden fields can be very photogenic, especially when the sun is low. The mood is different from spring, but still very Tuscan.
Winter
Winter is quieter and less predictable, but it can offer beautiful conditions. The landscape is more minimal, the tourist crowds are smaller, and fog can create very strong images.
Some days may be gray or rainy, but if you enjoy moody photography, winter can be surprisingly rewarding.
Best Time of Day for Tuscany Photography
The best light in Tuscany is usually early in the morning and late in the afternoon. This may sound obvious, but in Tuscany it is especially important.
The landscape is made of shapes and relief. When the sun is high, the hills can become flat. When the sun is low, every curve and line becomes more visible.
Sunrise
Sunrise is often the most magical time in Val d’Orcia. This is when you have the best chance of finding fog in the valleys, soft colors in the sky and gentle light on the hills.
It is also a quiet time. The roads are calm, the villages are still sleeping, and the landscape feels more intimate.
For many photographers, sunrise is the main reason to visit Tuscany.
Sunset
Sunset is perfect for warm light, long shadows and stronger contrast. The side light can reveal the texture of the hills and create a beautiful sense of depth.
Some locations work better at sunset than sunrise, especially when the light comes from the right direction and hits the subject from the side.
Blue Hour
Blue hour is a good time to photograph villages like Pienza, Montepulciano or Montalcino. The balance between natural light and artificial lights can create a soft and elegant atmosphere.
If the sky is clear and the landscape light is not interesting, moving into a village for blue hour can be a great choice.
What Gear to Bring for Landscape Photography in Tuscany
You do not need a huge amount of gear to photograph Tuscany well. What matters most is understanding the landscape and choosing the right focal length for the scene.
Camera Body
Any modern camera can work well in Tuscany. Full frame cameras are great for dynamic range and low light, but APS-C and Micro Four Thirds cameras can also produce excellent results.
More important than the camera body is your ability to work with light, composition and timing.
Wide Angle Lens
A wide angle lens can be useful for including foregrounds, skies and wider scenes. However, Tuscany is not always a wide angle destination.
Many scenes are distant and layered, so if you only use a wide lens you may end up with images where the main subject feels too small.
Standard Zoom
A standard zoom, such as a 24-70mm, is very useful for general landscape work. It gives you flexibility and allows you to react quickly when the light changes.
Telephoto Lens
A telephoto lens is one of the most important lenses for Tuscany. Something like a 70-200mm or even a 100-400mm can help you isolate farmhouses, trees, roads and layers of hills.
Telephoto compression works beautifully in Tuscany. It can make the hills feel closer together and create stronger, cleaner compositions.
Tripod
A tripod is important for sunrise, sunset and blue hour. It also helps you slow down and refine your composition.
Tuscany is not a place where you should rush. Setting up a tripod and carefully adjusting your frame often leads to better images.
Filters
A polarizing filter can be useful for controlling reflections and deepening colors, especially in some daytime situations. Neutral density filters can help if you want longer exposures, although they are not always essential for the classic countryside scenes.
Clothing and Practical Items
Bring comfortable shoes, layered clothing, a rain jacket and something warm for early mornings. Even in spring or autumn, sunrise can feel cold before the sun comes up.
A small towel, lens cloths and a rain cover can be very useful when there is fog, humidity or light rain.
How to Compose Better Images in Tuscany
Tuscany is a fantastic place to practice composition because the landscape offers simple but powerful visual elements. The challenge is not finding beauty. The challenge is organizing it.
Use the Curves of the Hills
The hills are the foundation of many Tuscan images. Look for curves that move naturally through the frame. These curves can guide the viewer’s eye and create a sense of rhythm.
Look for Leading Lines
Roads, rows of trees, fences and field lines can all become leading lines. Tuscany is full of them.
The key is to use these lines with intention. Ask yourself where the line is taking the viewer. If it leads to your main subject, the composition will feel stronger.
Simplify the Scene
One common mistake in Tuscany is including too much. The landscape is beautiful, so it is tempting to put everything in the frame.
Often, the stronger image is the simpler one. One tree. One farmhouse. One curve. One clear relationship between light and shape.
Use a Telephoto Lens to Isolate Details
When the scene feels too wide or confusing, switch to a longer focal length. Tuscany is full of small compositions hidden inside the larger view.
A distant farmhouse on a hill can become the whole image. A group of cypress trees can become a graphic pattern. A small patch of light can become the main subject.
Wait for the Light
Light is everything in Tuscany. A location that looks flat at midday can become extraordinary for five minutes at sunrise or sunset.
Be patient. Watch how the shadows move. Wait for the sun to touch the right part of the hill. Many of the best images happen after you think nothing is going to happen.
How Many Days Do You Need for a Tuscany Photography Trip?
You can see some beautiful places in two or three days, but for a serious photography trip, five to seven days is much better.
The reason is simple. Weather and light are never guaranteed. If you only have one sunrise in Val d’Orcia and the conditions are flat, you may miss the atmosphere you were hoping for.
With more days, you can return to key locations, adjust your plan based on the weather and spend more time exploring lesser known areas.
A good Tuscany photography itinerary should not be too packed. You need time for scouting, driving, resting and reviewing your images.
Sample Tuscany Photography Itinerary
Every trip is different, but here is an example of how a photography focused itinerary in Tuscany could work.
Day 1: Arrival and Sunset Session
Arrive in the Val d’Orcia area, check in, organize your gear and go out for a first sunset session. This first evening is a good time to understand the landscape and start getting into the rhythm of the trip.
Day 2: Sunrise in Val d’Orcia and Afternoon Scouting
Start early with a sunrise session near one of the classic viewpoints. After breakfast, review images or scout new locations. In the afternoon, head out again for sunset.
Day 3: Cypress Trees and Country Roads
Focus on cypress roads, farmhouses and layered hills. This is a good day to work with telephoto compositions and leading lines.
Day 4: Crete Senesi
Explore the more minimal landscapes of Crete Senesi. Look for graphic compositions, lone trees, curved fields and abstract shapes.
Day 5: Villages, Details and Blue Hour
Spend part of the day photographing villages such as Pienza, Montepulciano or Montalcino. In the evening, work with blue hour, streets, architecture and atmosphere.
Day 6: Return to the Best Conditions
Use this day to return to the locations with the best weather and light potential. By now you will understand the area better, and your compositions will usually become stronger.
Day 7: Final Sunrise and Departure
If time allows, enjoy one last sunrise session before departure. Sometimes the final morning gives you the best image of the whole trip.
Planning a Photography Trip to Tuscany from the USA
If you are traveling from the United States, planning is especially important. You are investing time, money and energy into a trip that may only happen once.
Most international photographers fly into Rome, Florence, Pisa or sometimes Milan, then travel by car or train toward Tuscany. For landscape photography, having access to a car is usually very helpful. Many of the best locations are in the countryside and are not easy to reach with public transportation.
Driving in Tuscany is not difficult, but it does require attention. Some roads are narrow, some are unpaved, and parking near popular locations can be limited. It is also important to know which areas are accessible and where you can safely stop without blocking traffic or private property.
This is one of the reasons why many photographers prefer joining a guided photo tour. Instead of spending most of the trip solving logistics, they can focus on photography.
Self Guided Trip or Tuscany Photo Tour?
A self guided trip can be a great option if you enjoy planning, driving and exploring on your own. It gives you freedom and flexibility.
However, a guided Tuscany photo tour can be a better choice if your main goal is to maximize your photography time.
With a guided tour, you do not have to guess where to go at sunrise. You do not have to spend hours researching locations, checking access, studying maps or wondering if you are missing better conditions somewhere else.
A good photo tour is not only about taking you to famous places. It is about helping you read the landscape, understand the light and improve your images in the field.
This is especially useful in Tuscany, where small changes in position, timing and focal length can completely change the final photograph.
If you want to experience Tuscany with local photographers who know the area and can guide you in the field, take a look at our Tuscany Photography Tour.
What Makes a Good Tuscany Photo Tour?
Not every photo tour is the same. A good Tuscany photography tour should give you more than transportation to beautiful places.
It should help you grow as a photographer.
Look for a tour that includes small groups, experienced guides, sunrise and sunset sessions, flexible planning based on weather, and real teaching in the field.
The best tours are not too rushed. You should have time to work on your composition, change lenses, ask questions and return to locations if the conditions improve.
Tuscany is not a destination to photograph from a checklist. It is a place to experience slowly.
Common Mistakes to Avoid When Photographing Tuscany
Trying to Visit Too Many Places
Tuscany may look small on the map, but photography takes time. If you try to visit too many locations, you will spend more time driving than shooting.
Choose fewer places and photograph them better.
Using Only a Wide Angle Lens
Wide angle lenses are useful, but Tuscany often works better with longer focal lengths. A telephoto lens helps you simplify the landscape and create stronger compositions.
Arriving Too Late for Sunrise
The best light often happens before the sun is fully up. Arrive early, set up calmly and give yourself time to study the scene.
Ignoring the Weather
Fog, clouds and changing conditions can create the best images. Do not only hope for clear skies. Some of the most atmospheric Tuscany photographs happen when the weather is uncertain.
Copying the Same Famous Shots
It is normal to visit iconic locations, but try not to stop at the obvious frame. Move around, change focal length, wait for different light and look for your own interpretation.
Final Tips for Photographing Tuscany
Tuscany is not a place that needs to be forced. The beauty is already there. Your job as a photographer is to observe, simplify and wait for the right moment.
Wake up early. Drive slowly. Stop often. Use your telephoto lens more than you think. Watch the light on the hills. Look behind you. And do not be afraid to photograph quiet scenes.
Some of the most meaningful images from Tuscany are not the loudest ones. They are the ones that feel balanced, calm and honest.
Join Our Tuscany Photography Tour
If you want to photograph Tuscany with a team of landscape photographers who know the area, the light and the rhythm of the countryside, we would love to have you with us.
Our Tuscany Photography Tour is designed for photographers who want to experience the most beautiful areas of Tuscany with guidance in the field, carefully planned sunrise and sunset sessions, and a small group atmosphere.
We will explore iconic locations, but also spend time looking for quieter scenes, better compositions and personal interpretations of the landscape.
Whether you are coming from the United States, Europe or anywhere else in the world, Tuscany is a place that can stay with you for a long time. Not only because of the photographs you bring home, but because of the way it teaches you to see.