Moonlight Landscape Photography: Shooting Landscapes by the Light of the Moon
Why a quarter moon often beats a full one, how bright moonlight actually is compared to sunlight, and the exposure settings and planning workflow that turn a moonlit landscape from a guess into a plan.
Moonlight Landscape Photography: Shooting Landscapes by the Light of the Moon
I have spent more nights than I can count standing in a dark field waiting for a camera to finish a long exposure, and the question I get asked most often afterward is some version of "so you just wait for a full moon, right?" Almost every time, the honest answer is no. Some of the moodiest, most dimensional moonlit landscapes I have shot or watched other photographers nail on our trips were made under a half moon or a fat crescent, not the bright, flat light of a full one. That surprises people, so this guide exists to explain why, with the actual physics behind it, and to give you real starting points for exposure instead of the vague "shoot at night and see what happens" advice that passes for a tutorial on most of the internet.
We will cover how the moon phase cycle actually works, why a quarter moon frequently beats a full one, how bright moonlight really is compared to sunlight, exposure settings you can use as a genuine starting point, and how to plan a moonrise so it lands exactly where you want it over your subject instead of showing up twenty degrees off from where you hoped.
Key Takeaways
Moonlight photography is a light-quality problem more than a brightness problem. A full moon gives you the most light but the flattest look, while a thinner moon gives you less light and more shape.
| Point | Details |
|---|---|
| Full moon brightness | Roughly 0.25 lux on a clear night, against roughly 120,000 lux for direct sunlight |
| Quarter moon brightness | Roughly 0.01 lux, about 25 times dimmer than a full moon |
| Why full moon looks flat | The sun lights the moon almost straight on from our point of view, which removes shadow texture from the light it reflects |
| Why a thinner moon looks better | Low-angle sunlight on the moon's own surface, and a lower position in your sky, gives more directional, shadow-casting light on your landscape |
| Baseline gear | A sturdy tripod and a wide-aperture lens, both specifically recommended for low-light night work |
| Planning factors that matter together | Weather, moon phase, the direction you are facing, and light pollution, not any single one alone |
Table of Contents
- Moonlight vs. photographing the moon: two different problems
- How the moon phase cycle actually works
- Why a quarter moon often beats a full moon
- Moon altitude and position: reading the sky before you shoot
- How bright is moonlight, really
- Exposure starting points for moonlit landscapes
- Planning a moonrise over your subject
- Essential equipment for shooting by moonlight
- A moonlit case study: the Algerian Sahara
- Frequently asked questions about moonlight landscape photography
Moonlight vs. photographing the moon: two different problems
Before anything else, it is worth separating two things that get lumped together constantly: photographing the moon itself, and using moonlight to photograph a landscape. They are almost opposite technical problems. The moon's disc is a sunlit object sitting in a dark sky, so photographing it sharply means treating it like a daytime subject, a fast shutter speed, a small aperture, and daylight white balance, because moonlight is just reflected sunlight, as NASA's own photography guide puts it. Using that same moonlight to light up a foreground is the opposite problem. You are no longer photographing a bright object in a dark sky, you are trying to gather enough of a very faint, indirect light source to expose an entire landscape, which calls for long exposures, wide apertures, and camera settings that would hopelessly overexpose the moon's own disc if it were in frame.
This article is about the second problem: using moonlight as the light source for a landscape. If you also want a crisp photo of the lunar disc with craters visible, that is a different shoot with a telephoto lens and completely different settings, and conflating the two is the single most common mistake I see in how-to articles on this topic.
How the moon phase cycle actually works
The moon does not generate any light of its own. Every bit of what we call moonlight is sunlight bouncing off the lunar surface, and the cycle of phases we see from Earth repeats about every 29.5 days, according to NASA's lunar science team. That number is worth knowing because it is slightly longer than the moon's actual 27.3 day orbit around Earth, the extra two days accounted for by the fact that Earth has also moved along its own orbit around the sun in the meantime, changing the angle we view the moon from.
What matters more for photography is what a given phase actually tells you about brightness. At first or third quarter, you are seeing half of the moon's illuminated hemisphere, which works out to a quarter of the moon's total light-reflecting surface area, not half the brightness of a full moon the way the name "quarter" might suggest. At full moon, the entire sunlit hemisphere faces Earth directly, which is as close as the moon ever comes to reflecting the sun's light toward us at full strength. That distinction between "how much of the moon looks lit" and "how much light is actually reaching your landscape" is the whole key to planning a shoot by moon phase instead of guessing.
Why a quarter moon often beats a full moon
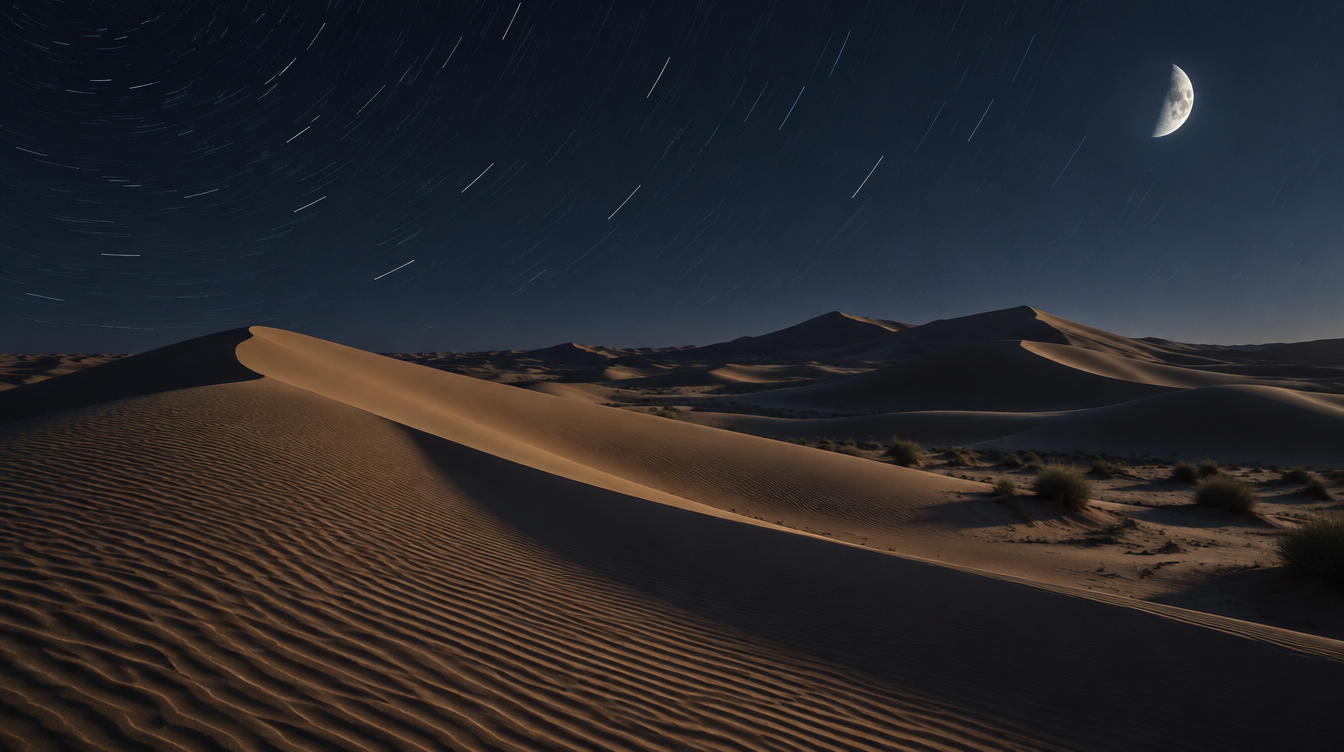
Here is the part that surprises most photographers who have not shot under moonlight before: a full moon is not usually the best choice for a moody, dimensional landscape photograph, even though it is the brightest option. NASA's own guide describes it plainly: "A full Moon is beautiful and extremely bright, but also quite flat", and that flatness carries straight through to anything it lights. The reason is angle. At full moon, sunlight is hitting the lunar surface almost head on from our perspective, which washes out the long shadows that give the moon's own craters and mountains their texture. During the partial phases, that same low-angle light lengthens those shadows on the moon itself, and a lower, more oblique moon in your own sky does the same thing to your landscape, casting longer, more directional shadows across rock, sand, or snow instead of a flat wash of light from almost directly behind you.
There is also a straightforward brightness trade you are making. A quarter moon puts out roughly twenty-five times less light than a full moon, which sounds like a disadvantage until you remember that a full moon's light is often too much of a good thing: it can wash out the sky to the point where only the very brightest stars survive in the frame, flattening what should be a dramatic night sky into a dull gray backdrop. A thinner moon gives up some foreground brightness in exchange for a darker, more star-filled sky and more shadow definition on the ground. Which trade you want depends entirely on what you are trying to show in the frame.
Pro Tip: If your shot depends on both a well-lit foreground and a genuinely starry sky, aim for a waxing or waning crescent that sets or rises outside your shooting window, rather than trying to balance a bright moon and a dark sky in the same frame. Check moonrise and moonset times for your date and location before you commit to a shooting plan.
Moon altitude and position: reading the sky before you shoot
Phase is only half the planning problem. Where the moon sits in your sky at the moment you are shooting matters just as much, which is why the U.S. National Park Service names "weather, moon phase, viewing direction, where stars and other celestial objects appear in the sky, and light pollution" together as the factors that decide whether a night shoot is worth planning around, not any single one of them in isolation. A low moon near the horizon behaves a lot like a low sun: it travels through more atmosphere, which can warm its color slightly, and it throws long, raking shadows across a landscape the same way a low sun does at golden hour. A moon sitting high overhead lights things far more evenly and flatly, closer to midday sun than to a dramatic side light.
This is also where composition and moon position intersect directly. A moon low in the sky and off to one side of your subject, rather than directly behind you, gives you a visible light source in frame and real modeling on foreground texture, sand ripples, rock faces, or the folds of a dune catching long shadows from one direction instead of being lit evenly from everywhere at once.
How bright is moonlight, really
Numbers make this much easier to plan around than vague descriptions like "bright" or "dim." Illuminance, the actual amount of light landing on a surface, is measured in lux, and the gap between sunlight and moonlight is enormous. Direct sunlight measures roughly 120,000 lux, while a full moon on a clear night measures only about 0.25 lux, a difference of roughly 480,000 times. A typical overcast midday sky, for comparison, sits around 1,000 to 2,000 lux, still thousands of times brighter than any moonlight, which is a useful reminder of just how little light you are actually working with on even the brightest moonlit night.
The gap between moon phases is nearly as dramatic. A table of illuminance values that traces back to a peer-reviewed estimate published in Astronomy & Geophysics lists a full moon on a clear night at about 0.25 lux and a quarter moon at about 0.01 lux, roughly a 25 times difference. Below that, a clear moonless night sky measures somewhere around 0.0002 lux without airglow, or about 0.002 lux including it, and an overcast moonless night drops lower still, around 0.0001 lux. Every one of those steps down represents several more stops of exposure you need to find somewhere in your settings.
| Light source | Approximate illuminance |
|---|---|
| Direct sunlight | 120,000 lux |
| Overcast midday sky | 1,000 to 2,000 lux |
| Full moon, clear night | 0.25 lux |
| Quarter moon | 0.01 lux |
| Clear moonless night, with airglow | 0.002 lux |
| Clear moonless night, airglow excluded | 0.0002 lux |
| Overcast moonless night | 0.0001 lux |
Exposure starting points for moonlit landscapes
There is no single correct exposure for a moonlit landscape, because so much depends on phase, altitude, and how reflective your subject is. What follows are starting points to dial in on your histogram, not fixed settings to copy blindly. Under a bright, high full moon, I usually start around ISO 1600 to 3200, an aperture of f/2.8 to f/4 to gather as much of that limited light as possible, and a shutter speed of 15 to 30 seconds, long enough to gather real detail without turning stars into noticeable trails on most lenses. Under a quarter or crescent moon, remember you are working with roughly 25 times less light, so you need to find those same four to five stops somewhere else: push ISO higher, open your aperture wider if you have the room, or extend your shutter speed well past a minute if your subject will tolerate star trailing in exchange for a brighter foreground.
A wide aperture lens is not a luxury here, it is close to a requirement. The National Park Service's own guidance on night photography specifically calls out that "a wide aperture lens also helps by allowing more light to reach the camera sensor", which matters enormously when your entire light budget is a fraction of a lux. The same source recommends a tripod paired with fully manual camera settings as the baseline approach for any night image, since autofocus and auto exposure both struggle badly once the light drops this low, and a tripod is non negotiable the moment your shutter speed passes a second or two.
Pro Tip: Shoot in manual focus, locked at infinity or fine tuned on a bright star or distant light using your live view zoomed in. Autofocus will hunt and often fail outright once ambient light drops below what a full moon provides, and it gets worse, not better, under a quarter moon.
Planning a moonrise over your subject
Getting a moonrise to land exactly where you want it, directly behind a ridge, a dune crest, or a specific rock formation, is a planning problem, not a luck problem. NASA's own guide frames knowing "when the Moon rises and sets on a given day" as the central input before you even think about composition, and that is doubly true when you want the moon to line up with a specific foreground element rather than just appearing somewhere in the sky. The moon's rise time, and more importantly its compass direction and height above the horizon, shift meaningfully from one night to the next, so the position that worked for a shot you saw online will not repeat itself automatically a month later.
In practice, that means working backward from your subject. Scout your location in daylight first, work out the compass bearing from your camera position to the point on the horizon you want the moon to rise behind, and then check that bearing against the moon's predicted rise azimuth for your actual shooting date, which changes every night as the moon moves along its orbit. Planning apps and sites built around sun and moon positioning can show you that azimuth and elevation well in advance, which turns a shot that would otherwise depend on chance into one you can show up for with real confidence, tripod already set on the right bearing before the moon ever breaks the horizon.
Essential equipment for shooting by moonlight
The gear list for moonlight photography is shorter than you might expect, but every item on it earns its place. A genuinely sturdy tripod comes first, since every moonlit exposure, even under a bright full moon, runs long enough that any shake ruins the shot. A fast, wide-aperture lens is second, for the same reason the National Park Service recommends one: more light reaching the sensor per second means shorter exposures and lower ISO for a given amount of ambient light. A remote shutter release or your camera's built in self timer removes the vibration of pressing the shutter button by hand on an already marginal exposure.
Beyond that, bring a headlamp with a red light mode so you can see your camera controls and the ground around you without ruining your night vision or anyone else's long exposure in progress, and bring more spare batteries than you think you need. Long exposures and cold desert or mountain nights both drain batteries far faster than a normal day of shooting, and nothing ends a moonlit session early faster than a dead battery twenty minutes before the moon reaches the position you planned for. A star tracker is worth mentioning here too, though it is optional equipment for this kind of work specifically. Trackers matter most when you are stacking long exposures of the stars themselves to avoid trailing, which is a different goal than exposing a moonlit foreground, so do not feel like you need one to get started.
A moonlit case study: the Algerian Sahara
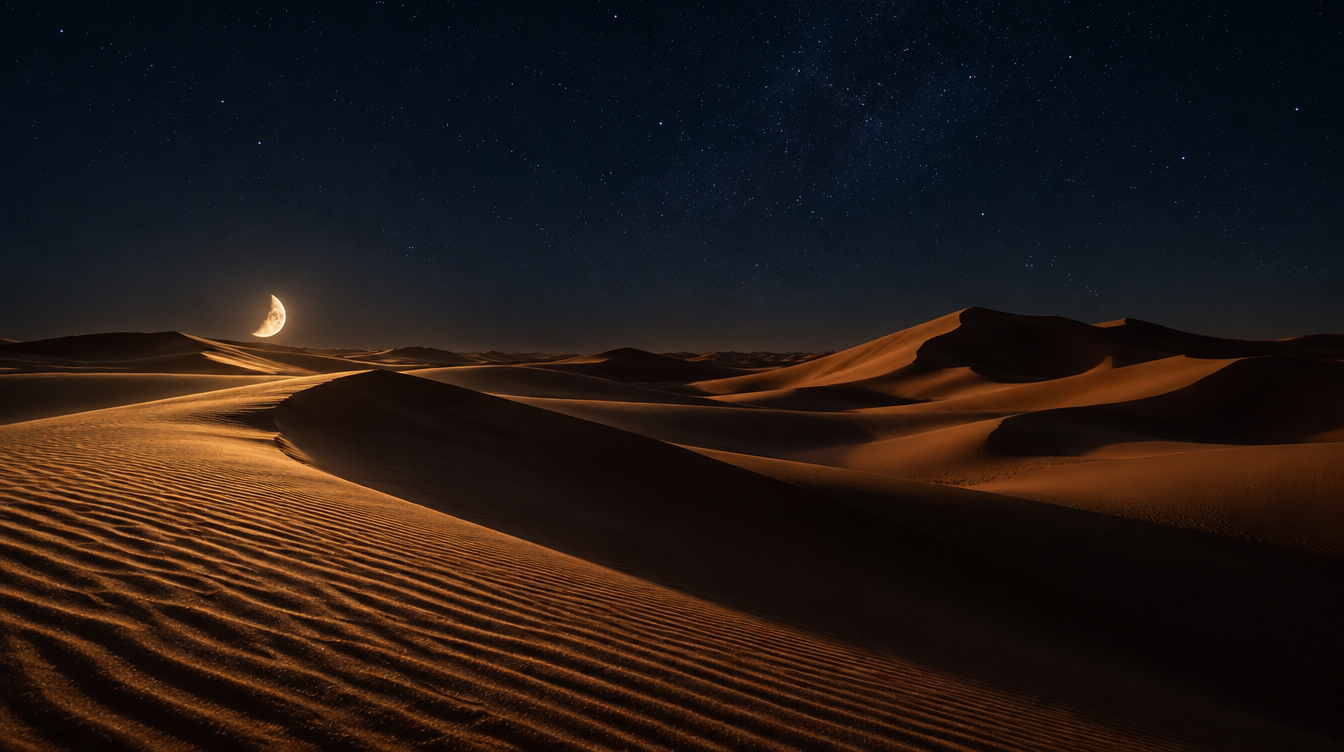
Some places simply give you more to work with than others, and the Sahara is one of them. Open, reflective sand does exactly what darker terrain cannot: it bounces back even the faint light of a quarter moon far more efficiently than a forest or a rocky, dark-toned landscape would, which is part of why desert dunes have become such a classic subject for moonlit long exposures. It is also, practically speaking, about as far from light pollution as landscape photography gets, which is the other half of the equation the National Park Service flags as essential to plan around alongside moon phase itself.
This is exactly the terrain our Algeria Sahara Desert PhotoTour is built around. The tour's own description puts it plainly: the region's night skies, free of light pollution, offer "an exceptional opportunity to photograph the Moon," and the Djanet region where the trip is based is a place where darkness still genuinely reigns. It is a seven day trip through the Algerian Sahara with Tuareg guided travel, desert camping among the dunes, and a photographer on hand who specializes in nightscape and Milky Way work, which means the planning workflow in this article, phase, altitude, and azimuth, is quite literally what the trip's own nights are built around. The gear guidance for the trip lists an optional star tracker for anyone who wants to push further into pure night sky work beyond the moonlit landscape techniques covered here. If shooting a real desert by real moonlight is on your list, this is the kind of trip built to make it happen rather than hoping you stumble into the right night on your own.
Frequently asked questions about moonlight landscape photography
Is a full moon or a quarter moon better for landscape photography? It depends on what you want. A full moon is roughly 25 times brighter than a quarter moon, so it lights a foreground faster and more evenly, but that same straight on light is what makes it look flat, washing out shadow texture and much of the night sky along with it. A quarter or gibbous moon trades some of that brightness for more directional light and a darker, more star filled sky.
What ISO, aperture, and shutter speed should I use for a moonlit landscape? Treat any number as a starting point to confirm on your histogram rather than a fixed setting. Under a bright, high full moon, ISO 1600 to 3200, an aperture of f/2.8 to f/4, and a 15 to 30 second shutter is a reasonable opening guess. Under a quarter or crescent moon, expect to need roughly four to five stops more exposure somewhere in that combination, since the available light is only about a twenty fifth as bright.
Do you need a star tracker for moonlit landscape photography? No. A tracker matters for pin sharp, stacked exposures of the stars themselves to avoid trailing, which is a different goal than exposing a moonlit foreground. A sturdy tripod and a single longer exposure, or a blended foreground and sky exposure, is the standard approach for landscapes lit by the moon.
How bright is moonlight compared to sunlight? Direct sunlight measures around 120,000 lux, while a full moon on a clear night measures around 0.25 lux, a difference of roughly 480,000 times. That gap is why moonlit photography needs long exposures, wide apertures, or high ISO even on the brightest moonlit nights, and why autofocus and auto metering both tend to struggle badly in this kind of light.
Can you still see stars when the full moon is out? The brightest stars stay visible, but a full moon's light drowns out fainter ones and noticeably reduces how much of the Milky Way shows up in a frame. If a rich starfield alongside a lit landscape is the goal, a thinner moon low in the sky is a far more workable middle ground than a full one.
How does the moon's altitude affect the shot? A low moon near the horizon behaves like a directional, side lighting source and often picks up warmer color from passing through more atmosphere, while a moon high overhead lights more evenly and flatly, closer to a midday sun. Viewing direction, where the moon sits relative to your subject, is named specifically as one of the core factors to plan a night shoot around.
What is the best moon phase for the Milky Way versus a moonlit landscape? These are close to opposite goals. A bright moon washes out the Milky Way's contrast against the sky, so Milky Way photography is usually planned around the new moon, while a moonlit landscape needs some moon in the sky to light the foreground at all. If a trip needs both in one night, plan around a thin crescent timed to rise or set outside your main shooting window.
Do I need a planning app to time a moonrise over my subject? Not strictly, but it removes most of the guesswork. Moonrise and moonset times, along with the moon's compass direction and height above the horizon, change meaningfully from one night to the next, so checking them in advance lets you confirm the moon will actually rise behind the ridge, dune, or peak you have in mind rather than hoping for it on the night itself.
Sources
- NASA Science: How to Photograph the Moon
- NASA Science: Moon Phases
- U.S. National Park Service: The Unique Photography Techniques That Help Preserve Spectacular Night Skies
- Wikipedia: Daylight (illuminance comparison table)
- Wikipedia: Orders of Magnitude (Illuminance), citing Kyba, Mohar & Posch (2017), Astronomy & Geophysics