How to Photograph Rolling Hills That Actually Look Three Dimensional
A composition focused technique guide using Val d'Orcia's hills as the case study, covering foreground anchors, atmospheric layering, light direction, and lens choice for real depth.
How to Photograph Rolling Hills That Actually Look Three Dimensional
Stand on almost any ridge in Val d'Orcia and the view in front of you feels enormous. Layer after layer of hills rolls off toward the horizon, cypress trees mark the curve of a farm road, and the whole scene has a sense of scale that makes your chest tighten a little. Then you look at the photo on the back of your camera and it looks flat. The hills read as a single green or gold shape instead of a series of receding forms, and the sense of depth you felt standing there has simply vanished.
This is one of the most common disappointments in landscape photography, and it has nothing to do with luck or equipment quality. A photograph is a flat rectangle, and depth has to be built into the frame deliberately using a handful of specific techniques. Val d'Orcia is one of the best places in the world to practice this, because its hills are so smooth and so repetitive that any flatness in your composition becomes obvious immediately. This guide walks through the tools that turn a flat hillside into a photograph with real, convincing depth: foreground anchors, atmospheric layering, light direction, and lens choice.
Key Takeaways
Depth in a landscape photograph is built, not captured, and a handful of deliberate choices separate a flat hillside shot from one with real three dimensional structure.
| Point | Details |
|---|---|
| Foreground anchor | Place something close to the lens, a farmhouse, a row of cypress, a curve of road, in the bottom third of the frame |
| Best haze conditions | Mid morning to early afternoon in warmer months, when heat haze naturally separates each hill by tone |
| Light direction | Side light, roughly one to two hours after sunrise or before sunset, carves shadow and shape into rolling terrain |
| Lens for exaggerated depth | A wide angle, 16 to 35mm, shot close to a foreground subject |
| Lens for compressed layering | A telephoto, 70mm and longer, isolating stacked ridgelines from a distance |
| Aperture | f/11 to f/16 for most wide compositions, to keep foreground and background both sharp |
Table of Contents
- Why hills photograph flat in the first place
- Foreground anchors that create scale
- Atmospheric layering and haze
- Light direction: the hidden variable
- Lens choice: compress or exaggerate
- Aperture and focus technique
- A field checklist for Val d'Orcia
- Frequently asked questions
- Putting it all together
Why hills photograph flat in the first place
A camera lens does something your eyes never do: it collapses a three dimensional scene onto a single flat plane. Your eyes constantly shift focus, use binocular parallax, and unconsciously track how objects move relative to each other as you tilt your head. A photograph gets none of that. Every visual cue for depth has to come from the composition itself, which is why a scene that feels enormous in person can look like a postcard of a green blob once it is squeezed into a rectangle.
Rolling hills are especially unforgiving because they are smooth and repetitive by nature. A mountain range gives you jagged silhouettes and obvious scale references. A rolling hillside in Val d'Orcia gives you soft, similar curves with few hard edges, which means the usual depth cues, a road disappearing around a bend, a building that shows scale, a shift in tone from foreground to background, have to be built in on purpose rather than relied on to appear naturally.
Foreground anchors that create scale
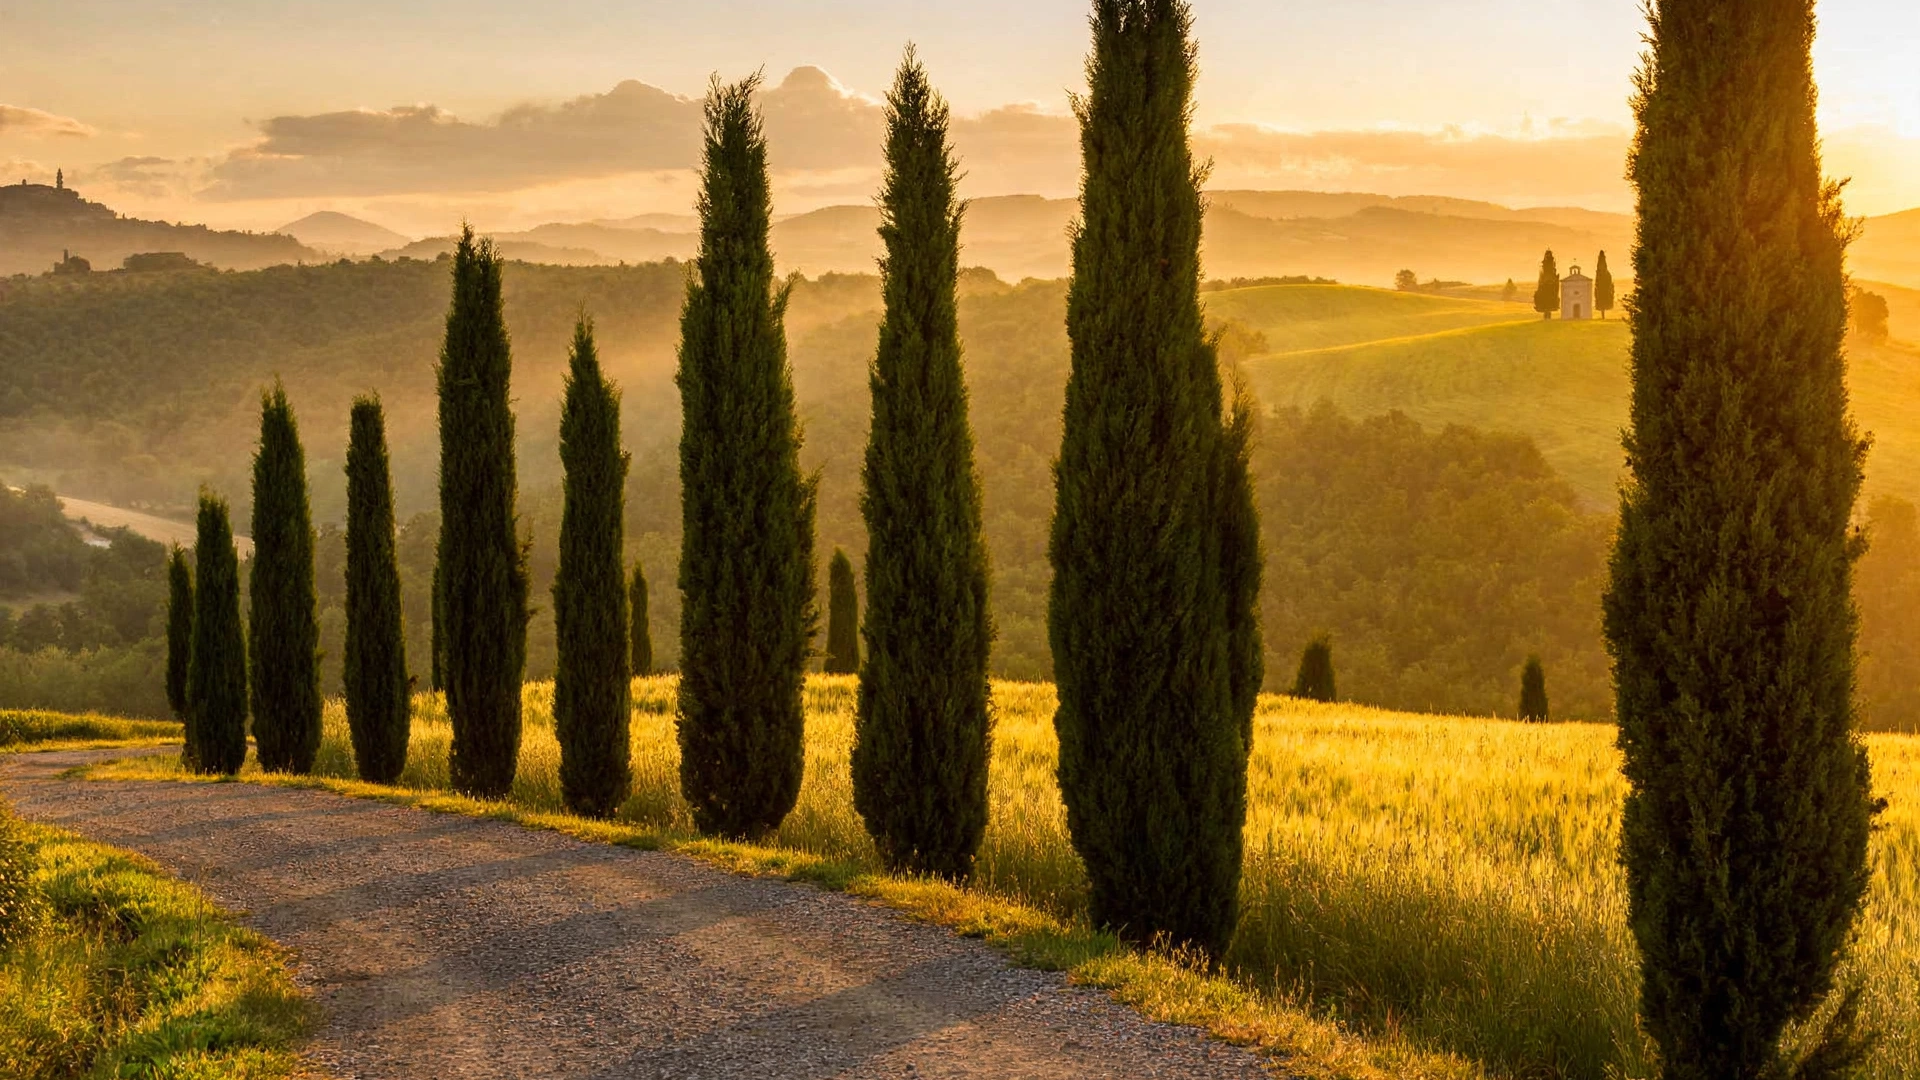
The single most effective fix for a flat landscape photograph is also the simplest: put something close to the camera. A foreground anchor, a row of cypress trees, a stone farmhouse, a curving gravel road, a single olive tree, gives the viewer's eye a place to start and a sense of scale to measure everything else against. Without it, the eye has nothing nearby to compare the distant hills to, and distance stops registering.
In Val d'Orcia this is rarely difficult to find. The region is full of farm roads that curve away from the camera, cypress rows planted along field boundaries, and isolated stone buildings sitting alone on a ridge. The trick is not finding a foreground subject but positioning yourself so it sits in the bottom third of the frame while the hills recede behind it. Get low, sometimes only a foot or two off the ground, and the foreground element will loom larger relative to the background, which stretches the apparent distance between the two and makes the whole scene feel deeper.
Pro Tip: Walk the scene before you set up your tripod. Moving even ten feet left or right can completely change which foreground element lines up with which distant hill, and that alignment is often the difference between a composition that clicks and one that just feels cluttered.
Atmospheric layering and haze
The second major depth cue is atmospheric perspective, the natural effect where distant objects appear lighter, softer, and less saturated than objects close to the camera. This happens because you are looking through more air, dust, and moisture the farther away something is, and that intervening atmosphere scatters light in a way that mutes contrast and color. It is the same reason distant mountains look pale blue while the hill in front of you looks fully saturated green.
Val d'Orcia's rolling terrain is almost purpose built for this effect, because the repeating hills sit at slightly different distances and create a natural stack of tonal layers when there is any haze in the air at all. Warm season mornings, once the sun has been up for an hour or two, are especially good for this: a light haze builds as the ground warms, and it separates each successive ridge by a slightly paler tone than the one in front of it. This is one of the reasons the region looks so different depending on time of day. The same hillside that looks flat under a crisp, haze free winter sky can look dramatically layered on a warm, hazy summer morning.
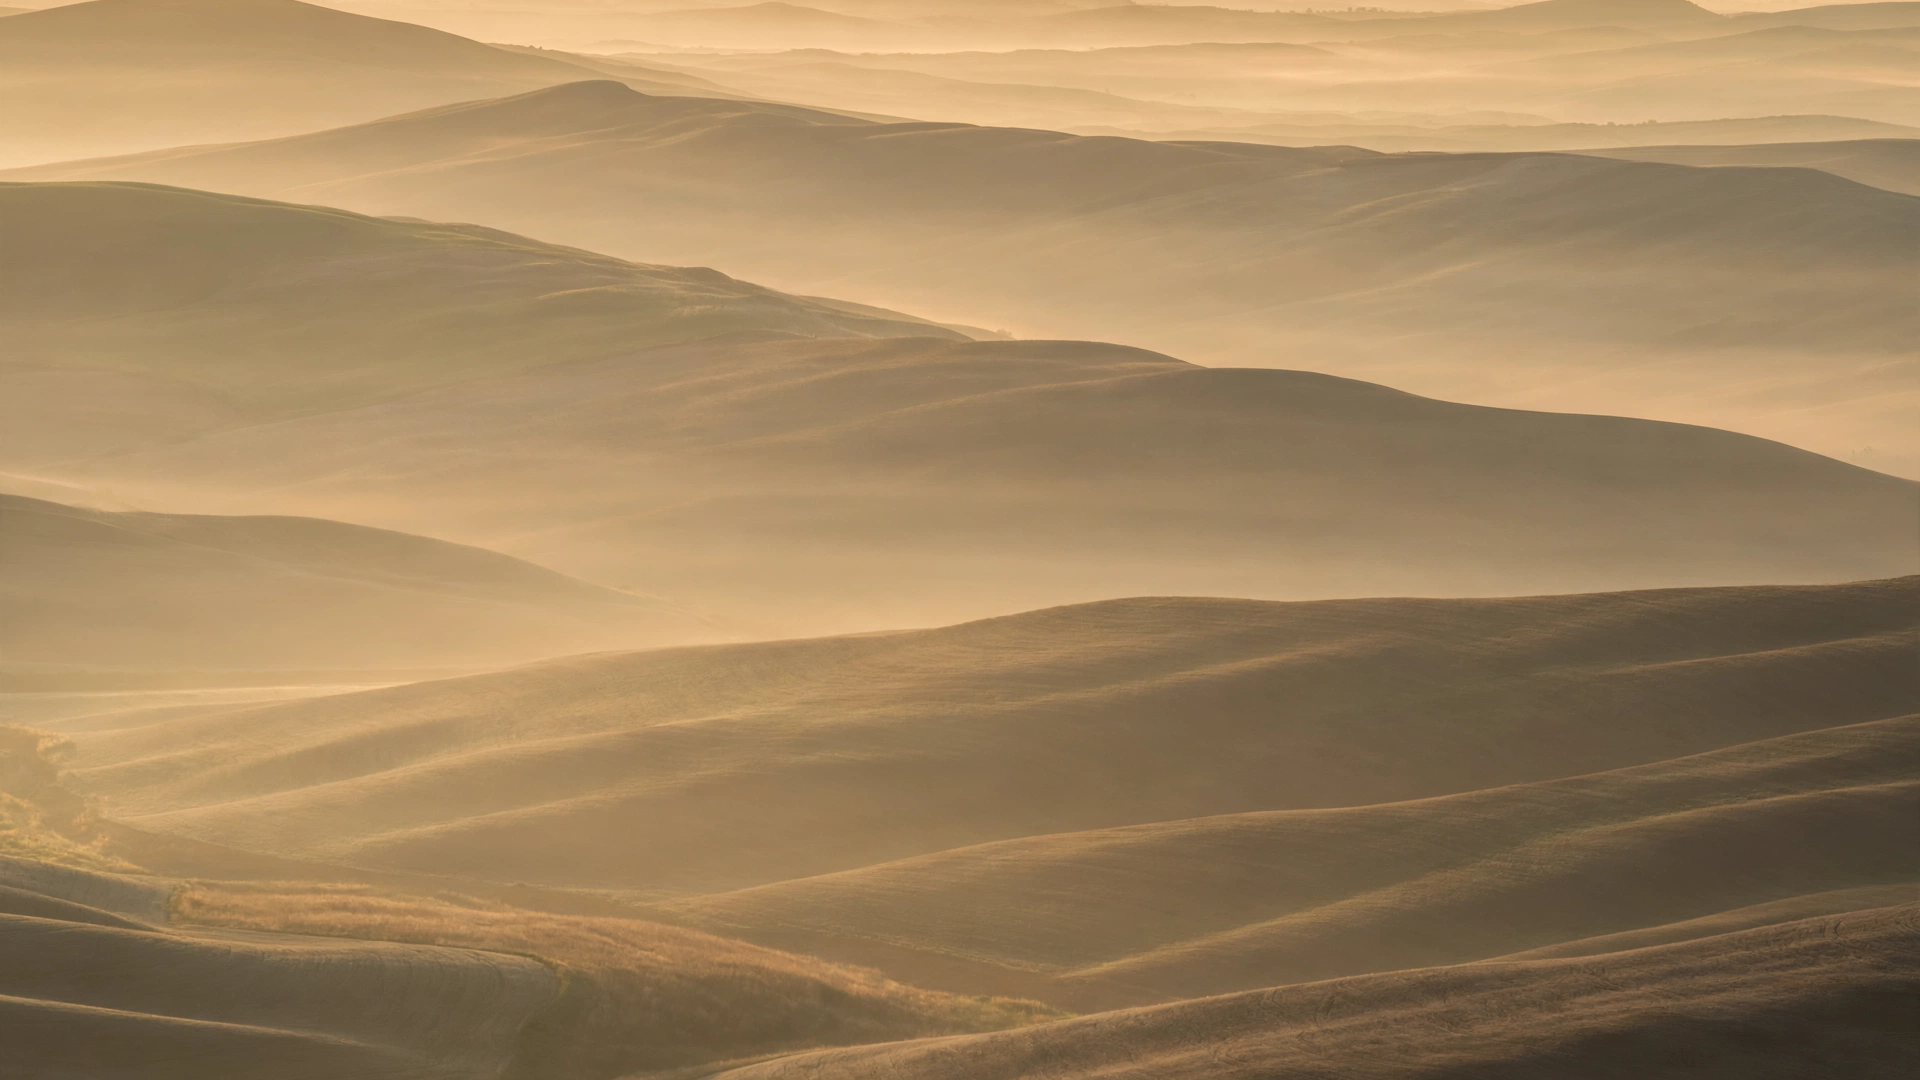
You can help this effect along in post-processing by very slightly reducing contrast and saturation on the farthest layers, but it works best when you shoot it correctly in the first place. If a scene looks flat through the viewfinder, waiting twenty or thirty minutes for the haze to build, or returning at a different hour, is usually more effective than trying to fake the effect afterward.
Light direction: the hidden variable
Photographers obsess over golden hour for its color, but its real value for rolling hills is the direction of the light. When the sun sits low and to the side of your composition, roughly one to two hours after sunrise or before sunset, it rakes across the terrain and throws long shadows into every fold and dip of the land. Those shadows are what reveal the actual shape of a hillside. Shoot the same hill with the sun directly behind you at midday and all of that shadow detail disappears, leaving a flat wash of even light with no visible structure.
This is why the same viewpoint in Val d'Orcia can produce a completely different photograph depending on the hour. A hillside that looks like a smooth green slope at noon can reveal a network of subtle ridges, farm tracks, and undulations once the light rakes across it at 7am. If your primary goal is a three dimensional looking hillside rather than a specific color palette, prioritize side light over the warm tones of golden hour. A slightly less colorful photograph with strong shadow structure will almost always read as more three dimensional than a warmly lit but flatly illuminated one.
Lens choice: compress or exaggerate
Lens choice is where a lot of photographers get the physics backwards. A wide angle lens does not make a scene look flatter, it exaggerates the relative size difference between foreground and background when you get close to a foreground subject, which stretches the apparent distance across the frame. A telephoto lens does the opposite: it compresses distance, pulling distant elements visually closer to nearer ones, which is exactly what you want when you are trying to stack several ridgelines on top of each other to show how many layers of hills exist in a scene.
Neither approach is correct in every situation. They are two different tools for two different kinds of depth. A wide angle lens close to a cypress row makes that row loom large while the hills fall away dramatically behind it, which is the classic dramatic foreground shot. A telephoto lens from a distant viewpoint, shooting across a valley toward several receding ridgelines, stacks those ridges into a layered composition where the depth comes from tonal separation rather than size difference. Both are valid ways to show three dimensionality, they just rely on different visual mechanisms.
| Focal length | Depth effect | Best use in Val d'Orcia |
|---|---|---|
| 16 to 24mm | Strong exaggeration of foreground to background scale | Close cypress rows, farmhouses, or road curves with hills falling away behind |
| 35 to 50mm | Balanced, closest to natural perception | General scenes where you want depth without obvious distortion |
| 70 to 135mm | Moderate compression, stacks two or three visible ridgelines | Classic layered hill shots from a distant viewpoint |
| 200mm and longer | Heavy compression, flattens distance between layers into a tight stack | Isolating a single tree or building against distant hazy ridges |
Pro Tip: If you only pack one extra lens for a Val d'Orcia trip beyond a standard zoom, make it a short telephoto in the 70 to 200mm range. Most visitors arrive with only a wide angle and miss the layered, compressed shots that a longer lens makes possible from the same viewpoint.
Aperture and focus technique
Depth cues only work if the whole scene is actually sharp enough to read clearly, which means aperture choice matters as much as composition. For wide angle foreground to background compositions, f/11 to f/16 is the usual sweet spot on a full frame camera, giving enough depth of field to keep a nearby foreground subject and a distant hillside both acceptably sharp without the softening that comes from diffraction at very small apertures like f/22.
Where you place focus also matters more than most photographers assume. Focusing at the hyperfocal distance, roughly a third of the way into the scene rather than directly on the foreground subject, generally produces the sharpest result front to back. If your foreground element is very close, within a few feet of the lens, you may need to focus stack, taking one exposure focused on the foreground and another focused on the distant hills, then blending them in post-processing. This is more relevant for close macro-style foregrounds than for a cypress row twenty feet away, but it is worth knowing before you commit to an extremely close composition.
A field checklist for Val d'Orcia
Putting these four tools together in the field is mostly a matter of habit. Before pressing the shutter on a rolling hills composition, run through a short mental checklist: is there something close to the lens to anchor scale, is there enough haze or atmospheric separation between distant layers, is the light coming from the side rather than straight ahead or straight behind, and is the lens and aperture choice matched to the kind of depth you are trying to show. Missing any one of these rarely ruins a photograph outright, but hitting all four together is usually what separates a strong three dimensional landscape from a flat one.
Frequently asked questions
Does a wide angle lens always create more depth? Only when paired with a close foreground subject. A wide angle lens pointed at a distant scene with nothing nearby actually tends to make hills look smaller and flatter, since it shrinks everything in the frame relative to a normal or telephoto view.
What time of day gives the most three dimensional look in Val d'Orcia? Mid to late morning in the warmer months often combines side light with the haze that separates distant ridgelines by tone, which is a strong combination for layered depth. Late afternoon works similarly in reverse.
Do I need a graduated ND filter for these shots? Not specifically for depth, though a graduated filter can help balance exposure between a bright sky and darker foreground in a wide composition, which keeps foreground detail visible and supports the same depth cues discussed here.
Can I add depth in post-processing if I missed it in the field? Partially. Subtle contrast and saturation reduction on distant layers can enhance an atmospheric effect that already exists in the raw file, but it cannot invent foreground scale or shadow structure that was never captured. Getting the composition right in the field matters more than any editing technique.
Putting it all together
None of these techniques are unique to Tuscany, but Val d'Orcia is one of the clearest places to practice them because the terrain is so forgiving of experimentation and so unforgiving of laziness. A hillside with no foreground, flat midday light, and a normal lens will almost always look like a postcard cliche. The same hillside, approached an hour later with a cypress row anchoring the foreground, side light carving shadow into the folds of the land, and a longer lens stacking two or three ridgelines behind it, can look genuinely three dimensional even though nothing about the land itself has changed.
For a broader sense of where in the region these techniques apply best, our guide to Val d'Orcia covers the geography and the specific villages and viewpoints that make this landscape so consistently photogenic. And for the full picture of when and where to shoot across the wider region, the Tuscany Photography Guide remains the best starting point before you plan a trip around any of these compositions.