Best Lenses for Milky Way Photography: What Really Matters at Night
Aperture, focal length, coma, and vignetting explained in plain terms, with a lens table by budget so you know exactly what to expect from your glass under a truly dark sky.
Best Lenses for Milky Way Photography: What Really Matters at Night
Every season I get some version of the same message before a Tunisia departure: "What lens should I bring for the Milky Way?" The honest answer is rarely the brand-and-model shortcut people hope for. It is a trade-off between three things, aperture, focal length, and optical quality wide open, and most buying guides online skip straight to naming lenses without explaining why those three things pull against each other in the dark.
This is the guide I wish existed before my first night under a truly dark sky. It covers what a fast aperture buys you in light, what you give up in coma and vignetting wide open, how focal length changes what you capture, and where real budget matters. By the end you should know exactly what to expect from your own kit, or one you are considering, on a clear, moonless night.
Key Takeaways
There is no single "best" Milky Way lens. There is a best lens for your sensor, your budget, and how much coma and vignetting you are willing to tolerate in exchange for more light.
| Point | Details |
|---|---|
| Aperture sweet spot | f/2.8 is the practical floor most photographers settle on; f/1.4 to f/1.8 buys 1 to 2 extra stops but usually needs to be stopped down slightly to control coma |
| Biggest optical cost of a fast aperture | Coma, which turns stars near the frame edges into comet-like smears, and is a property of the lens design, not something editing can fix |
| Vignetting | Optical vignetting improves 2 to 3 stops down; natural vignetting does not respond to aperture at all |
| Focal length range | 14mm to 24mm full frame (roughly 10mm to 16mm on APS-C) covers almost every Milky Way composition |
| Crop sensor math | Multiply focal length by about 1.5x to 1.6x to find the full frame equivalent field of view |
| Kit lens reality | Workable from a genuinely dark site at its widest aperture, but weaker on star detail and corner sharpness than a dedicated fast lens |
Table of Contents
- Why lens choice matters more at night than in daylight
- Aperture: what f/1.4, f/1.8, and f/2.8 actually buy you in light
- The real cost of shooting wide open: coma and astigmatism
- Vignetting at night: why your corners go dark and when it is fixable
- Focal length: 14mm vs 20mm vs 24mm, and crop sensor equivalents
- f/1.8 vs f/2.8 for stars: a practical comparison
- Prime vs zoom: when a fast zoom beats a faster prime
- A lens table by budget and use
- Does the lens matter more than the camera body or ISO
- Can you shoot the Milky Way with a kit lens
- Gear under a Sahara sky: the Tunisia Milky Way tour
- Frequently asked questions about Milky Way lenses
Why lens choice matters more at night than in daylight
In daylight, a slow kit lens and a fast prime produce images that look almost identical once you stop down to a sharp aperture and let the abundant light do the work. At night, that gap opens up fast. The Milky Way's core is genuinely faint, and you are usually working with a shutter speed capped by how long you can expose before stars start to trail, which leaves aperture and ISO to do all the remaining work of gathering light. A lens that lets in twice as much light at the same shutter speed means you can shoot at half the ISO, with a visibly cleaner result.
It helps to remember what you are actually photographing. The Milky Way is our own galaxy seen edge on, roughly 100,000 light years across, with our Solar System sitting about 26,000 light years from its center in a spiral arm (NASA Goddard Space Flight Center). The bright, dense core we all point our cameras at is faint by any normal photographic standard, which is exactly why every fraction of a stop in your lens matters more here than almost anywhere else in landscape photography.
Pro Tip: Before worrying about which lens to buy, worry about where you are standing. According to the National Park Service, roughly 80 percent of people in North America cannot see the Milky Way at all because of light pollution (NPS, Shenandoah National Park). A genuinely dark sky will improve your results more than any lens upgrade.
Aperture: what f/1.4, f/1.8, and f/2.8 actually buy you in light
The f-number on a lens is a ratio, and the amount of light it admits scales with the square of that ratio. An f/2 lens lets in four times the light of an f/4 lens, and each full stop represents a halving or doubling of light intensity from the one before it (Wikipedia, f-number). Run the same math on the two apertures most commonly debated for astrophotography and f/1.8 gathers about 2.4 times more light than f/2.8, which works out to roughly 1 and a third stops.
In practice, that difference lets you do one of three things: drop your ISO by about the same amount for a cleaner file, shorten your shutter speed to freeze stars more sharply, or split the difference between the two. None of this is free, though, which is the part most gear roundups leave out. The fastest apertures on any lens are also where its optical flaws are most visible, and for star fields those flaws show up in a very specific, very unforgiving way.
The real cost of shooting wide open: coma and astigmatism
Coma is the aberration that separates a genuinely good astrophotography lens from a lens that is merely fast. Technically, coma is a variation in magnification across the entrance pupil, and the practical effect is that a point of light, a star, stops rendering as a clean point and instead smears into a small comet or seagull shape. The effect gets worse the further a point sits from the center of the frame, which is exactly where most of your star field lives in a wide Milky Way composition (Wikipedia, coma (optics)).
This is the detail that trips up photographers who buy the fastest lens they can afford and assume faster always means better. Coma is a property of how a lens is designed and ground, not something you introduce by using a bad technique, and it cannot be corrected after the fact in Lightroom the way a slightly soft focus sometimes can be. A lens with poorly controlled coma will show distorted stars in every corner of every frame you shoot wide open with it, no matter how carefully you focus.
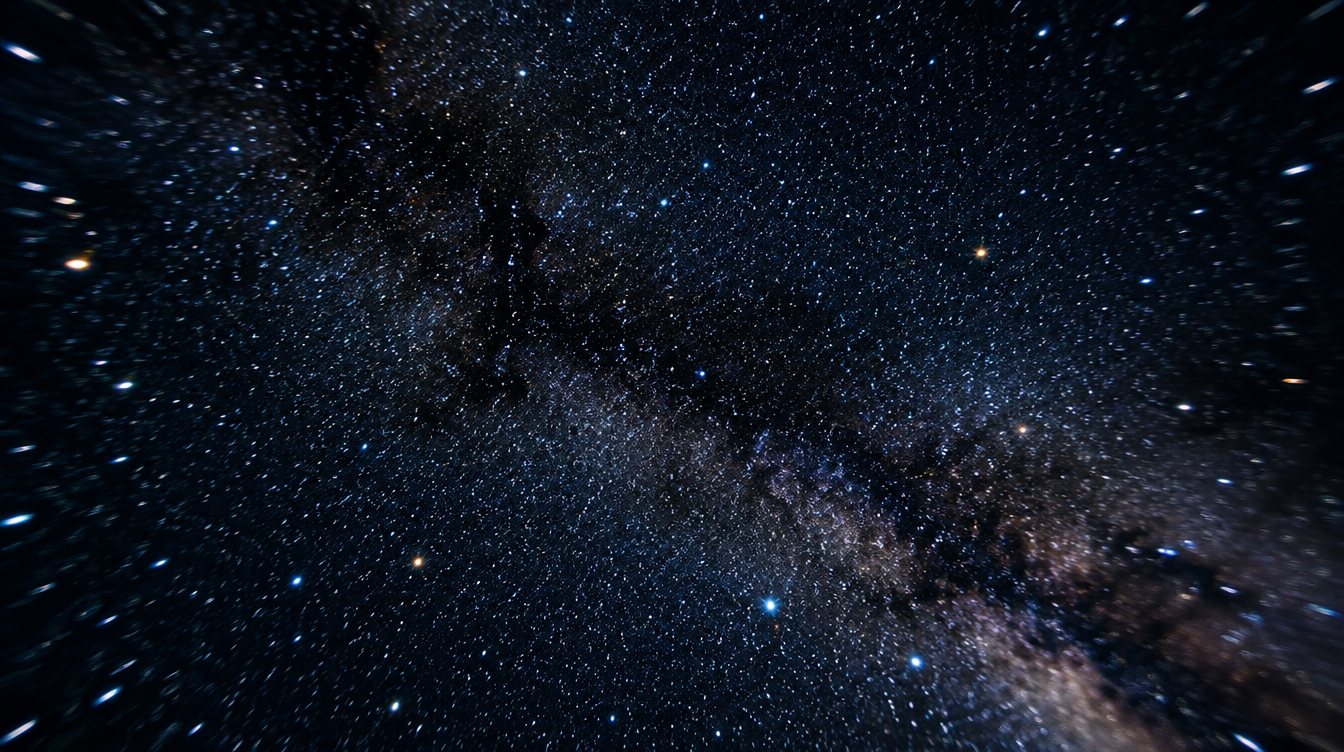
The practical fix is simple and almost universal: stop down slightly. Most lenses that are genuinely coma prone at their maximum aperture clean up substantially by one third to two thirds of a stop down. If you own an f/1.4 lens that smears stars badly at f/1.4, shooting it at f/1.8 or f/2 often keeps most of the extra light over f/2.8 while bringing coma back under control. This is why a "fast" lens on a spec sheet and a genuinely usable astrophotography lens are not always the same lens.
Vignetting at night: why your corners go dark and when it is fixable
Vignetting, the darkening you see toward the corners of a frame, has more than one cause, and the cause matters because only some of them respond to the fix everyone reaches for first. Optical vignetting comes from the physical housing of the lens blocking light rays that would otherwise reach the corners at an angle, and it is sensitive to aperture, often clearing up almost entirely with a reduction of two to three stops. Natural vignetting, sometimes called the cosine fourth falloff, is a function of basic optics and geometry and does not improve no matter how far you stop down. On zoom lenses, vignetting severity also shifts with focal length, and can reach as much as three stops of corner falloff at the widest, fastest settings (Wikipedia, vignetting).
For a Milky Way shooter, the practical takeaway is that a little corner darkening at your widest aperture is normal and often not worth fighting, since both Lightroom and most raw processors include a lens vignette correction profile that handles optical vignetting well. What you cannot profile away is natural vignetting stacked with a cheap, poorly corrected design, which is one more reason the specific lens you choose matters more at night than it does for a daylight landscape where the dynamic range and lighting hide a lot of these flaws.
Focal length: 14mm vs 20mm vs 24mm, and crop sensor equivalents
Focal length decides how much of the sky, and how much foreground, ends up in your frame, and it also sets a hard limit on your usable shutter speed before stars visibly trail. Wider lenses tolerate longer exposures for the same amount of trailing, because the stars are moving a smaller number of pixels across the frame in the same amount of time.
| Focal length (full frame) | Field of view | Best for |
|---|---|---|
| 14mm to 16mm | Very wide | The full galactic arc plus a large foreground, dune ridges, or a silhouetted horizon |
| 20mm | Wide | A balanced core-and-foreground composition, the most common Milky Way focal length |
| 24mm | Moderately wide | A tighter, more "zoomed in" core shot with less room for a large foreground element |
If you shoot APS-C rather than full frame, the math is straightforward: multiply the lens's actual focal length by your sensor's crop factor, typically about 1.5x for Nikon and Sony or 1.6x for Canon, to find the full frame equivalent field of view. A 24mm lens on a 1.5x crop body frames almost exactly like a 36mm lens on full frame, a meaningfully tighter view than the number on the lens barrel suggests (Wikipedia, full-frame digital SLR). A 10mm lens on that same crop body gets you back to roughly a 15mm full frame view, which is why most crop sensor astrophotography lenses cluster in the 10mm to 16mm range rather than matching full frame numbers directly.
f/1.8 vs f/2.8 for stars: a practical comparison
This is the single most common question I get before a night shoot, so here is the honest comparison rather than a blanket recommendation. An f/2.8 lens, whether a prime or a zoom, is the practical floor most working astrophotographers settle on. It gathers enough light to keep ISO in a reasonable range on a modern full frame body, and f/2.8 lenses, especially zooms built for landscape and travel use, tend to have more mature, more corrected optical designs because the aperture is not being pushed to its physical limit.
An f/1.8 or faster prime buys you roughly one to one and a third stops more light than f/2.8, which is a real, visible improvement in a file's cleanliness at high ISO. The trade-off is that very fast primes are more likely to show noticeable coma and vignetting at their widest setting, which means you often end up shooting that f/1.4 or f/1.8 lens at f/2 in practice to keep stars looking like points rather than seagulls. Once you account for that real-world stop-down, the gap between a disciplined f/1.8 lens and a well-corrected f/2.8 lens narrows considerably, and the decision comes down more to budget and weight than raw light-gathering power.
Prime vs zoom: when a fast zoom beats a faster prime
A fast wide prime is usually the better choice if Milky Way photography is your main goal for a trip and you are comfortable committing to one focal length for the night. Primes are typically lighter, often optically cleaner at a given aperture than a zoom covering the same speed across a range, and simpler to focus precisely in the dark since there is one fewer ring to bump by accident.
A good f/2.8 zoom in the 14-24mm or 15-30mm range earns its place on a trip where you shoot landscapes all day and stars only at night, since it means one lens instead of two in your bag, and the freedom to reframe without a lens change in the dark, by a dune, with sand in the air. On a trip where you hike into position before sunset and stay through the night, that flexibility is worth more than the extra light a prime would have given you.
A lens table by budget and use
Lens lineups change every year and specific model recommendations go stale fast, so instead of naming individual products that may be discontinued by the time you read this, here is how to shop by category and what each tier actually buys you.
| Tier | Typical spec | What you get |
|---|---|---|
| Entry | Kit zoom, f/3.5 to f/4 at the wide end | Usable from a genuinely dark site at its widest aperture; visibly noisier files and softer corners than the tiers below |
| Mid range | Third-party f/2.8 wide zoom, 14-24mm or 15-30mm class | A real jump in light-gathering and corner sharpness over a kit lens, and doubles as your everyday landscape lens |
| Dedicated astro | Manual-focus f/1.8 to f/2.4 wide prime from a third-party specialist brand | Excellent light-gathering per dollar; usually needs a mild stop-down to control coma; manual focus is not a drawback at night since you are focusing manually anyway |
| Premium | First-party f/1.4 to f/1.8 wide prime | The best combination of light-gathering and corrected coma and vignetting, at a significant price and weight premium |
Pro Tip: Whatever lens you bring, shoot a handful of test frames at your planned aperture before the main shoot and zoom into the corners on your camera's screen. Coma is far easier to spot on location, where you can simply stop down a third of a stop and reshoot, than it is to discover for the first time back home on a laptop.
Does the lens matter more than the camera body or ISO
This question comes up constantly, and the honest answer is that they are not really competing factors, they are sequential ones. Your lens's aperture, combined with your chosen shutter speed, determines how much total light reaches the sensor during the exposure. Your camera body's ISO setting, and the sensor technology behind it, then determines how usable the resulting file looks once that fixed amount of light has been amplified.
A faster lens effectively lowers the ISO you need for a given shutter speed, usually a bigger lever for file cleanliness than switching camera bodies alone. A newer sensor with better high ISO performance still helps you get more out of a slower lens. On a limited budget, though, upgrading from a kit zoom to a dedicated fast wide lens is usually the larger single improvement, since it changes the light hitting the sensor rather than just how that light gets processed afterward.
Can you shoot the Milky Way with a kit lens
Yes, with real caveats. A typical kit zoom's widest aperture, often f/3.5 at its shortest focal length, is usable from a genuinely dark site if you accept a noisier file and softer, more aberration prone corners than a dedicated lens would give you. You will likely need to push ISO higher than you would like, and faint structure in the galactic core will be harder to pull out in editing. If a kit lens is what you have for an upcoming trip, do not let it stop you from going. Shoot it at its widest aperture, keep your shutter speed within the guidelines covered in our full Milky Way field guide, and treat the results as a starting point rather than a ceiling.
Gear under a Sahara sky: the Tunisia Milky Way tour
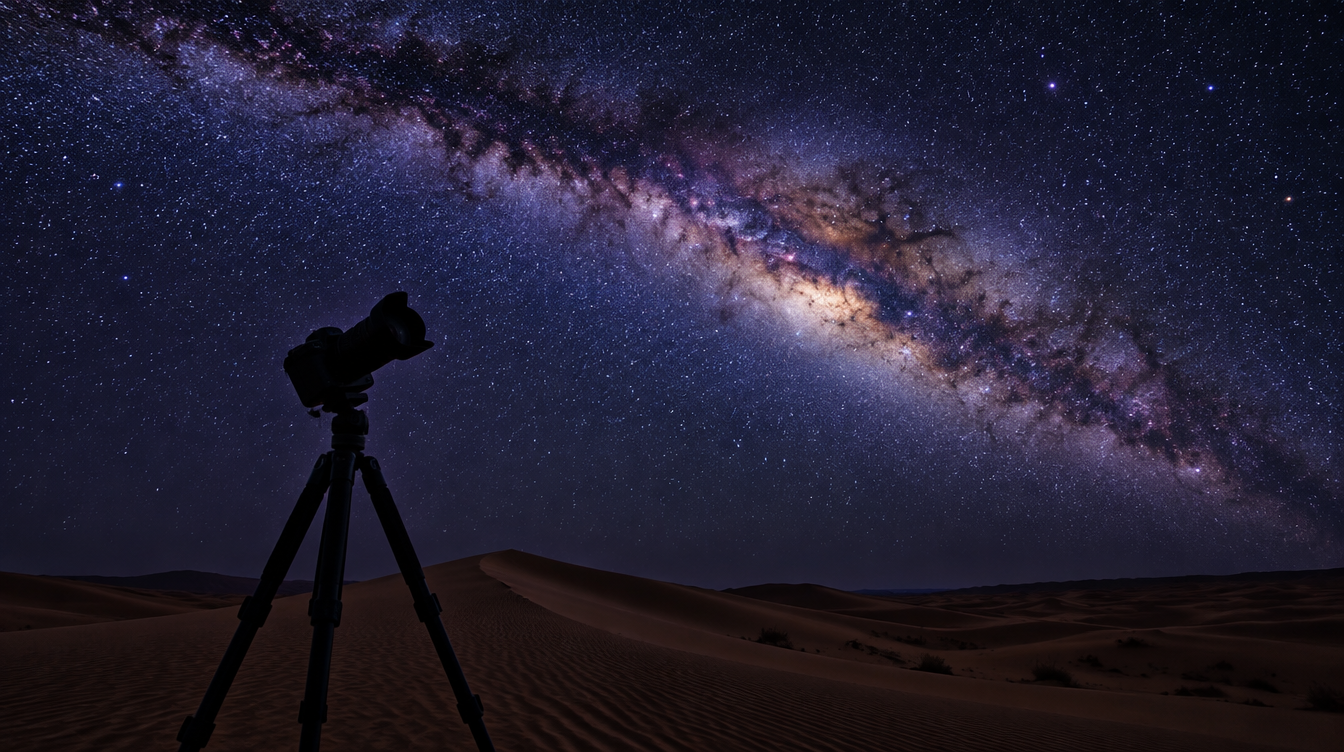
All of this theory matters most when you actually get somewhere dark enough to use it. On our Tunisia Milky Way photography tour, the final nights are spent at a tented camp called Camp Mars, reached by an 80 kilometer drive by 4x4 across the dunes from Tozeur, specifically because it sits far enough from any town or camp lighting to deliver genuinely pristine dark skies. It is a 7-day trip, kept to a small group of around 10 to 12 participants with an easy overall fitness level, built around 2 to 3 photo sessions a day so you are not shooting on no sleep the whole way through.
For gear, we recommend a wide-angle lens in the 10-15mm class alongside a mid-range zoom around 24-70mm, a sturdy tripod, a remote shutter or intervalometer, and a lens blower for sand, plus spare batteries and a power bank, since nighttime desert temperatures drop to around 10 to 15 degrees Celsius and cold batteries drain faster than expected. A fast wide prime earns its place if coma-free stars at low ISO are your priority, but the 10-15mm zoom many guests already own is genuinely enough once you are standing under skies this dark, which is really the whole point of traveling somewhere like Camp Mars.
The core reason to travel for this kind of shot is not lens choice at all. It is standing somewhere far enough from artificial light that the galaxy your lens is trying to resolve is actually visible to begin with.
Frequently asked questions about Milky Way lenses
Do I need an f/1.4 lens, or is f/2.8 enough? f/2.8 is a genuinely practical sweet spot that most working astrophotographers rely on. An f/1.4 to f/1.8 lens buys roughly one to two extra stops of light, but it often needs to be stopped down slightly from its widest setting to keep coma under control, which narrows the real world gap between the two.
Can I use my 18-55mm kit lens for the Milky Way? Yes, at its widest aperture and from a genuinely dark site, though expect noticeably weaker star detail and softer corners than a dedicated fast wide-angle lens would deliver.
Is a prime or a zoom better for astrophotography? A fast prime usually wins on light-gathering and coma control at its one focal length. An f/2.8 zoom trades a little speed for the flexibility to reframe without swapping lenses, which matters more on a trip where you are shooting landscapes by day and stars by night.
How does an APS-C crop sensor change my lens choice? Multiply the lens's focal length by your sensor's crop factor, about 1.5x for Nikon and Sony or 1.6x for Canon, to find the full frame equivalent field of view. A 10mm lens on an APS-C body frames roughly like 15mm on full frame.
What is coma and why does it matter for star photos? Coma is an optical aberration that turns points of light near the frame edges into comet shaped smears. It is worst at a lens's widest aperture and is a property of the lens's design, which means it cannot be removed in editing the way a soft focus sometimes can be.
Does lens choice matter more than my camera body or ISO setting? The lens determines how much light reaches the sensor during a given exposure, which in turn determines how far you need to push ISO. A faster lens generally lets you shoot at a lower ISO for the same shutter speed, which is usually the bigger lever for a clean file than the camera body alone.
What focal length should I use, 14mm, 20mm, or 24mm? Wider focal lengths capture more of the galactic arc and foreground and tolerate a slightly longer shutter speed before stars trail. 24mm gives a tighter, more zoomed in view of the core but requires a shorter shutter speed.
When is the Milky Way actually visible, regardless of lens? Viewing is best near the new moon, and in the Northern Hemisphere the brightest core season runs roughly spring through early autumn, because we face the galactic center on summer nights and the outer edge of the galaxy in winter (NPS, Curecanti National Recreation Area).
If you want the full shooting workflow, from the exposure settings and star-tracking techniques that pair with whichever lens you choose to composing the core over a real foreground, our complete field guide to photographing the Milky Way covers that ground in depth. And if you are building out the rest of your kit before a trip like this, our broader landscape photography guide is the right starting point for everything from daytime light to night technique.
Sources
- Wikipedia: f-number, on stops of light and aperture math
- Wikipedia: Coma (optics), on the mechanism and cause of coma aberration
- Wikipedia: Vignetting, on optical vs natural vignetting and aperture
- Wikipedia: Full-frame digital SLR, on crop factor and equivalent focal length
- NASA Goddard Space Flight Center: the Milky Way's size and structure
- U.S. National Park Service, Curecanti NRA: stargazing and Milky Way season
- U.S. National Park Service, Shenandoah NP: light pollution and Milky Way visibility