Northern Lights Photography Settings: Ready-to-Use Guide
Discover essential settings for capturing stunning northern lights photos. Our guide simplifies the process, helping you shoot like a pro!
Northern Lights Photography Settings: Ready-to-Use Guide
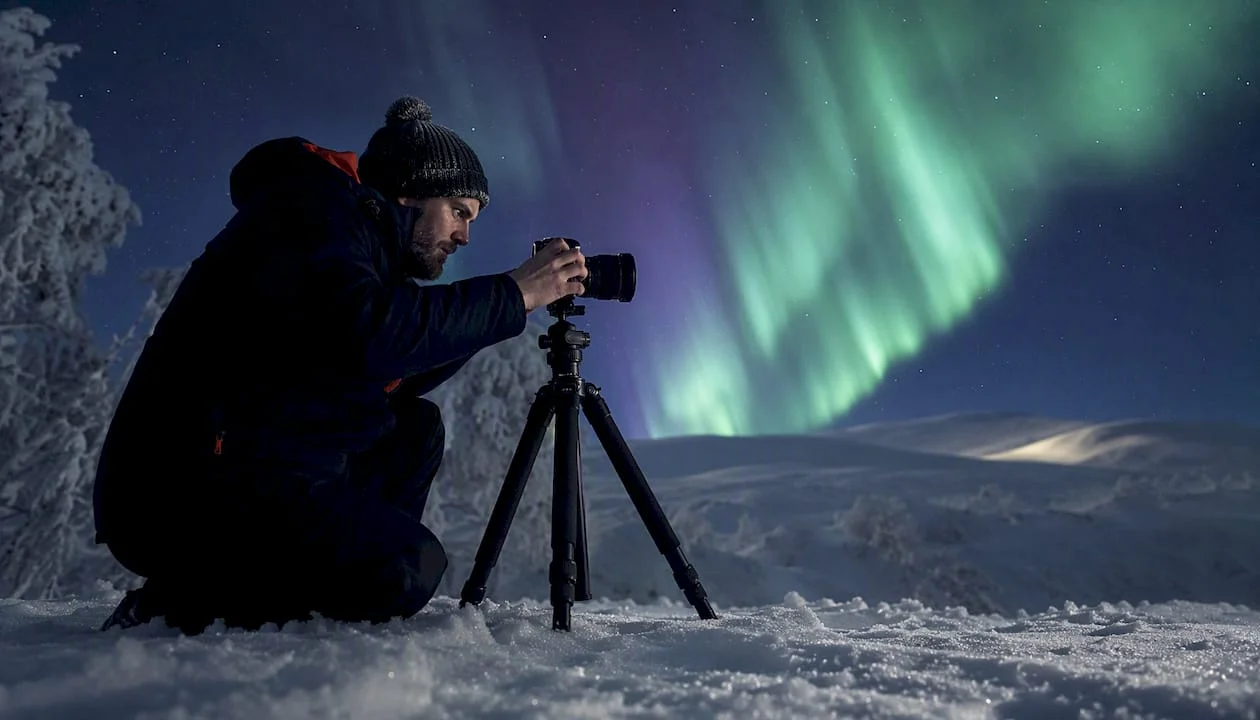
Set your camera to Manual mode, f/2.8, 10 seconds, ISO 1600, RAW, manual focus, tripod mounted. That single line of aurora photography settings covers roughly 80% of the situations you will face on your first night under the lights. The rest of this guide teaches you how to read the display and adjust from there.
Before you fire a single frame, run through this quick-check list:
- Tripod locked and head tightened
- Spare batteries in an inner pocket, kept warm
- Memory card formatted and inserted
- File format set to RAW
- In-camera long-exposure noise reduction turned off
- Manual focus engaged, autofocus disabled
- Remote release or intervalometer connected
- RGB histogram display enabled in playback
Pro Tip: Set these eight points as a physical checklist on your phone’s lock screen before you leave the car. Cold fingers and excitement make it easy to skip a step that costs you a full night’s work.
Key Takeaways
The single most important thing you can do before an aurora session is set your camera to Manual mode, f/2.8, 10 seconds, ISO 1600, RAW as a baseline, and confirm focus on a bright star before the display begins, but be prepared to adjust your settings as the aurora’s activity changes according to the guidance provided in this article.
| Point | Details |
|---|---|
| Starting settings | Manual mode, f/2.8, 10s, ISO 1600, RAW is a reliable baseline for most aurora conditions. |
| Adjust by activity | Fast curtains need 1–5 seconds and ISO 3200–6400; faint aurora allows 15–25s at ISO 1600–3200. |
| RGB histogram check | Always review the green channel; it clips before the combined histogram shows a problem. |
| Focus and cold prep | Lock manual focus on a bright star, carry warm spare batteries, and use a sealed bag when moving indoors. |
| Guided coaching | Weshootphototours aurora tours in Iceland and Norway provide scouted locations and live instructor feedback. |
Table of Contents
- What gear do you actually need for aurora photography?
- How do you plan a successful aurora shoot?
- How do you get sharp focus in the dark?
- What are the best camera settings for northern lights photography?
- How do you adjust your exposure as the aurora changes?
- How do you compose a compelling aurora image?
- Can you photograph the northern lights with a smartphone?
- How do you fix the most common aurora photography problems?
- What does a practical in-field aurora session look like?
- Why guided aurora tours produce better images, not just better memories
- See the aurora through a camera, not just your eyes
- Sources
What gear do you actually need for aurora photography?
The aurora does not care what brand is on your camera body. What matters is sensor size and high-ISO capability. Full-frame mirrorless or DSLR cameras tend to give you the cleanest files at ISO 3200 and above. APS-C sensors work well too, particularly recent generations from Fujifilm and Sony, though noise may become more visible past ISO 3200.
Lens choice shapes the image more than almost any other decision. Canon USA recommends a 14–16mm focal length when the aurora fills the sky and a 24–35mm range when you are working a lower arc on the horizon. The critical number is aperture: f/1.4 to f/2.8 is the practical range. Many photographers land on f/2.8 as the sweet spot because very wide apertures like f/1.4 or f/1.8 can produce soft corners on wide-angle lenses, and corner sharpness matters when stars are in the frame.
Beyond the camera and lens, these items are non-negotiable:
- Sturdy tripod: Carbon fiber is lighter for hiking; aluminum is fine for car-accessible locations. The head must hold firm in wind.
- Remote release or intervalometer: Eliminates camera shake from pressing the shutter and lets you run timelapse sequences without touching the body.
- Spare batteries: Cold drains lithium batteries fast. Carry at least two extras and keep them in a chest pocket against your body.
- Headlamp with a red-light mode: Red light preserves your night vision while you adjust settings.
- Hand warmers and layered clothing: Comfort directly affects how long you stay out and how carefully you work.
Pro Tip: If your lens has an aperture ring, tape it at f/2.8 with gaffer tape after focusing. Bumping the ring in the dark is a surprisingly common way to ruin a sequence.
How do you plan a successful aurora shoot?
Settings alone cannot save a cloudy night. Planning is where most aurora sessions are won or lost before the camera ever leaves the bag.
Start with the NOAA SWPC 30-minute aurora forecast, which gives near-real-time activity predictions and an oval map showing where the aurora is currently visible. Check it the evening before and again an hour before you head out. The Kp index is your shorthand: Kp 3–4 is generally visible from northern states like Alaska, Minnesota, and Michigan; Kp 5 and above tends to push the oval south toward the northern contiguous US.
Cloud cover is the other variable. The National Weather Service graphical forecast lets you check sky conditions at a specific latitude and longitude, which is far more precise than a general city forecast. Clear Sky Chart is another tool many astrophotographers use for hourly transparency and seeing predictions.
A few more planning considerations:
- Moon phase: A full moon brightens the foreground beautifully but washes out faint aurora. A new moon or crescent gives you darker skies and more vivid greens. National Geographic’s expert guidance recommends avoiding the full moon when possible for this reason.
- Peak hours: Aurora activity often intensifies around local magnetic midnight, roughly 11 PM to 2 AM at high latitudes.
- Light pollution: Use a dark-sky map to find locations away from city glow. Even modest light pollution competes with faint aurora.
- Safety: Remote locations at night in winter carry real risks. Tell someone your plan, carry a charged phone, and know the road conditions before you drive out.
How do you get sharp focus in the dark?
Focus is the single most common reason an otherwise well-exposed aurora image fails. Autofocus has almost nothing to lock onto in a dark sky, so switch to manual focus before you leave the car.
The most reliable method is live view zoom on a bright star or a distant artificial light. Follow these steps:
- Switch the lens to manual focus.
- Enable live view and zoom to 5x or 10x magnification on the brightest star you can find.
- Slowly rotate the focus ring until the star collapses to its smallest, sharpest point.
- Take a 2-second test shot and zoom to 100% in playback to confirm the star is a tight point, not a soft blob.
- If your camera or lens offers focus peaking, enable it as a secondary confirmation.
- Once sharp, do not touch the focus ring again. Use gaffer tape or a rubber band to lock it in place.
The infinity mark on most modern lenses is a starting point, not a guarantee. Thermal expansion in cold air can shift the true infinity position slightly, and many lenses have a focus range that extends past the marked infinity. Always verify optically rather than trusting the mark.
Pro Tip: If you lose focus mid-session because someone bumped the lens, refocus on a distant streetlight or the moon rather than a star. Lights are easier to see and the process takes under a minute.
What are the best camera settings for northern lights photography?
The Tamron astrophotography guide frames aurora work as a variation on Milky Way shooting with one key difference: you often need shorter shutter speeds to freeze the aurora’s motion rather than the longer exposures used for static star fields. The logic is the same, but the aurora moves.
Starting settings by aurora activity
| Aurora Activity | Aperture | Shutter Speed | ISO | Notes |
|---|---|---|---|---|
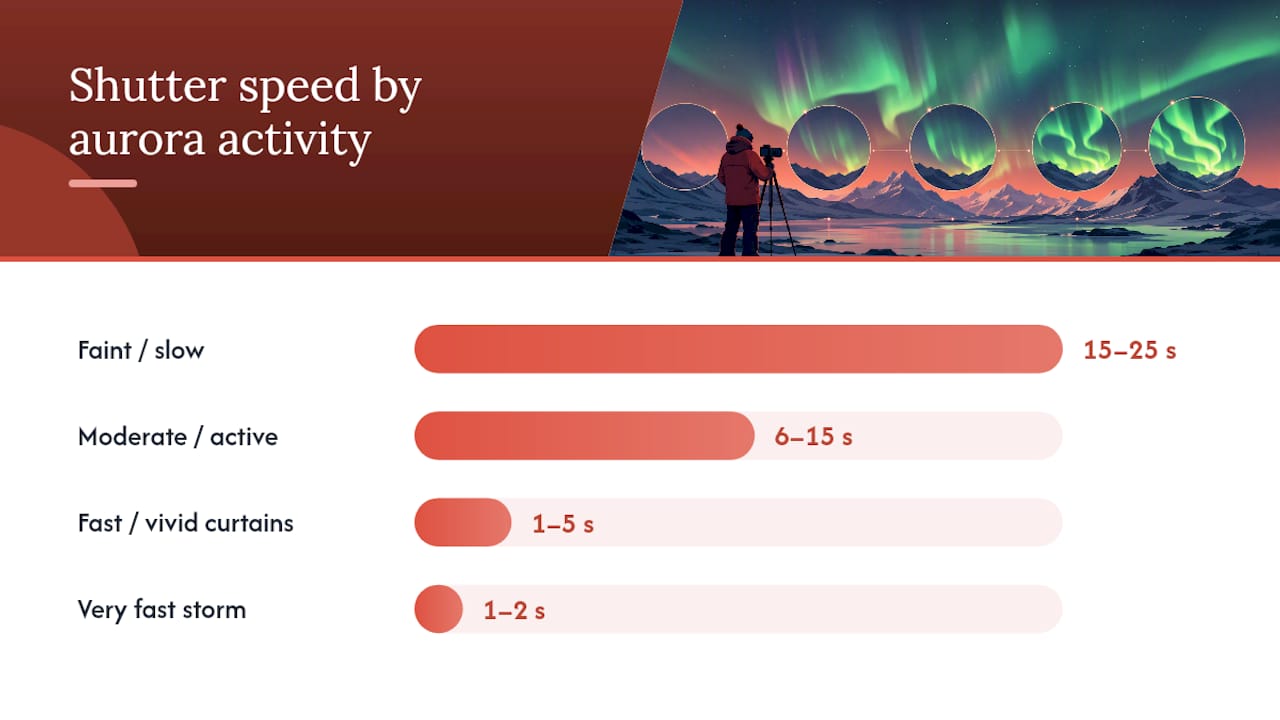
| Faint / slow | f/2.8 | 15–25s | 1600–3200 | Longer exposure captures dim light; curtains will be soft |
| Moderate / active | f/2.8 | 6–15s | 1600–3200 | Good balance of detail and brightness |
| Fast / vivid curtains | f/2.8 | 1–5 seconds | 3200–6400 | Short shutter freezes structure; raise ISO to compensate |
| Very fast storm | f/1.4–f/2 | 1–2 seconds | 6400+ | Maximum aperture and ISO; accept some noise |
Hasan Akbas’s Alaska field guide suggests starting every session at Manual mode, f/2.8, 10 seconds, ISO 1600 as a clean baseline, then adjusting from that first test frame.
Shutter speed and the 500 Rule
Star trailing becomes visible when your shutter speed exceeds a threshold tied to focal length. The 500 Rule gives a rough ceiling: divide 500 by your focal length (on a full-frame body) to get the maximum shutter speed before stars trail. At 20mm that is 25 seconds; at 14mm it is roughly 35 seconds. On an APS-C body, divide by the crop factor first. The NPF rule is a stricter version that accounts for pixel density and is worth using on high-resolution bodies above 40 megapixels.
For aurora specifically, the aurora’s own motion often limits your shutter speed before star trailing does. A fast display at 5 seconds will show streaked curtains regardless of the 500 Rule.
White balance and file format
Shoot RAW. This is not a preference; it is the only format that gives you full control over white balance in post-processing without any quality loss. A Kelvin setting of 3200–4000K tends to render the aurora’s greens and purples with natural warmth rather than a clinical blue cast, but you can refine this precisely in Lightroom or Capture One after the fact. In-camera JPEG white balance is a guess you cannot fully undo.
Turn off in-camera long-exposure noise reduction if you plan to stack exposures in post. The camera’s built-in process takes a dark frame equal in length to your exposure, doubling your capture time and preventing timelapse work.
How do you adjust your exposure as the aurora changes?
Nikon’s technical guidance is direct on this point: aurora shooting demands constant vigilance. The display can shift from faint wisps to blazing curtains in under a minute, and the settings that worked ten minutes ago may now be overexposing the green channel. The field routine below keeps you calibrated.
- Compose and focus. Lock your composition and confirm focus before the aurora intensifies.
- Fire a baseline test shot at your starting settings (f/2.8, 10s, ISO 1600).
- Check the RGB histogram. Look specifically at the green channel. Aurora emissions are green-dominant, so the green channel can clip while the overall brightness histogram looks safe. Pull the shutter speed shorter if the green channel is touching the right wall.
- Zoom to 100% in playback. Confirm stars are sharp points and aurora structure is not smeared into a uniform glow.
- Adjust one variable at a time. If the image is too dark, raise ISO before lengthening the shutter. If curtains are blurred, shorten the shutter and raise ISO to compensate.
- Repeat every 2–3 frames during active displays.
The RGB histogram is genuinely superior to the combined luminosity histogram for aurora work. Because the aurora’s light is concentrated in the green channel, a combined histogram can look healthy while the green channel is already clipping and losing all the fine structure in the curtains.
Pro Tip: When the aurora goes into a full storm with rapid motion, drop to 1–3 seconds and raise ISO to 3200–6400. You will get more noise, but you will capture the actual shape of the display rather than a smeared blur.
Bracketing is worth using during moderate, slower displays. Fire three frames at your base exposure, one stop under, and one stop over. In post, you can blend the best-exposed version of the sky with a slightly longer exposure for the foreground. Exposure stacking, where you align and average multiple frames at the same settings, reduces noise without sacrificing resolution.
How do you compose a compelling aurora image?
A sky full of green light is striking the first time you see it. By the third night, you will notice that the images you remember are the ones with something in the foreground. The aurora is the light source; the landscape is the subject.
Reflections on still water double the display and create a symmetry that feels almost designed. Silhouettes of trees, cabins, or lone figures give the viewer a sense of scale. Structures like lighthouses or old barns anchor the composition and tell a story the sky alone cannot. Scout your foreground in daylight or use Google Earth to identify interesting shapes before you arrive.
A few compositional ideas worth keeping in mind:
- Horizon placement: For a low arc, place the horizon in the lower third and let the aurora fill the frame. For an overhead display, tilt up and use a tree line or ridge as a base.
- Vertical framing: When curtains run from the horizon to directly overhead, a vertical (portrait) composition captures the full sweep better than horizontal.
- Panoramas: Overlap frames by 30–40% and keep exposure settings identical across the sequence. Shoot at 24mm or longer for easier stitching; ultra-wide lenses introduce distortion that complicates panorama software.
- Moonlight as a fill light: A crescent or quarter moon low on the horizon can softly illuminate snow or water without washing the aurora. The landscape becomes almost painterly when the light is gentle and directional.
- Timelapse: Set your intervalometer to fire every 5–10 seconds for a moderate display, every 2–3 seconds for a fast storm. Keep exposure consistent across the sequence. A 200-frame timelapse at 24fps gives you roughly 8 seconds of video.
Pro Tip: Before the aurora appears, taking a 30-second exposure of your foreground at ISO 400 can help capture a low-noise background for blending later. You can blend this low-noise foreground with your aurora frames in post for a cleaner final image.
Can you photograph the northern lights with a smartphone?
Yes, with real limitations. Forbes reports that modern phones with Night Mode or Astrophotography modes can capture aurora when the phone is completely stable. The critical word is stable: even a slight vibration during a 10-second exposure ruins the frame.
Practical phone settings for aurora:
- Mount the phone on a tripod using a phone clamp adapter. No exceptions.
- Use Night Mode and push the exposure slider to its maximum duration (typically 10–30 seconds depending on the phone model).
- Enable Pro or Manual mode if available (Google Camera, iPhone ProRAW, or third-party apps like NightCap or Camera+ 2). Set ISO manually to 800–1600 and shutter speed to 10–15 seconds.
- Use a Bluetooth remote or the self-timer (3–5 seconds) to avoid touching the screen during the exposure.
- Save in RAW if your phone supports it. iPhone ProRAW and Google Pixel’s RAW output give you meaningful post-processing latitude.
The honest limitation is sensor size. A phone sensor captures far less light per pixel than a full-frame camera, so noise at ISO 1600 on a phone looks considerably rougher than on a mirrorless body. Faint aurora may not register at all. For a vivid Kp 5+ display, a phone can produce a genuinely good image. For a subtle Kp 2 arc, you will likely come away disappointed.
How do you fix the most common aurora photography problems?
Most failures in the field trace back to four causes: noise, star trails, focus drift, and condensation. Each has a clear fix.
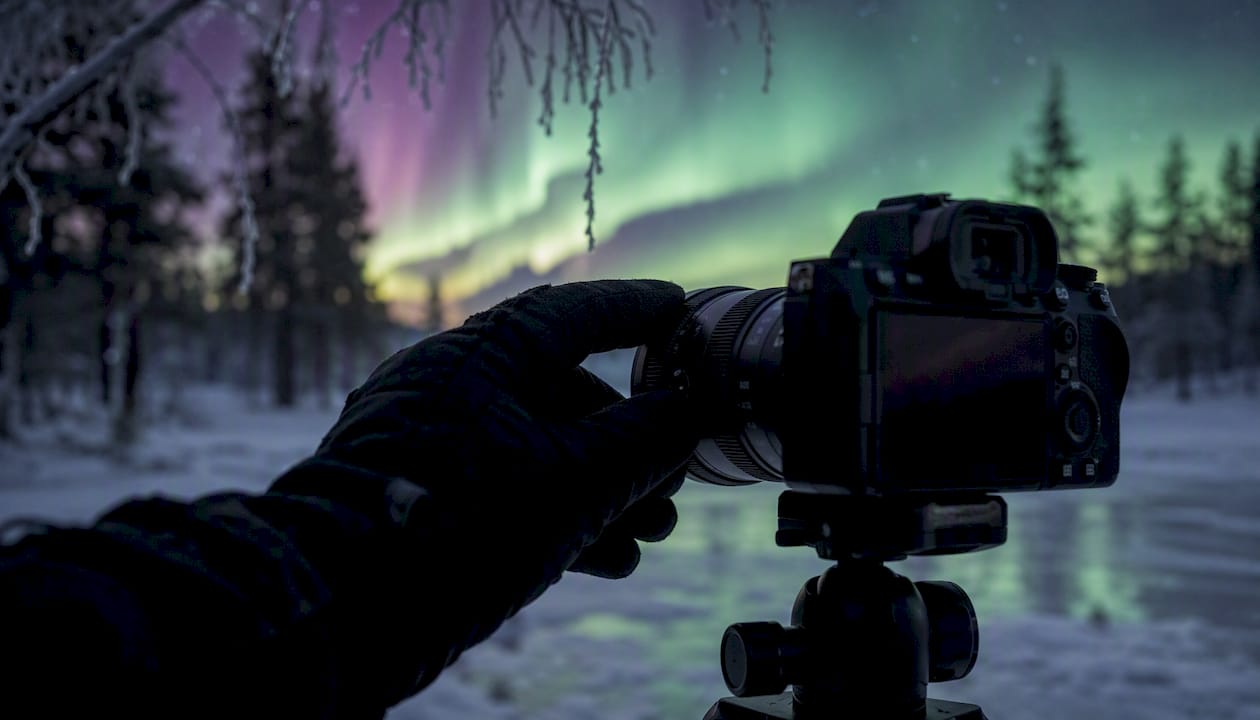
Noise: The first line of defense is lowering ISO. If the aurora is bright enough, ISO 800 or 1600 produces noticeably cleaner files than ISO 6400. When you need high ISO for a fast display, shoot multiple frames at identical settings and stack them in Sequator (free, Windows) or Starry Landscape Stacker (Mac). Averaging 8–16 frames reduces random noise without blurring the aurora structure. In-camera noise reduction is a reasonable fallback but prevents timelapse work and doubles your capture time.
Star trails: Apply the 500 Rule as a ceiling and shorten from there based on aurora motion. On a 45-megapixel body, the NPF rule gives a stricter limit that prevents trailing even at 100% zoom.
Focus drift: Temperature changes can shift focus slightly over a long session. Every 30–45 minutes, zoom to 100% on a star in playback and confirm sharpness. If stars have softened, refocus using live view zoom on the brightest star available.
Condensation: Moving a cold camera into a warm car causes immediate lens fog that can take 20 minutes to clear. Sky at Night Magazine recommends sealing the cold camera in a plastic bag before bringing it indoors, allowing the equipment to warm gradually inside the bag so condensation forms on the plastic rather than on the optics.
Battery drain: Cold temperatures can reduce battery capacity by 30–50%. Keep spares in an inner jacket pocket and swap them before the battery indicator drops below 30%. A dead battery during a storm display is a genuinely painful experience.
Pro Tip: Lens heater strips, powered by a USB battery bank, prevent condensation from forming on the front element during long outdoor sessions. They are inexpensive and weigh almost nothing.
What does a practical in-field aurora session look like?
A structured routine keeps you from spending the best 20 minutes of the display reviewing menus. Here is a realistic timeline for a two-hour session.
Before you arrive:
- Check NOAA SWPC forecast and cloud cover
- Charge all batteries; pack spares and hand warmers
- Pre-set camera to Manual, f/2.8, 10s, ISO 1600, RAW
On location (first 5 minutes):
- Set up tripod on stable ground
- Compose the shot with foreground element in frame
- Focus using live view zoom on a bright star
- Tape or lock the focus ring
First 10 minutes:
- Fire a baseline test shot
- Check RGB histogram, green channel specifically
- Zoom to 100% to confirm star sharpness
- Adjust ISO or shutter speed based on histogram result
- Fire a second test shot and confirm
Active session cadence:
- Review each frame within 30–90 seconds of capture
- Adjust shutter speed first when aurora motion changes
- Switch to intervalometer for timelapse when the display stabilizes
- Recheck focus every 30–45 minutes
Pro Tip: When the display suddenly intensifies, resist the urge to immediately change settings. Fire two frames at your current settings first to capture what is happening, then adjust. You can always fix exposure in post; you cannot recreate a missed moment.
When the aurora slows to a faint glow, shift to bracketing for foreground blending or switch to a longer timelapse interval (15–20 seconds per frame) to capture the gentle movement without burning through storage.
Why guided aurora tours produce better images, not just better memories
There is a gap between knowing the correct settings and applying them calmly when the sky turns green at midnight in sub-zero temperatures. The settings are learnable in an afternoon. The composure to use them well under pressure, in an unfamiliar location, with cold fingers and a display that may last only 12 minutes, takes practice or guidance.
What guided aurora photography tours actually provide is not the settings themselves but the conditions in which those settings become second nature. A scouted location means you arrive knowing where the foreground is, which direction to face, and where to park. An instructor beside you during a live display can tell you in real time that your green channel is clipping, that your focus has drifted, or that a better composition is 30 meters to your left. That kind of immediate feedback compresses months of solo trial and error into a single night.
Weshootphototours has spent over a decade building aurora photography tours based on this coaching-first philosophy. The instructors are award-winning photographers who have shot the aurora across Norway, Iceland, and beyond. The locations are scouted in advance. The logistics, accommodations, and timing are handled so that when the forecast turns favorable, you are already in position with a composed frame and a locked focus, not still looking for a parking spot.
The technical knowledge in this guide is real and sufficient. But there is something quietly different about learning it with someone who has seen the display a hundred times and can read its rhythm before you can.
See the aurora through a camera, not just your eyes
Weshootphototours offers small-group northern lights photo tours in Iceland and Norway, led by award-winning instructors who coach you through exposure, focus, and composition during live displays. Every tour includes meticulously scouted locations, boutique accommodations, and full logistics handling so you can focus entirely on your craft. Private and custom expeditions are available for photographers who want a tailored experience.
If you are ready to put these settings to work in the field with an expert beside you, browse the current tour schedule and reserve your place on a guided aurora expedition.
Sources
These are the primary references used throughout this guide, organized by how you are most likely to use them.
For planning your night:
- Awesome skies: tips and techniques for photographing the northern lights | Nikon USA
- Astrophotography Camera Settings for Every Night Sky Subject | Tamron
- Northern Lights Photography: Camera & iPhone Settings | Aurora Hunt
- Aurora Photography Settings for Beginners — Alaska Field Guide – Hasan Akbas Fine Art
- How to photograph the Northern Lights, according to an expert | National Geographic
- Photographing Auroras | Canon U.S.A., Inc.
- How do you take photographs of the aurora? | The Sky at Night Magazine
- How I Photograph The Northern Lights With My Phone — By An Expert | Forbes
For technical settings and technique:
For composition, planning, and safety:
For troubleshooting: